by Sherri Sylvester | Sep 1, 2017
Hi! I’m popping in to let you know that my block is out this month (September already!) in the Canadian Sampler, a block of the month from my sponsor, Sew Sisters Quilt Shop.


I went through lots of scraps creating this block, and my final test ended up being in Cotton and Steel Mustangs. It was my first time fussy cutting a block and I love how the horses gallop in a circle! (Don’t mind the strange-looking bent horses at the sides, lol!) I also made the final “proper” red and white one to send to Sew Sister’s with the pattern, and it’s great how different they look next to each other. I can’t wait to see what everyone else will do with it.


We are almost at the end of the sampler and mine is coming along, slowly but surely. I’ve got 8 out of 20 blocks finished and 3 more cut and ready to sew. This might not seem like an accomplishment – especially when I now have patterns for 18 blocks… but it’s my first sampler and I’m thrilled! I wrote about the first two blocks and you can see the other’s I’ve made so far on Instagram. Oh, and there’s more in my intro post from last year as well – including links to all of the designers.


Sew Sisters has written a bit about each designer on their blog, so you can find more about this month’s block designers there as well. I’ve enjoyed learning the history and reason for each block design, as well as sewing them up!
If you are in North America, I hope you enjoy the upcoming long weekend!
See you again soon,
Sherri
by Sherri Sylvester | Jul 27, 2017
Picnics spark all kinds of good summer memories. And what better to celebrate Canada’s 150th birthday than with a whole look book of picnic ideas – including a brand new Fold-N-Go Placemat tutorial I wrote for the project!

Disclaimer: I am a Canadian Janome Artisan. Janome provided the materials for this look book project and the Skyline S9 on-loan machine I am currently using. Michael Miller Fabrics also provided the Cotton Couture solids. As with all the products I write about – I always tell you my own honest opinion. Thanks for reading! (P.S. Working with Janome is a dream-come-true for me, it never gets old! Plus, they are amazing and fun to work with, and I love their machines, which doesn’t hurt either!)
Earlier this year, Janome asked their artisans to contribute picnic-related projects for their latest look book – Cross Country Picnic – and the result is chock-full of great ideas, tutorials, and patterns. (You can read the previous look book full of projects too!)


These Fold-N-Go Placemats combine my love of impromptu picnics with the desire for a cute (and clean!) space to have them on – plus a little Maple Leaf Canadian pride.
Our set is going to live in our car so we can grab it and picnic whenever we want! This quilted project includes a matching napkin and divided utensil section. Plus it folds and buttons to keep everything tidy. I used vintage leather buttons and added a customizable leather (or vinyl) label to give it a more professional look.


Materials: (makes 1 placemat with included napkin)
- Placemat: 2 pieces pre-washed 12″ x 18″ Essex Linen in Flax (Found at my sponsor Fabric Spark)
- Napkin: 1 piece pre-washed 16″ x 16″ piece of linen or linen blend
- Binding/Applique/Pocket: 1/2 yard/metre pre-washed Michael Miller Cotton Couture (I used Violet, Raspberry, Cornflower and Lime)
- Quilt Batting: 1 piece 12″x18″
- Fusible Web: 1 piece 8 1/2″ x 11″ (I love Steam-A-Seam 2!)
- Matching Thread
- One Button
- Scrap of Vinyl or Leather for the Optional Label
- Basting Spray or Pins
- Removable Fabric Marker
- Janome Skyline S9 sewing machine with these included machine feet/accessories: ZigZag Foot A, Satin Stitch Foot F, Quilting Guide Bar, AcuFeed Dual Feed Holder and Foot AD (quilting), Automatic Buttonhole Foot R and Stabilizer plate, Knee Lifter

Before you begin:
- Print out the free pattern pieces (link in the materials list above) on letter size (8.5″ x 11″) or A4 paper. Important: Do not select “fit to page” when printing, make sure you print at the original size.
- Once you have printed the first page, measure the 1″ test square to ensure the pattern is the correct size.
- Cut the pattern pieces on the outer gray lines and tape them together if needed, matching the letters in the gray half-circles.
Cutting the Binding/Applique/Pocket:
Important: These pieces are carefully placed to fit in 1/2 yard/meter of fabric. Please follow the cutting layout carefully!

- Applique: Use the Applique pattern piece to cut 1 Maple Leaf in the solid accent colour. Be sure to place it as indicated in the layout above. Also cut 1 Maple Leaf from the Fusible Web.
- Pocket: Cut 2 Pocket pieces, mirrored and placed as indicated in the layout above.
- Binding: Cut 3 full 2 1/2″ strips along the width of the fabric and one 1/2 strip as indicated in the layout above.
Prepare:
1) Thread your machine. The Janome Skyline S9 includes Large and Small Spool holders to fit the size of your thread spool.

2) Binding: Sew the 2 1/2″ strips together to create a 147″ length (approx.) of binding using your preferred method. This will be used for the napkin and placemat.

3) Pocket:
- Place Pocket pieces right-sides-together matching diagonal raw edge. Pin and stitch the diagonal edge with a 1/4″ seam.


- Press seam allowance open. Fold pocket wrong-sides-together along the seam, matching remaining raw edges. Press.


- Match and baste all raw edges with a scant 1/4″ seam. I used the Auto Basting setting on my Skyline S9. Top-stitch the finished edge.


- Press the pocket in half width-wise, matching the two side edges.

- To create utensil pocket divisions: With the short diagonal pocket facing up (See Pic), mark the binding area with a 3/8″ seam allowance along the left and bottom raw edges. Mark another line 1 5/8″ from the left binding mark (not the raw edge), and another from the right fold. The center section will be about 1 3/4″ wide. Pin and stitch along each marked dividing line (but not the binding markings) to finish the pocket.


Let’s Sew!
1) Match the maple leaf shape to the right side of the placemat, 3/4″ up from the bottom edge. Fuse according to the manufacturer’s instructions.

2) Switch to the Satin Stitch foot F and choose an Applique stitch. I used stitch #6 with a width and length of 3. Stitch carefully around your applique to secure the edges.


3) Sandwich the front and back of your placemat wrong sides together with the batting between them and baste using basting spray or pins.
4) Switch to your AcuFeed Dual Feed Holder and Foot AD (or walking foot) and choose a straight stitch to prepare to quilt the placemat. I used the automatic Quilt Setting Straight Stitch option. (Note: If you do not have a machine with automatic or computerized tension, test your stitches on a scrap quilt “sandwich” before quilting.)


5) Stitch around the applique 1/4″ from the edge. Use the clear inside edge of the Dual Feed foot as a guide.


6) Mark your remaining quilt lines with a removable marker. I stitched 2 rows of 1″ wide and 4 rows of 2″ wide straight lines, following the leaf outline. Alternatively, use the Quilting Guide Bar to evenly stitch the around your applique.

7) Quilt along each marked line. Attach the Knee Lifter to easily lift and replace the presser foot. (Side note: It was so nice not to use my hands to pivot at each corner!) My favorite Thread Cutter button made trimming the threads at each edge quick and easy.


8) Place the pocket in the bottom left-hand corner of the placemat matching the raw edges. Pin and baste with a scant 1/4″ seam allowance.

9) Bind the placemat. I like to use Cluck Cluck Sew’s machine binding tutorial and the AcuFeed Dual Feed system. ** Don’t forget to insert your leather label! See the Janome Cross Canada Picnic look book for instructions. Place it along the back edge of the binding about 3 1/2″ up from the bottom as you sew.


10) Choose and set up your machine to make a buttonhole that will fit your button. The Skyline S9 has an automatic buttonhole system with lots of options. The buttonhole should be centered on the back edge of the placemat (sSee pics for reference). Mark a 2″ center point 1/2″ away from the binding, make a test buttonhole and mark its beginning and end points on the placemat.


11) Attach the Automatic Buttonhole foot R and included Stabilizer Plate. Sandwich your project between the Buttonhole foot and Stabilizer Plate to secure it and hold it in place. Stitch and finish your buttonhole.

12) Fold the placemat in thirds; left side first, then the appliqued side with the buttonhole. Mark your button placemat using the buttonhole as a guide. Stitch your button on securely at the marked point.


Matching Napkin:
- Machine bind the 4 raw edges of the napkin as you did for the placemat. I used a decorative applique stitch to further secure the longer edge of the binding. Fold the napkin in quarters and then in half again to fit it into the pocket.


Insert your utensils and napkin and Fold-N-Go. Enjoy your picnic!
I hope you have enjoyed this tutorial. Please email or message me anytime with questions or leave a comment below.
——————————————————————-
I’d love to see your project! You can share your placemats on Facebook, Twitter or Instagram (links below) using the hashtags #alongforthreadride and/or #threadridinghood. Be sure to tag me @sherrisylvester so I can see it! Thank you!


by Sherri Sylvester | Jul 21, 2017
I love the precision of paper piecing, once I remember how to do it again. (Every Time!) It allows for crazy things to be pieced, like the eye on this flamingo – that is only 3 or 4 stitches across each side. I have so much respect for quilters who “regular-piece” mini things!

This pillow started with the backing fabric a couple of years ago. I found it while on vacation in Florida at Byrd’s Nest Quilt Shop. My parents’ saw some flamingos on their honeymoon (I think!) and it has become “their animal”. Since their 40th wedding anniversary was this January I decided they needed a flamingo throw pillow.


The pattern is from Quiet Play – my go-to for paper piecing as she has made so many patterns, and lots of them are free! I picked this one up as part of a monthly zoo animal block blog post. She was giving away one free block per month and I happened to get in for the Flamingo. (If you want to get it now you can purchase her Zoo Animal Bundle. Or you could purchase this Geometric Flamingo on its own.)
To get the flamingos to face each other, I printed the pattern once correctly and a second time using the mirror-image setting on my printer. Then, I made them and sewed them together down the center.
The front is pieced from my solids stash, most of which is from my sponsor Sew Sister’s Quilt Shop, purchased while I was part of their Kona and Colour Wheel Club. The quilting is simple, straight lines in blue. I took my time deciding the quilting colour and I think it turned out ok! Though I should not have quilted right through the black of the eye. Next time I’ll plan differently.


As I sew more of them, I am realizing that throw pillows are super fast, good scrap destashers and fun to sew. They make great gifts, especially for kids’ birthdays. They can be personalized to someone’s favorite colour and even include their initial. Plus it’s a fun “quilty-break” between other projects. My pillow forms are from IKEA, pretty inexpensively, which works out to an “almost free” project most times!
Hope your summer is sew-ing well. 🙂
See you next time! Sherri
by Sherri Sylvester | Jul 10, 2017
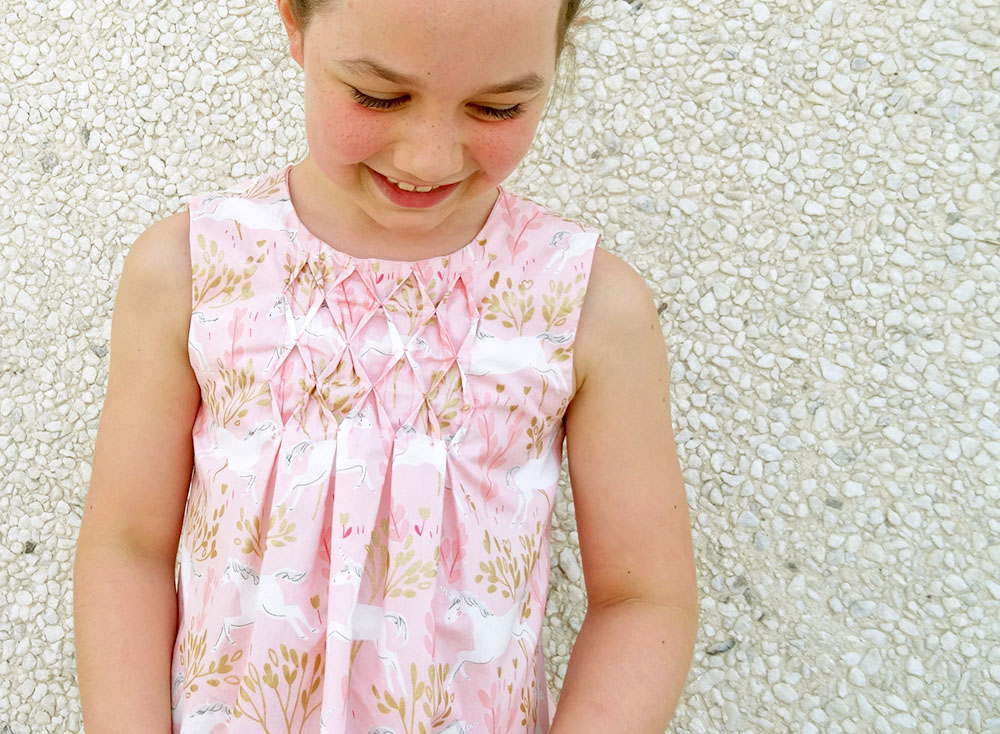
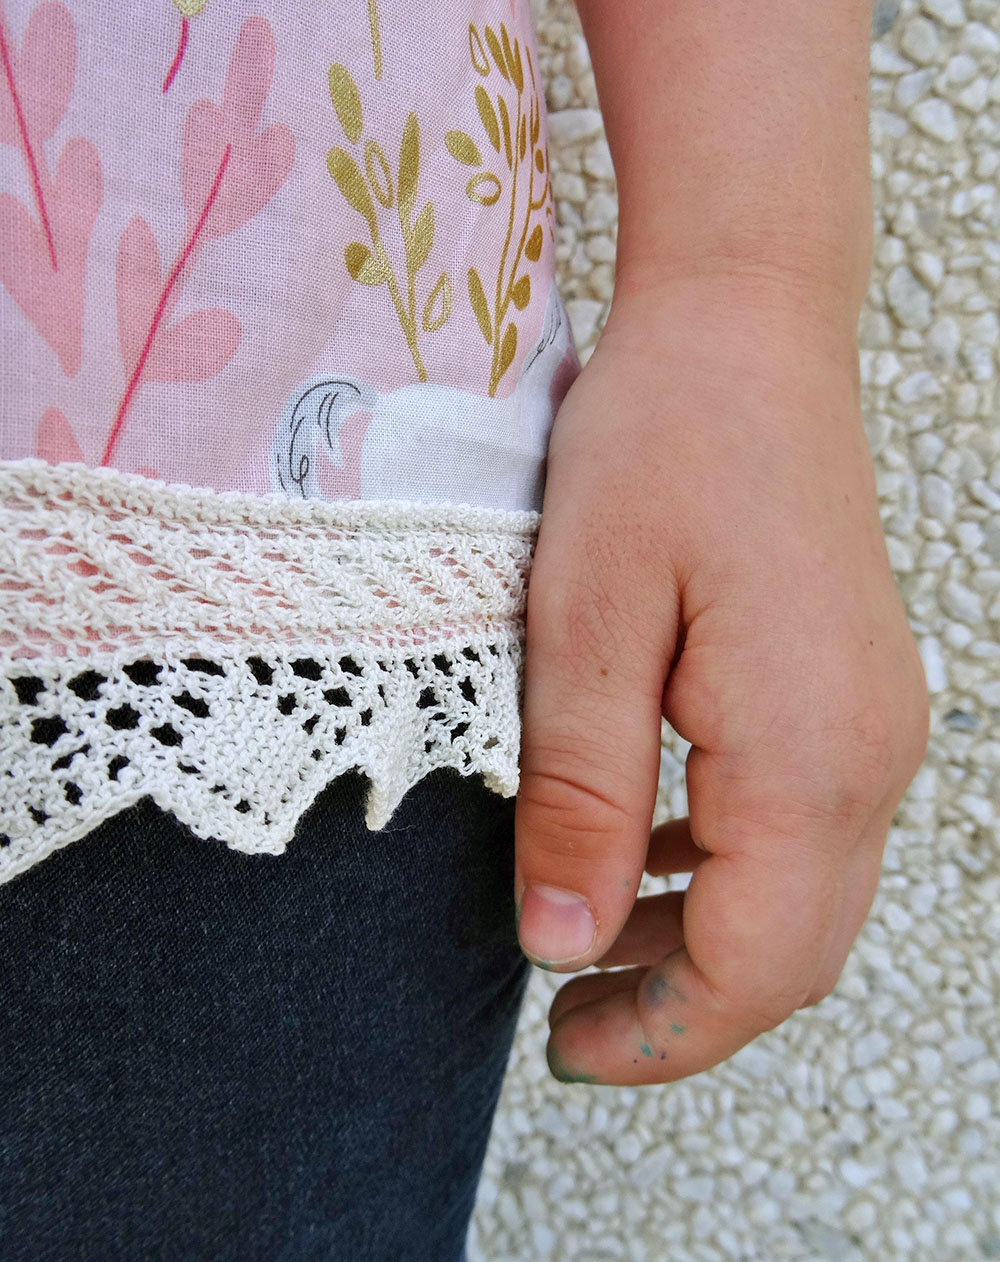
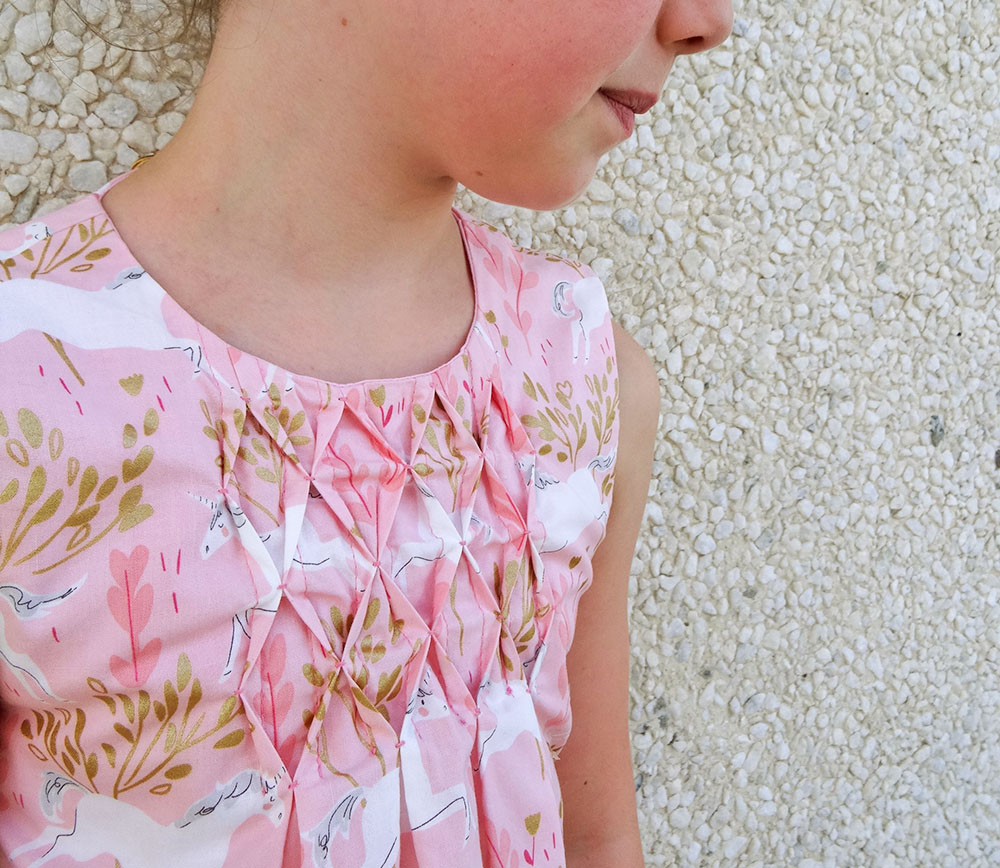
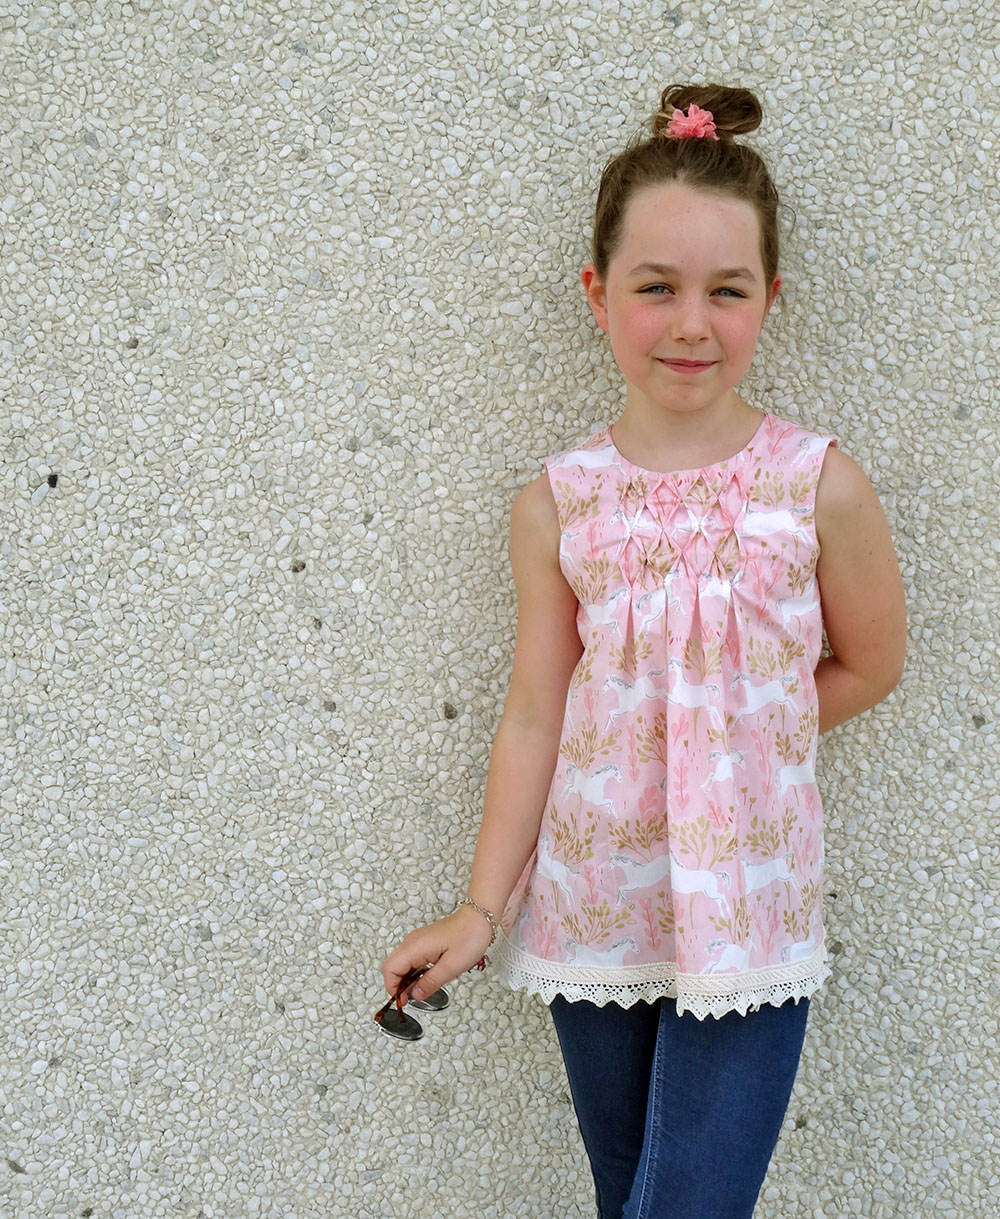
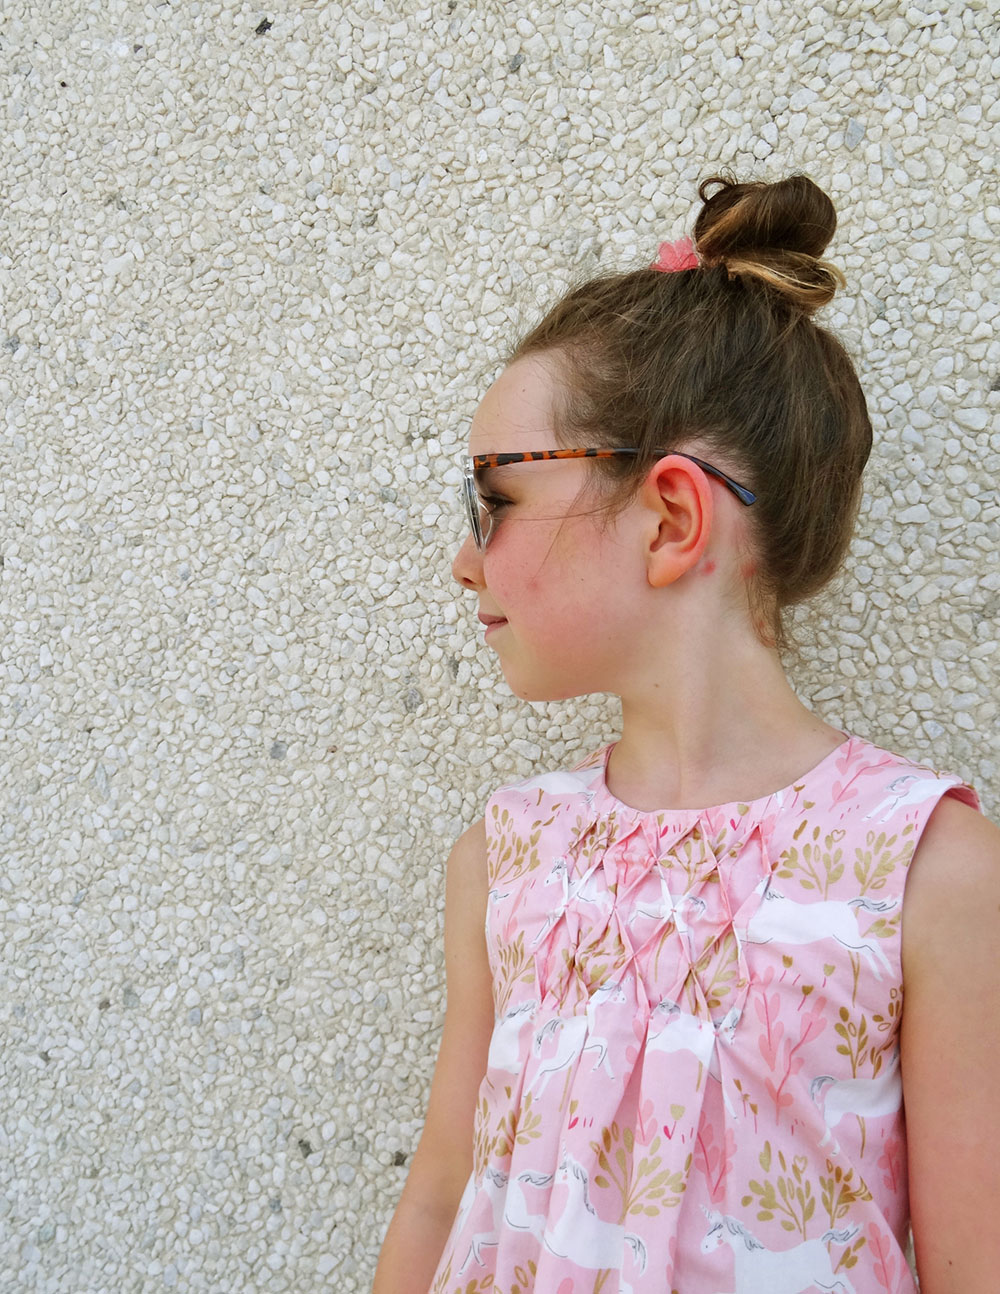
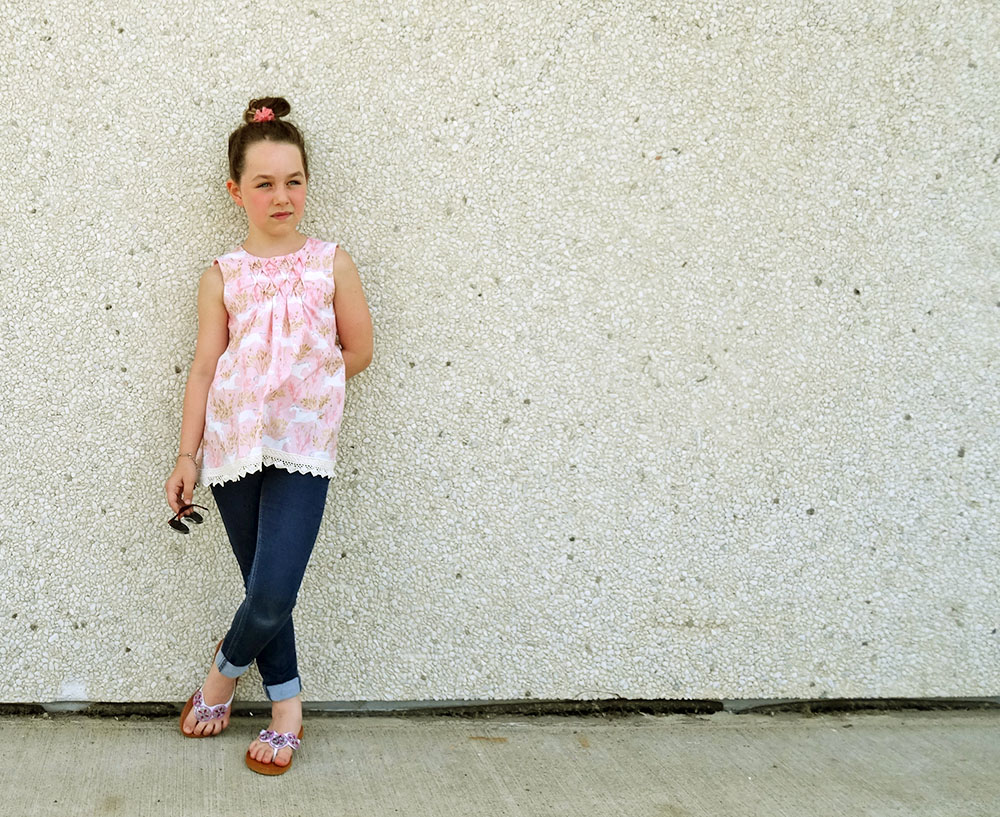
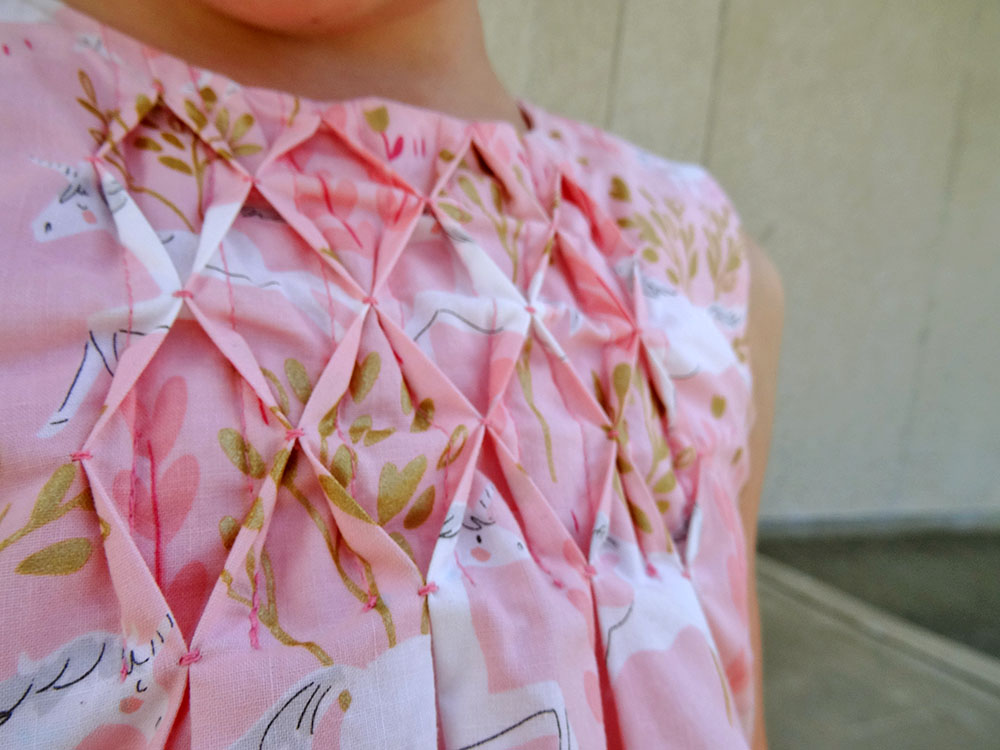
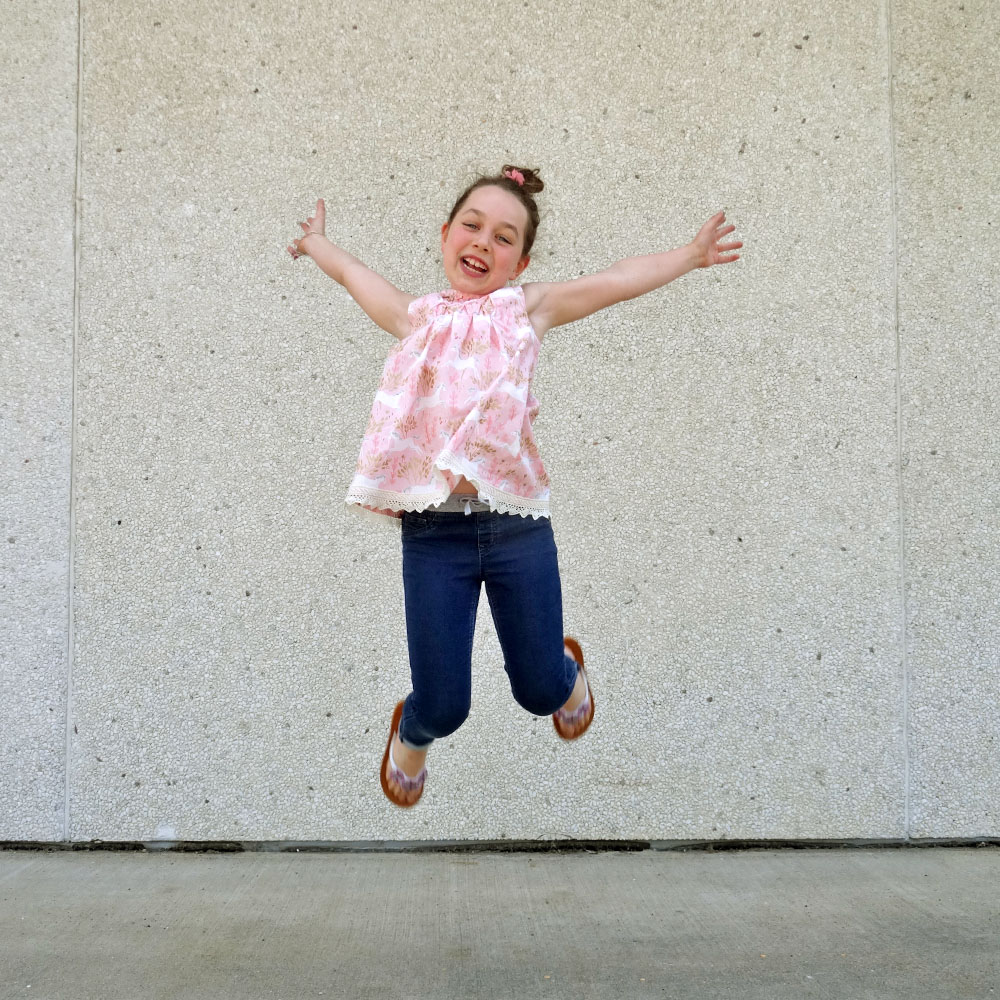
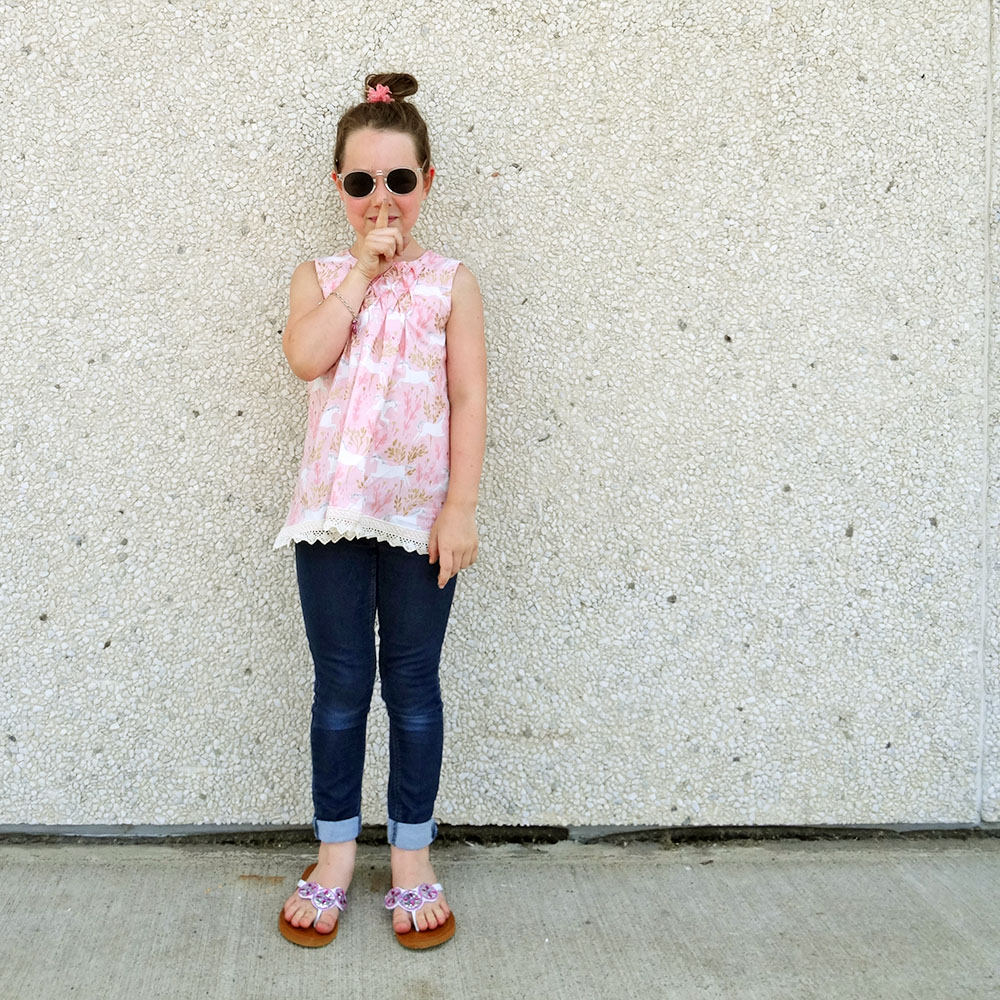
What do you get when you mix my favorite unicorn fabric from the Sarah Jane, Magic collection, some hand smocking, and vintage (probably) hand-tatted lace? This shirt!
I broke with my better sense and designed this blouse without asking the girls what they would pick. It just seemed too perfect a match. My oldest has snatched it up, and for good reason, I think.

StraightGrain provided the Nova pdf blouse/dress pattern for this blog tour. My opinions are always my own. Thank you for reading!
Today is my stop on the Nova pattern tour with StraightGrain patterns. I am going to go right out there and date myself by saying I’ve been following them around since the Bubble Dress debuted in 2012… eep! I love the simple, European style of their patterns and the Nova is no different.


The Pattern:
Since I haven’t made a StraightGrain pattern before I was interested to see what they were like. Also, the many options could make the pattern very confusing! I was so impressed, the details were clear and easy to follow. There are many notes on the pattern pieces and instructions to help you through the steps for each option. It also comes in a pdf version, or a paper pattern from the StraightGrain shop.
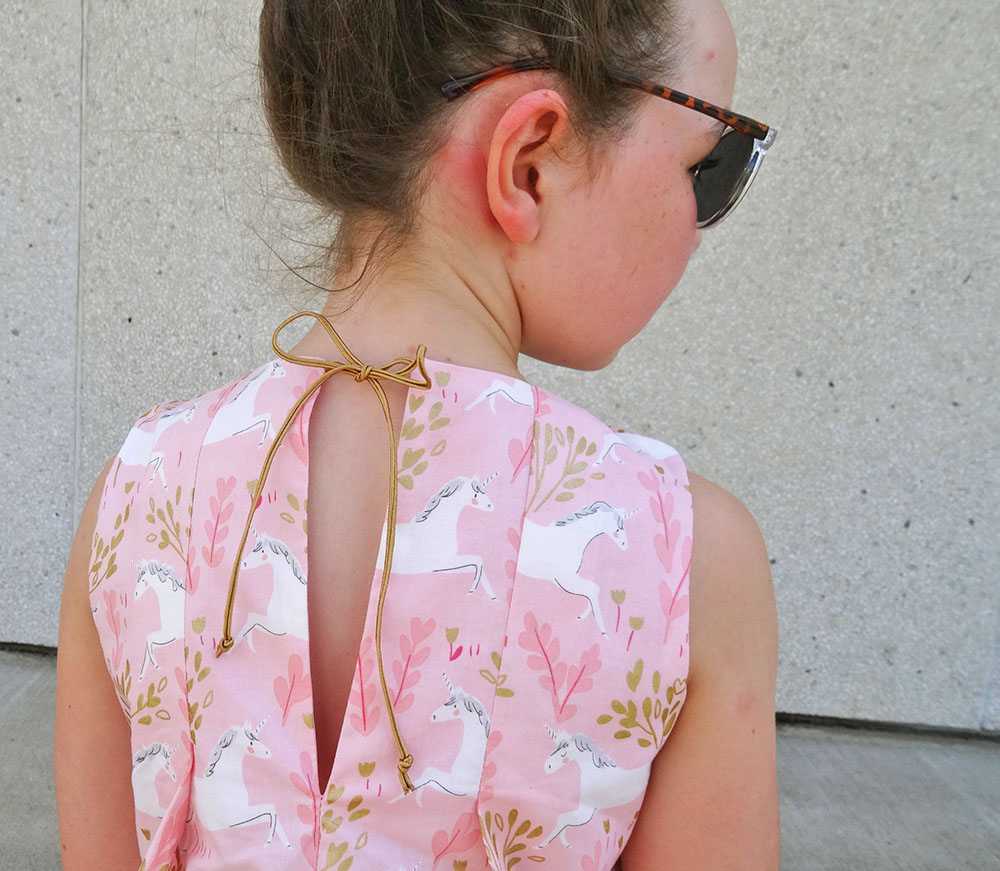
I was happy to see the finished garment measurements included along with the regular measurements. These are not common on indie patterns and it helps a lot when I’m merging sizes. For this blouse, I made a size 6 with an 8 length for my small 9-year-old. Had I made a muslin, I would have adjusted it to have slightly wider shoulders – but this is me skipping steps, not the fault of the pattern. The tie back allows room for her to fit and grow.


The Style:
I love how swingy the blouse is. Plus, having many options for pleating, smocking, dress/blouse, button, zip or tie back and sleeves or none give it tons of potential for the future. The pattern also covers a wide range of sizes from 3 months to 12 years! This means it is a great option for an older child or tween especially.
As my oldest grows up, I am finding the need for more grown-up styling and the Nova is perfect to grow with her. It’s comfortable, but looks stylish and includes long sleeves for winter. Though, I admit, this is not the most “grown up” looking fabric!


Sewing the Shirt:
I squeezed this blouse out of 1 yard of fabric, there was “just” enough room to make the sleeveless version without the cap sleeve. I breathed a sigh of relief as I only had 1 yard of the unicorns and really, really wanted it to fit!
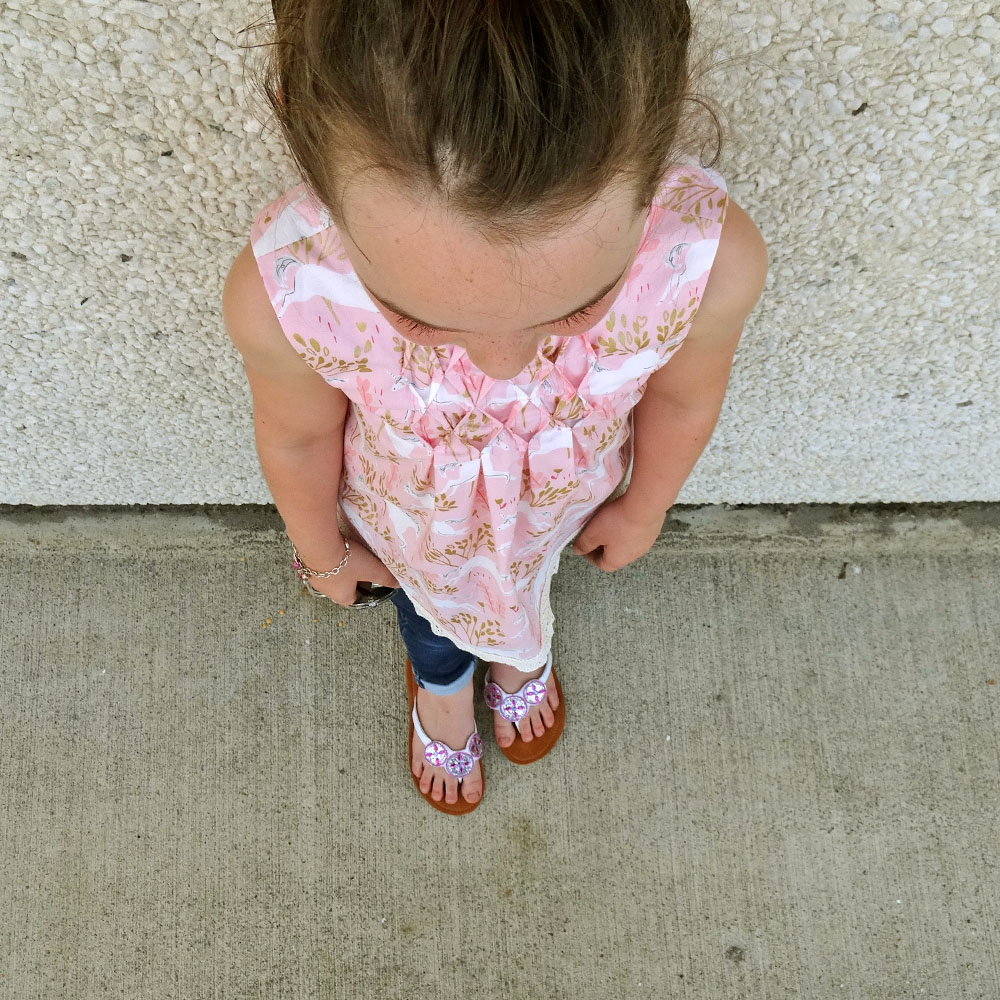
Smocking! Crazy, never would have thought I’d sit down to hand-sew smocking. But it was relaxing, and I perched on a chair in the sun and just sat and sewed. Very calming! I have to admit that the pleating process was a bit more time-consuming. I didn’t mark them as precisely as I should have and had to redo them all a bit smaller to make them fit. Next time! A new process usually has a learning curve.
The rest of the steps followed without trouble and I love the included bodice lining. It’s simple and finishes all the edges nicely. Since I didn’t make the sleeves I’m not sure about those steps, but can imagine they are clear as well.
Materials:
- Sarah Jane, Unicorn Forest from the Magic collection for Michael Miller.
- Vintage (probably Hand-Tatted) lace! My friend’s mother had a box from someone she knew and gave it to me a few years ago. It’s gorgeous. This shirt will be washed carefully!
- Gold Ribbon for the tie
- Pink Broadcloth lining


Photoshoot
We picked the kids up from their first week at sleep-away camp and my daughter has so many mosquito bites! Despite that, she was enjoying being home after a week and did an awesome job thinking up poses with her sunglasses. She cracks me up! As she gets older her sense of humour is kicking in and it’s so much fun. Can’t believe she will be 10 later this year!


Conclusion?
Wow, this post is sounding super formal, LOL! Anyhow. It’s a great pattern with lots of options and a large size range. Definitely worth buying as it will last a long time. If you’re not sure there’s lots of inspiration in the rest of the tour, with links you can find below.
Check out the other participants in the Nova tour:
Sisko by Mieke – Bel’Etoile – Zowiewo – Petrol & Mint – sewpony – Fairies, Bubbles & Co
Elizabeth Little – Maker Mountain Fabrics – Better Dressed Child – Just Add Fabric – My Petite Sophie
Frances Suzanne – I Sew Blanche – Lily & Woody – My Minnie Mie
I Love You Sew – Thread Riding Hood – Ariane Blog
I hope you are enjoying your summer!
Thanks for reading, Sherri
by Sherri Sylvester | Jun 6, 2017
Sometimes I wonder if my girls realize how lucky they are to have so many amazing clothes hanging in their closets. Amazing artists and designers design fabric and I get to sew with it and then they get to walk around wearing the gorgeous artwork-turned-creation!
Case-in-point, Tamara Kate’s latest collection for Michael Miller Fabrics ~ Frolic. I was able to feature the knit fabrics in this collection a few weeks ago, and now am fortunate to be able to work with the wovens. Everything Tamara designs is beautiful, and I am loving the last few collections especially. The bright springy colourways, the watercoloury designs. Did I mention the colour? I LOVE colour!


Michael Miller Fabrics provided these woven Tamara Kate “Frolic” prints for me to play with. My opinions are always my own. Thank you for reading!


This time I sewed up two Sally dresses. This pattern is easy to sew, has no closures for easy dressing and has HUGE pockets! This time I rounded the corners of the square neckline. I found that the squared off corners tended to fray over time – but maybe it was just me? Anyhow, it was an easy fix. and it keeps the original intent of the pattern in tact.
The girls love the contrasting pockets. (And I’m waiting to find the youngest’s rock collection in my washing machine, LOL.) Plus it gave me a chance to show off more of Tamara’s fabric. I also added an inset into the bodice in the same fabric to tie the whole dress together. It was fun fussy cutting the inset to match each fabric print!


I also played around with a fun heirloom-style stitch that comes with my on-loan Janome S9. I have used the cross-stitch looking X’s on so many projects – they are simple and add a nice touch without being overly decorative.
The girls surprised me again and picked the opposite favorite colours for their dresses! My blue-loving youngest girl chose (my favorite) On the Wind in Spring with contrasting pink Big Love in Candy. The pink-loving oldest chose On the Wind in Blue with pockets and inset in Maggie Jean in Sky. Fun Fact: The Maggie Jean print is named for Tamara’s grandmother – how cool is that?! This print is my absolute favorite and I’ll be hoarding the scraps for until I find the perfect project for it.


The Tamara Kate Frolic collection will be shipping to stores on June 15th, 2017. Ask for it at your local shop! To find more Frolic inspiration visit Tamara Kate to find all of the Frolic Fabric Tour posts as they are released.
Thanks for visiting, see you again soon! ~ Sherri


