by Sherri Sylvester | Oct 23, 2013

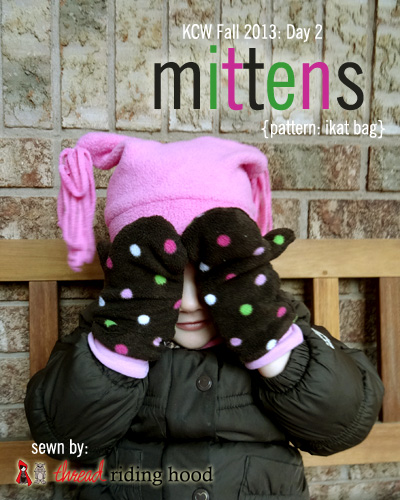
I was looking for a quick project yesterday for KCW. I had some client work to do, and my daughter is not in Nursery school on Tuesday and Thursdays – so it’s always a bit busier. I’ve used this mitten pattern from ikat bag a lot! I’ve made them several times in fleece and flannel, once or twice in rip-stop nylon – though it doesn’t work as well, even if it is waterproof. I reviewed the pattern last year here. And, believe it or not (likely you believe it!) I have had this pair in my project basket since I posted the last pair (see the previous same link for confirmation!).
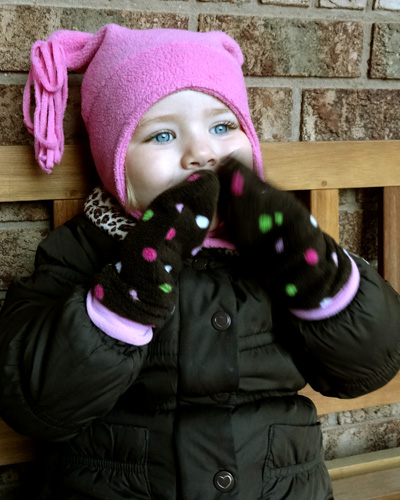
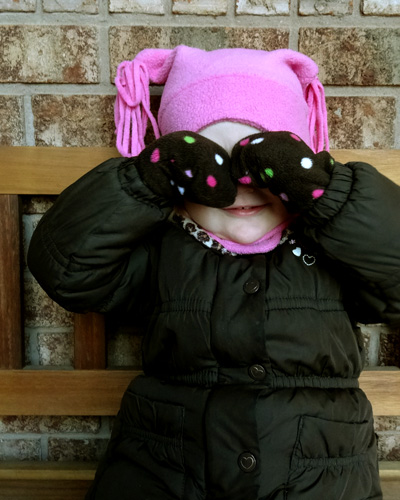
I re-puroposed one of my daughter’s fleece sleepers for this project. I love the brown dotted fleece and it matches her fall coat really well. I’m hoping to use the rest of the sleeper to make a hat and some kind of neck warmer – though I am having difficulty finding anything safe besides this quick release scarf that I’m not sure she can manage on her own. And which, incidentally, I just pinned to my “For the Kids – Clothes” Pinterest board.
I used the cuffs from the sleeper as the cuffs on the new mittens. If you are curious how I cut it, I left the sleeper sleeves sewn together and lined up the pattern pieces with the ends of the cuffs. I cut the outer back piece from one side of the sleeve and the bottom palm piece from the other side of the same sleeve. Make sure, if you do this, that the sides line up. It should look something like the photo below when you are done cutting those two pieces. Now you can proceed as per the instructions, sewing only to the bottom of the open areas when directed to sew the sides.
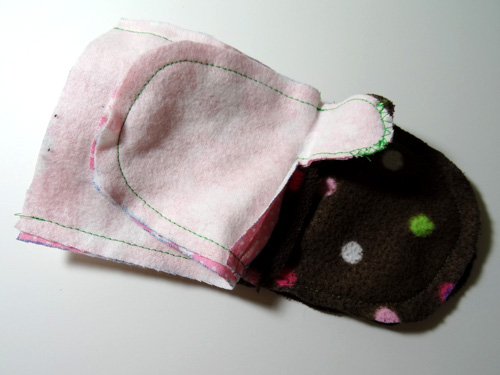
I also figured out a way to keep the thumb lining inside the thumb – which is seriously exciting to me! It’s actually a small step, but it makes a big difference when your kids are expected to easily wear the final product. Take a look at the photo below (both lining and outer are inside out)…
- Match up lining palm to outer palm to get the right orientation for the thumbs.
- Now line up just the thumbs and zigzag over the seam allowance of both lining and outer thumb ends before turning the mittens inside out.
- Turn them together using some kind of pointy object (I used a Sharpie) to push the outer thumb into the lining thumb while the outer is inside out.
- Then turn the entire mitten so the lining is right side out (as per the directions to sew the casing).
Easy! I suppose you could also do this with the finger portion of the mittens… but I didn’t think of that last night!
On to KCW Day 3. What are you sewing?
Click on the button above to visit the KCW site. If you want to see my ikat bag Mittens on the KCW site you can go here.
by Sherri Sylvester | Oct 22, 2013
So, if you are anywhere in the vicinity of Toronto, Ontario – the biggest crafting show in Canada is happening this weekend!
Via, click to visit their website!
I’m really excited to be going with some women from my sewing club on Saturday the 26th. I know a few of the Canadian Online Fabric Stores will be there as well – Friday’s Off and Warp & Weft are confirmed! And I’m sure there will be many others from the pinterest board there as well.
A huge reminder! Warp and Weft has generously offered a 10% off coupon to be used at their booth during the show. The coupon is associated with their interview with me in August, so you can check out the bottom of this linked post and print off the coupon here.
Also – I would love to know if you are going to be at the show. It would be fun to meet up! If you aren’t able to come out you can follow me around on twitter. I will do my best to remember to let you know what’s going on!
by Sherri Sylvester | Oct 22, 2013
Here is my KCW Update: Day 1! I made two pairs of Fancy Pants Leggings (Sew Fab Fall 2013 Pattern Bundle). I have been saving this jegging-esque interlock knit since my trip to Hamilton in June of this year. I wanted to make legging with it – so this was the perfect time.
The Fancy Pants Leggings pattern is really well written with TONS of information about sizing, knits, adjustments… Laura (Craftstorming) has done an amazing job of writing up easy to follow instructions with well taken photos. On the topic of photos – if you bribe your kids by telling them they can jump on your bed for a photo shoot be sure to tell the responsible older one to stay still while the smaller one jumps. It helps to keep at least one person in the photo in focus!
I got to do some altering of the pattern based on my kids’ sizes. They each spanned 4 sizes based on height, inner leg length, hips and waist! In the end I traced the correct size for each part of the body and re-drew the connecting lines. It worked really well and they fit perfectly everywhere I altered them (hooray!). Unfortunately I forgot that my kids leggings usually have a shorter rise and I should have shortened this one significantly. I think I will go back, remove the waistband and shorten it so they will get more use.
The cutest part of this pattern is the separate bum panel. I had to resist the urge to add in a crazy coloured knit there – but for leggings my kids will wear out of the house I don’t think it’s probably a good option. I would love to try a pair of pj pants with multi-prints and colours now though – it would look so cute! Especially since I now have an almost perfectly sized pattern piece for each of them!
If you want to visit the KCW website to see some other great projects click on the button below. If you want to see my Fancy Pants Leggings on the KCW site you can go here.
by Sherri Sylvester | Oct 21, 2013
I have decided to take on the Kid’s Clothes Week Challenge this fall! I feel a bit behind, since everyone else has been doing this for like… forever… I even had to look up what it was. (Shhh… don’t tell anyone!) So, just in case you don’t know what it is either I will give you my 2 sentence understanding of the challenge. 1) You agree to sew for your kids (at least) 1 hour every day for 7 days starting today. 2) You load your photos up to the kid’s clothes week website and blog about it if you want to. ~ Sounds easy?
I’m excited because my oldest actually needs a few things this fall. Cardigans, leggings, zip-up sweaters, dresses… ummm… 1 hour a day is not going to cut it! I’m also excited because I’ve got some great patterns to work with from the Sew Fab bundle. I was going to write out my plan for the week, but I still have to think it up! I will see if I can get more organized tomorrow. Are you going to join the challenge, I’m curious, what are you going to sew?!
Back to today, this Made by Me Monday’s project was going to start on Friday night. I have a Sewcial club, we named ourselves the Material Girls, at my place once a month and I had everything ready to cut out. Until it didn’t happen… turns out it was more fun to talk about sewing than actually sew something! So, I worked on it Saturday night and finished it late Saturday early Sunday, in time to wear to church.
When I first saw the Sally dress from Very Shannon patterns (luvinthemommyhood) it made me want to sew it. It looks like such a happy dress – and I love the square neckline and giant pockets. (Helps that her daughter looks super-cute in it too!) Anyhow – because my bloggy budget is not huge I put buying things like patterns on the back burner – fabric comes first! – and about jumped for joy to see it included in the Sew Fab bundle. Really! It was the second pattern that I printed the instructions for a few weeks ago and while I was waiting for some others to print, I decided to design it up a bit and doodled on the pattern cover like so:
Awesome! It was so easy to design it when I drew over the lines in the photo and I’m super excited that the end result looks very much like my drawing! I had some green Kona and California Dreamin’ from my Bee Modern Fabrics trip. And, since my youngest daughter had chosen the California Dreamin’ herself I decided to make her the dress.
Overall I am happy with how the dress turned out. It is SUCH a cute pattern! I love the neckline and the elbow sleeves (and the giant pockets!). It is very well written and includes very detailed instructions, including how to fully line the bodice the “proper” way. All of the instructions are illustrated – making everything very professional. It was also nice to only have 2 pages to print out for the pattern pieces – the bodice and the sleeve!
The details I added were pretty easy, though time consuming. The large pleat – similar to Figgy’s Scirocco – and the 2 pintucks on either side. Also the tiny pleats on the sleeves that I had so much fun ironing (ha!). The tiny pompom trim was the thing that gave me the most trouble. It had almost no flat space to work with beside the pompoms, so I tried stitching it on with a zipper foot – only to have to try again – and rip stitches and again – and rip stitches and… again. Argh! I should have hand-stitched it on – but once I had figured that out I was on the last pocket, I’m slow to give up on machine stitching something!
Unfortunately, there is one thing I am not so happy with. I think I gave this pattern a run for it’s money by not making a muslin of the bodice. Since it does not have any zippers or button closures, it turns out that it is super hard to get on and off of my daughter. I was a bit worried about it when I was adding the long sleeves that it would not have enough room, and I suppose I should have listened to myself. If I was making it with long sleeves again I would add in enough room to put a long-ish zipper in the back, one that extends past the bodice and into the skirt – since the bottom of the bodice is the tight area that makes it hard to get into. I also have to say that my daughters both have arms that are not super skinny – so that likely doesn’t help either!
I’m curious to know what you think of the Sally dress – will you give it a go? It is SO cute… I’m wondering if I should make a sleeveless version for my oldest for KCWC because she loves to wear her summer dresses to school in the winter with long sleeved tops underneath. I also think that removing the sleeves will allow for her to more easily put it on. We’ll see!
by Sherri Sylvester | Oct 18, 2013
Hi! We’re talking about customizing your patterns again today. There are so many things you can do if you know how… so – here’s another tutorial this week (previous one here) on how to help make any pattern into your own creation!
Adding gathers to a shoulder seam can do a few things. First – it will add extra width to the top or the whole bodice – especially nice if you have a fabric with a great drape, or if you need a bit of extra wiggle room in the width of your pattern. Second – it adds a nice feminine touch and a bit of visual interest to the shirt – especially if it is a straight-forward simple pattern.
Wanna try it?
You will need:
- bodice pattern piece – must include shoulder area (I used the Skipper Top from Sew Much Ado – pattern review here)
- paper the length of the bodice
- pen
- ruler or straight edge
Here we go:
(1) Determine how much of the neckline on your pattern piece will be taken up with the seam allowance and/or neckline finish – mark this on your pattern piece. This pattern, for example, has a hemmed neckline and a neckband finish. Since I was using the neckband 1/2″ from the seam allowance would be removed from the visible shoulder area.
(2) Determine where to put the extra width for the gathers.
- (2a,b) Because I used a dolman sleeve top it is not immediately obvious where the gathers should be placed because the sleeve has no shoulder indication. I measured my daughter and found about 2″ of room before her shoulder started. I decided to leave 1″ between my seam allowance mark from Step (1) and where the gathers would start.
- OR If you are starting with a set in sleeve pattern this is a much easier process. Because you know where the shoulder starts, draw a mark at the centre of the shoulder seam area.
(3) Determine how you would like the final shirt to fit.
- Do you need extra width in the top of the shirt only, or also through to the bottom of the bodice (say, to cover a toddler belly!)? For my daughter’s shirt I picked a size width that would cover her belly and added the extra width only to the top 2/3 of the pattern. I ended up cutting a size 5 width, with a size 4 everywhere else.
- Top only (Track A): (3a) Pick and mark a spot about 2/3 of the way down the bodice along the centre line – Draw a line from your Step (2) mark to this new mark. ** The area above this mark will have added width – so be careful with your choice! Do not place your mark too high or the fit of your sleeve and/or neckline will be off due to the extra width that only occurs around the top of the shirt.
- Through the whole shirt (Track B): (3b) If you like you can add width all of the way through the shirt by drawing your line from your Step (2) mark to the hem, parallel to the centre fold line. ** Be careful, the width you add will be doubled – once on each side of the shirt!
(4) Cut the line you just drew.
- Track A: (4a) If you followed Track A cut the line ALMOST to the edge of the centre seam. Leave a little “hinge” of paper.
- Track B: (4b) If you are following Track B you can cut your line all the way down the pattern.
(5) Determine how long you want the gathers to be. I decided to add in 1 3/4″ of extra space – though, I think looking back I should have only added 1″ because the added width distorted the top a bit much.
- Track A: (5a) Spread the top of the paper by the amount of gathering space you want to add. Tape another piece of paper underneath the entire area you just opened up.
- Track B: (5b) Spread the pattern pieces apart by the amount of gathering space you want to add. Tape them to another piece of paper the length of the pattern piece, matching up the hemline. Make sure they are evenly spaced all of the way along.
(6) Cut away the extra and even out your pattern lines.
- Track A: (6a,b) Draw a line from neckline point to sleeve point along the shoulder/sleeve seam.Cut along the line to remove the excess paper. Add in paper to straighten the bodice centre line. Tape the paper in and draw a line from neckline centre to hemline centre. Cut along this line.
- Track B: (6c,d) Draw a line from neckline point to sleeve point along the shoulder/sleeve seam. Draw a line along the hemline from side to side. Cut along these new lines to remove the excess paper and straighten your pattern lines.
- NOTE: If you have curved lines (say, at a hemline) eyeball a curve instead of straightening the pattern line.
YAY! You now have your new pattern piece!
(7) Cut out your pattern pieces as per the pattern instructions. * You may need more yardage if you are adding a lot of extra width.
(8) Line up your new pattern piece with the shoulder seam of your fabric. Now you will mark the area you will need to gather. (8a) Mark 1 edge even with one edge of your added width, I chose the right side. (8b) The gathers will need more space than the width you added, so mark 1/2″ to 1″ extra on the other side of your extra width, I added 1/2″ extra. Mark the other shoulder seam in the same way* If you do not have the room and are making a set in sleeve with a skinny shoulder seam, you can gather the whole shoulder seam. Or, distribute the extra amount by adding 1/4″ – 1/2″ on either side of the extra width instead of on one side only.
(9a) Make two lines of basting width straight stitches within your seam allowance area. (9b) Gather the area to match the shoulder/sleeve width of your back bodice and tie off the ends of the gathering stitches to keep them in place. Continue following the pattern instructions as written using your newly gathered shoulder!
I’d love to know how your project went. Post your project on Facebook and it might end up in a “You Made It” post on the blog! I’d love to hear if you liked this tutorial or any changes you might make.