by Sherri Sylvester | Jul 5, 2018
Check it out! This is my awesome new sewing shirt, with an added side zipper (a new tutorial!) to make it fancy. Plus, it’s this sewing nerd’s most fun thing to do to wear my hobby. #youknowit

Today’s tutorial will show you how to add a side zipper to a garment with a side seam. (Yes – the bottom of pants too!) I used my trusty Union St tee pattern as a base for the embroidery and zipper. This will be my 5th I think!
This post is sponsored by Janome Canada. I am a Janome Artisan and have been loaned a Janome Skyline S9 sewing and embroidery combination machine as part of this program.
To sew the zipper, I used the Janome twin Dual Feed holder with the AD twin foot. My zipper was flat enough to topstitch it without using a zipper foot! This foot hooks into the AcuFeed system in the Skyline S9 to feed the top and bottom fabric layers through your machine at the same rate – creating amazingly flat and accurate seams, especially when sewing knits and quilting.
Embroidering on the Skyline S9 is an amazing bonus! I’ve wanted to put this saying on something for a long time and I was thrilled to be able to design and execute my very own embroidered sewing shirt. Guess how many other things I want to embroider this on now? #lol #embroiderallthethings #andsewonandsewforth
You might like these previous posts! 12 Tips and Tricks for Sewing with knits, Machine Embroidering, and more projects on the Janome Skyline S9.
Thanks for reading Thread Riding Hood. Don’t miss a post – come #alongforthreadride!
——————————–
How to Add a Side Zipper to any Seam!
You will need:
- Pattern and supplies for a knit garment with a side seam
- Ballpoint needle (for sewing knits)
- Zipper (in your desired length)
- Fusible Interfacing scraps
- Removable Marking Pen
- Sewing Machine and Supplies
- Optional: Serger
Prepare the garment
- Sew your garment, according to the instructions, until you reach the step requiring you to stitch the seam where you’d like to add your zipper.
- Mark where the garment’s hem will finish on the seam you’d like your zipper. My hem is 1″ deep.
- Place the bottom zipper teeth at the hem mark. With the slider open and away from the hem, mark just above the zipper stop.
- Measure from the bottom of the fabric to the top mark and add 1″. Cut 2 pieces of interfacing 1″ wide by your measured length.
- Fuse the interfacing to the wrong side of the fabric on each marked edge.
Stitch the Seam
- Stitch the seam as per your instructions, stopping at the top mark. Press sewn seam allowances open or towards the back. NOTE: If serging, stop 2″ above the mark and stitch to the mark with a sewing machine. This allows the zipper area seam allowances to be pressed open.
- Draw a line on the back of your zipper just under the zipper stop. Also, mark two lines on either side about 1/4″ from the center of the zipper teeth. Place the zipper right sides together with the sewn seam (over the unsewn area) with the zipper slider away from the hem and the zipper stop along the previous zipper stop marking (shown here in blue). It is very important that the zipper teeth are well centered along the side seam!
- Sew along the marked line on the zipper from one 1/4″ marking to the area. Don’t worry that the zipper seems oddly placed, this will all work out!
- Turn the garment wrong side up and open the seam allowances. Mark two 45 degree lines from the center opening to the edges of the line you just sewed. Cut along these marks being careful not to cut through or past the stitches.
Finish the Zipper
- Press each interfaced seam back 1/2″. Fuse or glue them down if desired.
- Fold the excess zipper tape on each side of the bottom of the zipper to the wrong side at a 45-degree angle (left in photo), and then fold it up and out of the way (right in photo). Baste each side in place.
- Lay the shirt right side up on a flat surface. Pull the zipper down from the wrong side of the shirt until the zipper slider near the shirt hem. Align each folded side seam evenly on top of the zipper tape. Glue or pin in place.
- Topstitch around the zipper about 1/8″ away from the folded edges. Start at the bottom of one side seam and stitch around to the other side seam, pivoting at each corner.
Finish the garment
- Finish the shirt as per the instructions. When hemming, make sure the hemline and stitching match on both sides of the zipper for a professional finish.
Congratulations, you’ve sewn a Side Zipper!
——————————–
Sewing Machine: Janome Skyline S9 (on loan from Janome Canada as part of their Artisan program)
Knit Fabric: Heather Grey – 10 oz Cotton/Spandex Jersey Knit from Fabric Snob
by Sherri Sylvester | Jan 11, 2018
I was thrilled a few years ago to find a fantastic sketchy knit with drawings of Disney Frozen’s Anna and Elsa in my local Canadian online fabric shop, Funky Monkey Fabrics. “Frozen Fever” is still going strong in our house and the youngest, very blond child, has claimed to be Elsa. Our newly pronounced tween, while interest is slightly waning, is still very OK with being Anna.
Canadian online fabric shop Funky Monkey Fabrics sponsored this post and provided the Anna and Elsa Disney Frozen Sketch knit fabric for these hoodies.
Finding the Fabric
I love the way this Springs Creative knit is designed and drawn. I get a cool-looking product, and my kids get to wear their favorite licensed character. It has been very difficult to find good quality knits at my local box stores, and the smaller shops don’t seem to carry many either. Enter a Canadian Online Shop to fix the problem!
I’ve known about Funky Monkey Fabrics for quite a while. (Check out my 2015 interview with Melissa.) Recently I’ve started looking for better quality garment fabrics than I can get at my local shops and I’ve begun ordering more from them. Each fabric I’ve received has been delivered quickly and accurately. As a bonus to living very close by to their location, my fabrics sometimes arrive even as soon as the next day!
A quick look through their online shop shows that they sell everything you’ll ever need to create your projects. I’ve personally ordered lots of knits, but also included Pellon interfacing for bag-making and Minky and Licensed Character woven fabric for the Mitered Corner Nap-time Blankets I made a few years ago. Honestly, they really stock it all – needles, cork, batting… I could go on.
Exciting News!
Funky Monkey is currently working with a new solids supplier that will allow them to always have stock readily available. So good! Look for that coming up in the next couple of months. They also have a weekly sale, so you can save on the fun stuff you need!
Since I know some of you are like me (blergh!) and will need a reminder to check out their of their sale info, go ahead and follow them on Facebook and Instagram. For all of you with amazing memories *so jealous*, you can also check the Funky Monkey online shop regularly so you don’t miss their stocking announcement.
P.S. They are planning a big expansion for later this year as well! Can’t wait to see what they have in store for us. Pun intented!
Making the Hoodies
I’ve wanted to try the Kitschy Coo Reversible Zippy Hoodie for a while now. While I was scrap-busting it turned out that the Anna and Elsa Sketch knit was just long enough for two raglan sleeves and a hood. I happened to have enough cozy blue and purple knit to offset it and some shiny knit in silver and gold to use as an accent.
The pattern was easy to change to a non-reversible hoodie. The Zippy Hoodie includes a regular sleeve, and I wanted to feature the Sketch knit with a raglan sleeve. Altering the top of the sleeve with the Hey June Greenpoint Cardigan pattern was really simple and I was thrilled when it all worked out. Whew!
I added the gold and silver to the hood and pocket edges – silver for Elsa and gold for Anna – of course! My daughter’s also love the trendy armband thumb hole, and it was fun to sort out how add that as well.
The not-so-bad fallout of writing a blog and working with online Canadian shops?
While we were planning this post last month, I happened to fall in love with a few knits from their shop – of course! I posted these gorgeous Art Gallery knits and pink French Terry on Instagram and they are now pre-washed and waiting not-so-patiently in my stash. Yay!
Honest Conclusion…
In my personal experience and opinion, Funky Monkey’s online shop really is amazing. As sewists, we put a lot of work and effort into our projects and I am regularly dismayed by the state of fabric quality and pricing in most of our local Canadian box stores.
We need a great go-to shop and Funky Monkey Fabrics really fills that void.
Their fabric stock is huge and includes thread, zippers and notions, plus they have unique fabrics I can’t find anywhere else in Canada. The fabric quality is good, their service is fast and their pricing is competitive. This makes them a great stop on the perfect supply search for your next project, I’d highly recommend them.
by Sherri Sylvester | Oct 19, 2016
What do Flowers, Bunnies, and the colour Purple have to do with each other? I’m so glad you asked! I found this amazing floral fabric on the “specialty fabrics” rack at my local fabric shop a few years ago – and put it in my “stashed with no plans” category! It’s a light fabric, not see through, but comfy with some drape and good body.
I have been experimenting with mixing wovens and knits in shirt patterns this year. Some unblogged, due to the backlog of things I’ve sewn #cantpostthemall! Since making 5 Extraordinary Girl Shirts for my youngest and I last year, including one mixing wovens into the knit pattern. I wanted to try it again.
The first knit/woven Extraordinary Girl shirt I made – with Ann Kelle’s super-cute mermaid fabric – only fit my youngest for about 2 weeks. The woven back didn’t allow enough stretch for her arms and it really didn’t work. Which made me sad, since it was SO CUTE! Ack…
This time around, I was smarter! Practice really does help.
- Added a back yoke in the knit material to help with the stretch and gathered the woven fabric in the center to add some extra ease.
- To capitalize on the long shirt-tail hem trend, I added a longer rounded hem to the shirt front and back as well. Looking at the photos – I think I could have sized up on the shoulders, my daughter is about a size 4 around – but likely needs a size 8 shoulder. Next time I will adjust the width, but leave the shoulder alone.
- Shortened the sleeves (this pattern includes long and 3/4 sleeves).
De-stashing is fun, and you might find the purple knit again on the blog. Turns out little girls’ projects don’t use much! I’ve already sewn an Exposed Zipper Banyan Tee out of it. The knit is super comfy and washes and wears really well. Now the purple Banyan is being worn by the second child. Much to the dismay of the older one who grew out of it… I’ve written an Exposed Zipper tutorial if you want to check it out.
We took these photos on a trip to the Royal Ontario Museum this summer – along with the photos of my youngest’s quilt. I try to capitalize on all opportunities for great photos shoot locations over here. Oh, and the purse! The girls have carried their cross-body purses around everywhere this summer, they are super-cute and really useful.
by Sherri Sylvester | Oct 1, 2015
Ever since I made four more Noodlehead Cargo Duffles at Christmas last year I’ve been wanting to make some for my girls. They would be perfect for overnight stays at Grandma and Grandpa’s house. And how cute would it be to go on vacation with some too! I’ve recently been looking for the pattern yardage information and it reminded me that I meant to post this yardage-saving information earlier this year. Oops.
Moving on! When planning to make my family their Cargo Duffles, I wanted to do it as cost effectively as possible. When all the pieces were laid out, I noticed that the Cargo Duffle pattern yardage can be reduced quite a bit if you are careful! Of course, if you like having extra fabric around, Anna’s suggestions are just fine – and leave you room for error. Always a good way to go!
If you are looking to save fabric and use up some smaller cuts, the cutting layouts below work great and save you an entire yard of fabric. I would recommend that you are VERY careful when using the Exterior Main cutting layout (see below). It fits absolutely perfectly into a 1/2 yard cut. This leaves no room for error, or pre-washing/shrinking even! Make sure that whoever cuts your yardage is precise – and that the print is on-grain or not obvious – so if it is not straight it won’t look wrong when you make the bag.
Note: These cutting layouts do not include measurements. These are available in the free Cargo Duffle Pattern by Anna from Noodlehead. All other measurements in the pattern should be used as they are noted in the original Cargo Duffle Pattern. These layouts do not include the binding and canvas, interfacing etc.
Hope it helps! Let me know if you have any questions. One day I’ll make some for my girls… (I hope!)
Have you made an Overnight-Style Bag before? What is your favorite one?
Other useful Cargo Duffle related posts I’ve written are here:
by Sherri Sylvester | Mar 4, 2015
Wow – it’s been a long week! I feel like I haven’t been back at my computer in ages. I’ve used this time away to think about lots of things that are going on over here and re-calibrate. It’s been nice to plan a bit about how best to move ahead. Don’t worry, I’m not going anywhere – things have just been a bit disorganized lately. I’d like to be scheduling things early instead of writing them at the last minute.
I’ve written up a mini tutorial today! A few people have asked for the measurements I used to make my girls’ Cargo Duffle Backpacks last year.
Before we get to that I wanted to congratulate the winner of the Meerkat Shweshwe Fat quarter bundle! This unique fabric was so well received – I was excited to introduce it and hope you like it as well. The winner of the bundle was Erin A. – who already received it, despite it’s being mailed yesterday! You can head over to this post to find out where you can get the fabric and to find out more about it.
I wasn’t too sure how much to include in the mini tutorial. So I’ve taken some straight forward photos of the bag, and listed the measurements and a few simple instructions below. I can’t put in a full tutorial, since I’m not making another one at the moment, so I’ve left quite a bit up to your interpretation. Please note that the photos are of a bag that’s been used for the past year and a half, so please excuse wrinkles and threads. I’ve also included lovely shots of my super hurried inside binding (yikes, how embarrassing). Lucky you! #justbeingreal
The construction is basically the same as the Noodlehead Cargo Duffle, free pattern from Robert Kaufmann. I’d recommend that you have experience sewing one before tackling this. Either way, please use your intuition, judgement and sewing experience to help you take these measurements and sew up a backpack of your own! I am always available for questions – so don’t hesitate to ask. Just click the envelope button at the top of the blog to email me, or find my email address in the “About” section.
Helpful Notes:
- Please use the photos as reference. Especially if you use the “Extras” section.
- Use the Cargo Duffle seam allowance, as noted in the instructions.
- Cut the batting smaller all around, as noted in the Cargo Duffle instructions.
- The width of the zipper gussets should be trimmed (once sewn) to match the width of the bottom gusset as noted in the Cargo Duffle instructions.
- Gusset length measurements are approximate. I’ve re-measured the bags, but without making another one I can’t confirm that the measurements I wrote down when I made them originally are correct. If the gusset loop doesn’t fit around your bag, un-stitch it where the zipper gusset connects to the bottom gusset and adjust it as necessary to fit.
You might find these other posts I’ve written helpful for the construction:
A note about the “lining”:
- This bag does not have a true lining. I have simulated a different inside print by cutting an extra layer of fabric (the “lining”) and layering it over the canvas before quilting the layers together. My goal was to cover the canvas with something a bit more fun! Of course, you can leave the canvas interior as is – it looks great too.
Main Piece Measurements:
- Front/Back: (Cut 2 Outer, Batting & Canvas, Optional: Cut 2 Lining) – 12″ wide x 15″ tall
- Exterior Bottom Accent: (Cut 1 Outer) – 12″ wide x 2.5″ tall
- Bottom Gusset: (Cut 1 Outer, Batting & Canvas, Optional: Cut 1 Lining) – 5″ wide x 28″ tall/long
- Zipper Gusset Sides: (Cut 2 Outer, Batting & Canvas, Optional: Cut 2 Lining) – 2.5″ wide x 22″ tall/long
- Front Pocket & Flap: (Cut Outer/Lining/Interfacing for each) See printable pattern pieces in this “Add a Pocket” post OR Add a zipper pocket (change the width to fit the backpack)
- Straps: Make as per the original Cargo Duffle, add strap adjusters etc. as desired
- Binding: about 3 1/2 yards of double-fold binding (1/2″ wide)
- Zipper: 24″ or longer (See how to change the direction of your zipper pulls in this post.)
Extras:
Handle: Cut 2 aprox. 6″ x 1.5″ in outer and interfacing
- Stitch the two pieces right sides together, leaving an opening. Turn, press the seam allowance along the opening to the inside. Stitch on the back-top zipper gusset after finishing the bag.
Luggage/Name Tag: Cut 1 Outer 5″ wide x 3″ tall, Cut 1 Clear Vinyl 4″ wide x 2.5″ tall
- Stitch vinyl to outer on 3 sides. Finish edges of tag backing with a zig zag or pinking shears. Stitch to the inside-back of the backpack or mesh back (if using) Note: stitches will show on back of bag/inside of the mesh
Mesh Back Pocket: Cut one layer of a zippered mesh laundry bag to 15″ x 12″ (same size as the back of the bag). Baste to the backpack back before stitching the gusset. Finish stitching when finishing the gusset and adding the bias tape.
Water Bottle Pocket(s): Cut 1 piece 8″ wide by 8″ high for each pocket.
- Hem the bottom edge & gather to 5″ to match the gusset width. Match the width of the top edge to the 5″ gusset by applying fold-over elastic to the top edge (or create a casing and insert 1/4″ elastic). Stitch the bottom of the pocket to the gusset at the bottom corners of the bag. Stitch before the gusset is sewn to the front/back. (Note: stitches will show on the outside of the gusset) Baste the sides of the pocket to the gusset. Finish stitching when stitching the gusset to the front/back and adding the bias tape.
I hope that helps! I love these bags and we’ve used them so much that the bottom gusset is wearing through on the corners. Time to make some new ones perhaps?! (Or maybe try something new this time!)
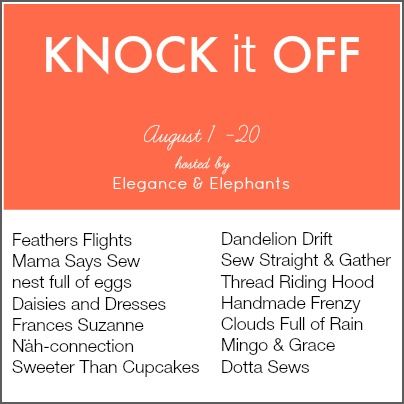
by Sherri Sylvester | Aug 14, 2014
I was so excited to get an email from Elegance & Elephants owner Heidi a few months ago. (Maybe you’ve heard me talking about her Bohemian Babydoll Dress/Top pattern (affiliate link) once or twice… ha!) She was asking if I would like to be part of her “Knock it Off” series… and I didn’t waste a minute signing up. This series is so much fun, and I’ve been following it along for a few years now. The idea is to take a clothing item found in a store – usually one at a ridiculous price you wouldn’t pay – and “Knock it Off” – self-explanatory!
When I found this Hartstrings dress I knew it was the one I wanted to make. First off, it’s made of Ponte di Roma double-knit and I’ve been looking for an excuse to work with this type of knit for a while now. I love the navy and white and simple lines – a ton of retro style. The pockets have vintage gold buttons from my husband’s grandmother and there’s a tiny pop of red in the back elastic closure in the back. There is no way I would pay the (regular price) $60 to buy it for my kids, even if both of them were to wear it, I couldn’t justify the cost. Instead I have knocked it off for around $10, if you don’t include the vintage buttons and interfacing I found in my sewing stash.
I decided to use Dana’s First Day Dress pattern again for this dress. Which coincidentally looks nothing line the empire waist party dress I made my youngest for her birthday last week! Just goes to show how you can use the same pattern and alter it to come out with radically different results. For this dress I cut a size 5 with a size 10 length, since the A-line option is a little shorter than I wanted. I also added a peter pan collar and gathered sleeves with a banded hem.
Just in case you feel like joining in and knocking off something yourself – come sew-along and add an entry to the Knock it Off Flickr group before the end of the series. Two prizes will be awarded at random and they’re good ones – You could win a $100 or $50 gift certificates to Gold Star Tool! If nothing else, go check out the amazing garments everyone has created.
Ready to make your own Necklace Dress?
You will need:
- Ponte de Roma double-knit in Navy (outer and full lining – see A-line Dress pattern option for yardage)
- Ponte de Roma double-knit in White – aprox 1/4-1/2 yard for collar and faux pockets
- elastic & button as per the pattern insructions
- knit interfacing for the collar and pockets
- tailor’s chalk or other removable fabric marker for dark fabrics
- white fabric paint
- small round objects for painting dots (ie. marker, pencil eraser)
- freezer paper and/or pattern drafting paper
- ballpoint needle for sewing knits
- matching white and navy thread
Please Note: I did not line this dress and I wish that I had, since the knit is a little bit thinner than I would like and the construction would have been much simpler… So I’m going to write the directions as if I had, since how to sew a knit First Day Dress is on the MADE blog and I won’t be posting photos of those parts of the instructions anyhow.
When you have finished cutting all of your pieces they will look like this.
Cutting your Fabric:
- Main Dress: Cut 4 A-line Dress pieces from navy according to the pattern. The direction of most stretch should be from side to side.
- Sleeves: Cut 2 navy sleeves (these will not be lined). The direction of most stretch should be from point to point. Place the pattern piece 1″ away from the fold when cutting to leave room for the gathered sleeve.
- Sleeve Bands: Measure the “hem side” of the sleeve pattern and double the measurement. Now subtract 1″ – this is how long you will cut the sleeve band. Cut 2 white sleeve bands that are 2″ wide by this measurement. The direction of most stretch should be along the length of the rectangle.
- Faux Welt Pockets: Cut 2 white pocket pieces 2″ high by 5″ wide. Direction of most stretch should be along the short side of the rectangle.
- Peter Pan Collar: (A) Draft a collar according to these helpful instructions. Before you draft the collar, trace the top of the dress front/back and measure 3/8″ to the inside all of the way around the shoulder, neckline and sleeve to remove the seam allowance. Now draft the collar and add the seam allowance back in. I overlapped the edges about a third of an inch (3/4 cm). (B) Cut 4 collar pieces, making sure you mirror two of them.
Prepping your fabric:
- Interfacing: (A) Match the collar pairs together so there are two for each side of the dress. Interface one of each set. The interfaced side will be the under collar. (B) Fold each of your pockets in half lengthwise and interface the lower half (under the pressed centre line) of each one.
- Sleeve Band: Press each rectangle in half so the long raw edges come together (lengthwise). Press well. Fold again so the short raw edges come together. Press to mark this centre point.
- Mark the Pocket Placement: Fold the front of the dress in half from side to side and press to find the centre. Mark two 4″ lines at approximately hip length – or just below the middle of the dress. These lines should be about 2″ away from the centre line of the dress. This measurement will change depending on the size of the dress you are making, so take this into consideration as well.
Painting the pearls:
Find some objects that you can use to stamp/paint the pearl necklace. I used the end of a washable marker and the eraser from one of my daughter’s pencils. The contrast between the two sizes added a bit more depth to the necklace once it was finished. I was going to use the white paint pen, but didn’t end up needing it.
- If you have it, press freezer paper to the wrong side of the top portion of the dress to reduce movement while painting – try not to press away centre line.
- Draw the general curves of the necklace onto your dress front. Use the pressed centre line to centre the necklace and the pocket markings to reference length.
- Dip the end of your largest object in the fabric paint – I usually put mine on a small lid or piece of parchment paper – and test stamp it on a scrap of fabric. Find how much paint you need and then begin stamping the necklace. Once you have finished the large beads, put the smaller ones on top. After one layer of paint my necklace looked like this:
- Once the first layer is dry, add another on top of each “bead”. Keep letting it dry and adding layers until you are happy with how it looks. I used 2 layers of paint on the large beads and 3 layers on the smaller ones.
Sewing the Collar:
Note: Please ignore the elastic and finished back opening in these photos. You will finish these later when you fully line the dress.
- Place two collar pieces right sides together. You will have one collar and one interfaced under collar. Stitch them together with a 3/8″ seam, do not stitch the neckline.
- Trim the seam allowance to approximately 1/8″ and cut the corners to reduce bulk.
- Turn the collar, make sure to push all seams and corners. Press well.
- Stitch the dress shoulder seams together as indicated in the pattern.
- Pin the collar to the dress neckline – the interfaced under collar is right sides together with the dress front. Make sure the front of the collar is at the centre front and the back of the collar lines up at least 5/8″ away from the centre back.
- Baste the collar to the dress front with a 1/4″ seam. The neckline will be properly finished later on in the tutorial.
Sewing the Faux Welt Pockets:
- Fold each pocket piece right sides together. Stitch a 3/8″ seam on each side.
- Trim the seam allowance to approximately 1/8″ and cut the corner to reduce bulk.
- Turn the pocket right side out and press well.
- Align the raw edge of the pocket with the pocket line marked earlier.
- Stitch across the raw edge of each pocket with a 1/4″ seam.
- Press the pocket upwards, enclosing the raw edge.
- Top stitch the sides and bottom of the pocket close to the edge.
Sewing the Sleeve:
- Line up the centre of the sleeve band with the centre of the “hem side” of the sleeve. Raw edges are together. Next, match up the ends.
- Stretch the sleeve band to find the centre point between each set of pins and pin the band to the sleeve again. Continue adding pins until you are comfortable sewing the band to the sleeve.
- Stitch along the pinned edge with a 1/4″ straight stitch. Stretch the sleeve band to fit the length of the sleeve between stitches.
- Press the seam towards the sleeve.
- To gather the sleeve, mark the armhole side of the sleeve approximatly 3″ away from the centre on each side. Stitch a line of basting stitches between the two marks. Pull the threads to gather each sleeve until it is about the same size as the pattern piece.
- Pin the sleeve and stitch it to the dress front armhole, as indicated in the pattern instructions. You will only have 1 sleeve layer, because these sleeves are not lined.
Finishing the Dress:
- Add the lining, finish and hem the dress according to the pattern instructions. Make sure to watch out for the collar when stitching the neckline so you don’t accidentally sew over it. I would suggest hemming the lining and outer dress together to make it less awkward to put the dress on.
- Attach the faux pocket buttons. I stitched them through to the inside of the dress so the pocket would sit flat and not be weighed down by the button.
- To finish the collar, roll the lining down into the dress slightly (about 1/16″) and use matching thread to top stitch all of the way around the neckline of the dress, about 1/8″ under the collar. This will help the lining not to show when the collar is being worn.
Congratulations – you’d successfully saved yourself $50 by knocking off a really cute dress! Enjoy!