by Sherri Sylvester | Jul 14, 2013

My Fiskars are amazing, and they came from my mom – which makes them even better! These scissors are really useful for clipping threads, but they do a whole lot more than that. They have a spring loaded handle – so they are easy on your hands. The blades are super-sharp, and cut all the way to the tip – so they are really great for clipping and grading seams.
They can also double as an impromptu seam ripper. The tip of the blade works well if you have a small seam to pull out and are too lazy busy to get the seam ripper. I have not had a lot of success using them for cutting out pattern fabric, the blades are too short. But I can imagine they would be amazing for applique – especially small precise shapes. I also like that they have a safety latch, because these are really sharp (can I say again, REALLY sharp!) and I would never want my kids to find them open.
You can find something similar here – but I can’t seem to find a link to the exact ones that I have. All of them seem to have stainless steel blades, and the ones that I own have Titanium Nitride blades. What are your favorite scissors?
Want free fabric? Enter the giveaway and you could win a Tula Pink fat quarter bundle. Back tomorrow for Sew Essential #4 – “Made By Me Monday”-style!
Disclaimer: I was not paid by Fiskars for this review, these scissors really are great!
by Sherri Sylvester | Jul 13, 2013
If you do a lot of applique you know how important it is to fuse the pieces properly before stitching everything together. I have tried quite a few fusible web products and LOVE the results I get with Steam-A-Seam 2 from the Warm Company.
The main difference between Steam-A-Seam 2 and the other fusible webs I have tried is how precise you can be with your final product. Steam-A-Seam 2 is made with a pressure sensitive adhesive on both sides. This allows you to cut out, place and re-place your applique wherever you’d like on the final project. If you are making a shirt applique, for example, it is possible to try the shirt on with the applique in place before ironing it down to ensure everything is exactly where you want it. Once everything is perfectly placed, you can iron it on and know you will love how your project turns out!
I generally stitch around my applique – but apparently this fusible web also works to adhere permanently even without stitching. I also really like that it provides a non-fraying edge wherever you have fused it to your background. Steam-A-Seam 2 is available by the metre/yard and also in “hemming” widths of 1/4″ and 1/2″ wide.
Here are a few Thread Riding Hood tutorials that use Steam-A-Seam 2:
Notice a trend? The first two Sew Essential Tips help me to easily make things EXACTLY how I want them to be! Do you like “Slow and Precise” or “Get it done Quick” sewing best? Make sure you enter the giveaway to win some Tula Pink goodness and come back tomorrow for Sew Essential #3!
Disclaimer: I was not paid by the Warm Company for this review, they really do have an amazing product!
by Sherri Sylvester | Jul 12, 2013
Some of you on Facebook got a sneak preview of today’s post, but for the rest of you… (Cue drum roll and trumpets!) It’s Thread Riding Hood’s One Year Blogiversary today! I think that is cause for celebration and a BIG thank you to all of my followers! I was going to do a “year in review” and “thank you” post – but I covered off most of my (sentimental) thoughts in this post – Dear Wonderful Reader {that’s you} – I’d love it if you would read it, I mean every word. I can’t say enough how thankful I am for all of you that journey along with me as I am on this sewing adventure!
To start off the fun, I am giving away a fat quarter bundle that I picked up from Fabric Spot and am excited to pack it up with a little surprise so I can ship it to one lucky reader. (Entry details for the giveaway are at the end of this post. UPDATE: The giveaway is now over.)
I would love to give the fabric to each of you, but since I can’t, I am going to give you the only thing I can – more posts! Today is the beginning of a two week series filled with 14 things that I love to use when I sew. I’ll be posting a new Tip, Trick or Notion every day until the end of the giveaway. I sincerely hope you find them useful.
All that done… on with the show!
I’m a bit of a perfectionist, and when I see instructions to fold the edge of your fabric 1/4″ and then 1/4″ again to hem I go a bit crazy! I used to get out my sewing gauge and inch my iron along the fabric edge until the fold was perfect. Then I discovered the Scientific Seamstress! Carla thinks like me – and she has provided all of us with a really easy way to iron a perfectly measured fold. Head on over to her website and download her free Printable Folding Templates.
She has included a straight folding template and a curved folding template – for those pesky curves on dresses that we all hate hemming! The templates are included in a handy downloadable e-booklet that includes both templates + the instructions on how to use them. Now you can be so much more precise! Happy folding!
I LOVE Tula Pink’s fabric designs, and you’re supposed to gift what you would want to receive, so… here’s your chance to win some of my favorite fabric! I’m giving away one fat quarter bundle of The Birds and the Bees in the Sunset Colourway. This giveaway will run during the Sew Essential Series – from Friday July 12th (today!) to Thursday, July 25th at 10 pm. The winner will be posted on the Sew Essential Round-Up post. The giveaway is open to everyone, worldwide. UPDATE: The giveaway is now over.
Here’s how to win: (Make sure to leave one comment per entry on this post so we can count them all properly.)
- Leave a comment on this post. Let me know what you would be interested in seeing on Thread Riding Hood in the coming year.
- Optional Extra Entries: If you would like more chances to win, you can have one giveaway entry for each of the following: (1) Like Thread Riding Hood on Facebook and/or (2) Follow on Twitter and/or (3) Follow on Bloglovin’. Leave a comment on this post for each extra entry to say that you did.
- Free Entries: If you already like Thread Riding Hood on Facebook or follow on Twitter or Bloglovin’ you get one free entry for each! Please leave a comment for each way you follow to let me know.
Again, thanks for reading, without you, there would be no reason to blog. And, an extra big thanks to those who comment, here and on Facebook – You know who you are, I so appreciate the conversation! I’m super-excited to see what this next year will bring. See you tomorrow for Sew Essential #2!
Disclaimer: I am not being paid by Fabric Spot, I just really like her store!
by Sherri Sylvester | Jul 8, 2013
This summer has involved a lot of swimming! So I decided to join in the swimsuit making fun that seems to have been going around bloggy land for the past few years. (There is a kid’s swimsuit roundup for inspiration at the end of this post.)
Since my oldest needed a new suit – she’s getting so tall – I decided to make her a 2 piece with a skirt in hopes that it will last more than one year. She grows up and the suit goes with her, at least until the skirt stops covering up her belly! Around the same time I read The Sewing Rabbit’s Scirocco Bathing suit DIY. I was super-excited about it because I have the Figgy’s Scirocco pattern and hadn’t had time to use it to make a dress just yet.
Scirocco Swimsuit
The Sewing Rabbit tutorial is more true to the dress, using one of the flounces from the Scirocco pattern for the swimsuit skirt. I decided to use mesh to make a 3 tiered “ballet-style” skirt. I used the top of the Scirocco to make the top of the suit though, and I love the twist on the back. As well as looking great it also provides some good tension across the back so the suit stays on properly.
I got my swimwear fabric at an amazing store in Hamilton, Ontario called Ann’s Fabrics. More about them in this post. I bought about a metre of outer fabric and lining and used up a lot more than I was expecting making this suit. I had forgotten that the back of the suit needs to be self-lined so the twist works properly. I’m hoping that I have enough left to make another (less involved) suit for my youngest.
The sizing was tricky, to make it small enough to fit her properly I ended up keeping the length and taking in the sides until the actual pattern piece was smaller than the 18 month sized Scirocco. Most of the tutorials that I read suggest making the bodice 1 or 2 sizes smaller than the size you would normally make – so that seems about right. I also think that the twist on the back gives the suit bodice a lot more give, so you need to make it a lot smaller than you think to fit properly.
I made the bottoms by copying some high-waisted underwear of my daughter’s – again, trying to keep the suit around as long as possible by making the waist on the bottoms higher! I love that this also allowed me to make a swim bottom that actually covers her bottom (hee hee). Here’s to modest swimwear that we can all be proud of because we made it!
Love this smile!
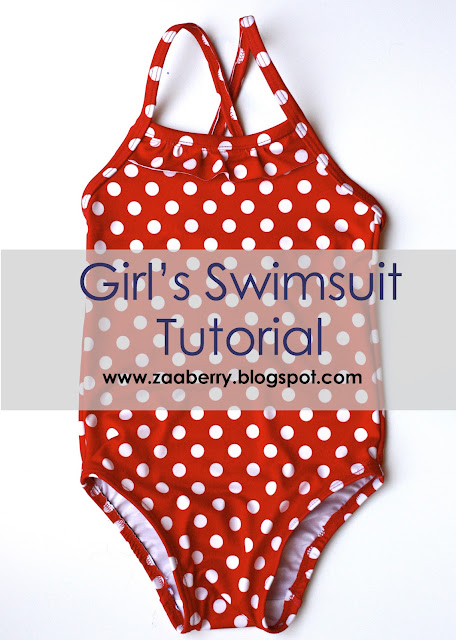
To finish off, some kids swimwear tutorials from around the web. Have fun!
Have you made a swimsuit for your little one – or maybe for yourself? Comments make the world go ’round! Share what you know and help another poor soul out there that could benefit from your sewing wisdom!
by Sherri Sylvester | Jul 5, 2013
I love the gathered clutch tutorial from Noodlehead. I’ve made several of them in the past and her instructions make a very polished project (as usual!).
Ever since I figured out how to change a zipper pull I have been extra excited about my zipper projects! I added a swivel clip and a strap to this one so that it would mimic my favorite clutch – I explain more about it in this past Monday’s post. I love how it turned out, here’s how you can to do it too!
You will need:
- swivel clip – mine has a 3/4″ D-Ring with a clip attached (I re-purposed one from a stashed luggage clip)
- jump rings (chain findings) in two sizes – from the jewelry section of your local craft store (mine were 1/4″ and 1/2″)
- Noodlehead Gathered Clutch tutorial and Materials
- Thread Riding Hood – Change a Zipper Pull tutorial
- needle-nose pliers
- school glue stick
- safety pin
Here we go:
(1) Follow Steps 1-5 from the Thread Riding Hood tutorial on how to change a zipper pull and put the zipper aside until needed for your Gathered Clutch (2) Follow the Noodlehead Gathered Clutch tutorial up until she gets to the “Assembling the Clutch” directions. (3) Cut a piece of fabric for your strap that is 14″ long by 4 times the width of the D-Ring on your swivel clip. (My D-Ring was 3/4″ wide, multiply by 4 = 3″ wide) (4) Iron your Strap fabric in half, unfold and fold the sides into the centre (5) Fold and glue down 1/4″ on one end of your strap. Refold the strap and iron.
(6) Top-stitch around the strap, start at the raw ends, stitch around the end you folded under, and finish at the raw ends. (I like using contrasting thread – but make sure you sew straight because every wobble with show!) (7) Fold the finished end of the strap around the D-Ring on the swivel clip. Stitch across the strap close to the D-Ring. (I find it easiest to use my zipper foot.) (8) Continue on following the Noodlehead tutorial until after you have top-stitched the zipper. (9) Pin the strap to outside fabric only on the “zipper pull” end of the clutch, halfway between the zipper and the front band (10) Open the zipper, fold and safety pin the strap in the centre of the bag so you do not accidentally sew it while assembling the clutch (11) Finish the clutch as per the Noodlehead directions.
My daughter made a “book” with all of her favorite things from Kindergarten and we added this to the clutch before it was gifted to her teacher. The colour choices assigned to me were her teacher’s “favorite colours” (as per my daughter!) – Purple, Pink and Yellow – I think she liked it!
I hope you are loving the zipper pull transformations as much as I am! What would you put a new zipper pull on? It would be fun to see some great zipper tutorials listed so we can all be inspired!