by Sherri Sylvester | Apr 6, 2013

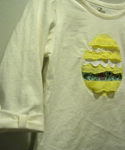
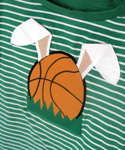
Hi All! I’m over on Sew Can She again today featuring the Super Hero Cape tutorial! I was fortunate enough to have my Sew Handy Fridge Towel tutorial featured about a month ago as well.
I know I have talked about Caroline’s site before, but I can’t say enough good stuff about it. Getting a new (really well designed and photographed) tutorial in your email every day is amazing! I’ve been introduced to so many good bloggers because of Sew Can She. Check out these cute tutorials that I found on Sew Can She.
By the way, I have a few Pinterest boards that you might be interested in following! I’m going to keep these up to date as I find more great stuff around the web.
by Sherri Sylvester | Apr 4, 2013
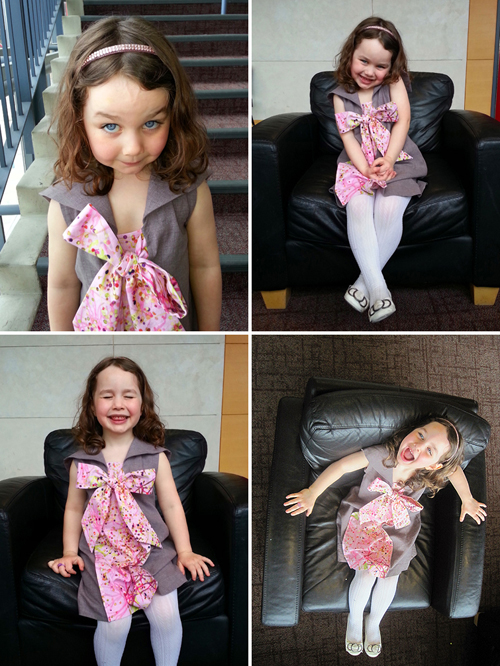
When I bought my pattern bundle a few months ago I was lucky enough to score a copy of the Goodship Dress by One Girl Circus.
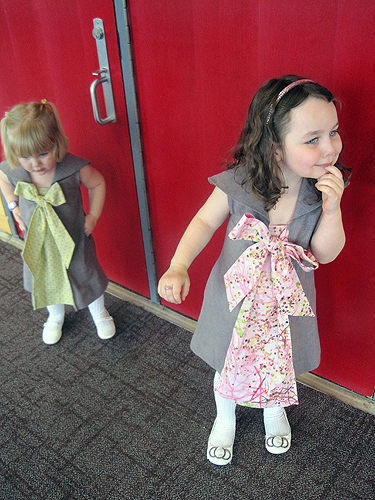
Karen has created the cutest dress with a huge amazing bow on the front and somehow I convinced my “twirl-loving” oldest daughter to go for it! (I apologize ahead of time for the barrage of photos! I couldn’t decide which ones to post. This photo shoot was so much fun. The girls were high on sugar (Easter and cookies) and therefore a bit wiggly – amazingly everything worked out great!)
The pattern is amazing to work with. Everything is very clearly written and illustrated and VERY well though out. The inside of the dress looks as amazing as the outside. The side seams and hidden pockets are even put together with french seams!
The only thing I think I would change on when I make this again is that the neckline is a bit low for my girls – could be I made them a size too big. I think I am going to add in some hidden buttons under the collar to hold it up a bit higher. It is fine as long as it is tied – but the kids like to pull on the bows so they come undone pretty easily.
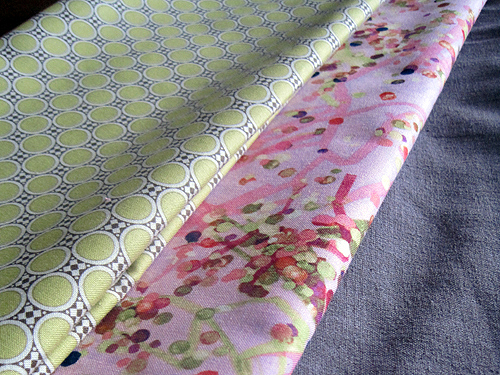
The fabrics I ended up with for this project were a dream to work with. The gray is a linen/polyester blend and it is so soft… I have about 1/2 meter left and I’m hoping to make something for myself from it! The pink is from the Fiesta line by Jennifer Sampou for Robert Kaufman. The green is my first stash of Amy Butler fabric. (Amazingly – I’ve never bought her fabric before!) It is the Gypsy Caravan line in Deco Dots from Amy Butler’s Stash. Apparently this is a reprint from her first fabric line.
Your Sewing Tip for Today: Ever have trouble turning a sash that has an angled sewn end? Here is a super easy way to do it (via one of my most favorite blogs: Made By Rae).
I’ll leave you with the one and only workable photo with both kids in it!
by Sherri Sylvester | Apr 1, 2013
Hope everyone had a wonderful Easter weekend! I have some great photos of my girls in their dresses that I am dying to share – but, since it is late we will go with a backup today! Keep in mind, this is not a second-rate project – this pattern is really well put together and very on trend!
Angela Osborn’s Bow Tie Pattern
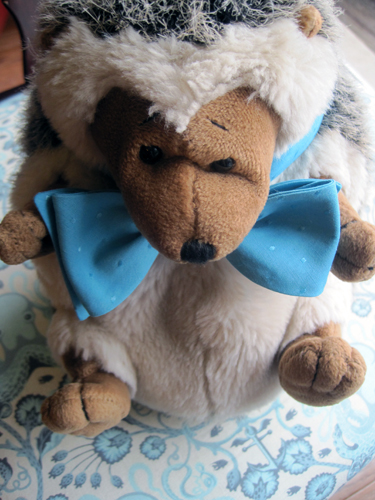
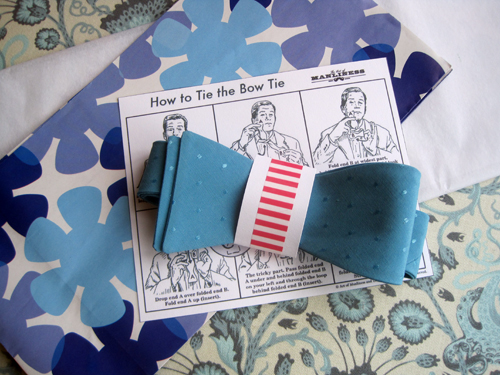
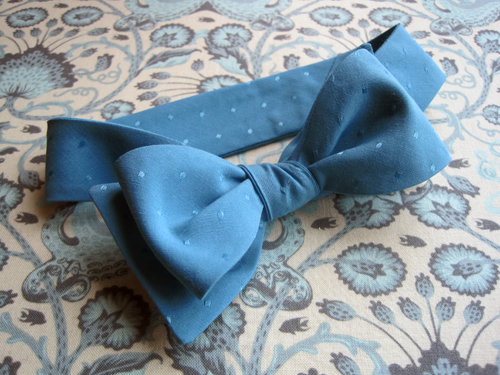
My husband suggested (last week, while I was sewing Easter dresses) that I should undertake another project. I have to say, this was met with a bit of reluctance at first (another project? while I am sewing dresses that I am late on and HAVE to be done by Thursday?!) – until I heard what he wanted me to make. Our good friend’s birthday was on Wednesday of last week and my husband wanted me to make him a bow tie. So – in the middle of making dresses – all else was put aside and I found a great free pattern and stitched up a lovely blue one.
Angela’s pattern is very thorough, she includes a wonderful illustrated sewing glossary at the beginning – so even if you don’t make the bow tie you can definitely benefit from reading that. The pdf download is easy to follow and includes great photos to illustrate the directions. She also includes two ways of making the tie. Since it has to be cut on the bias so it has some stretch and is more comfortable for the wearer, it uses up quite a bit of fabric. Angela’s instructions include a pattern piece that has a seam in the centre back (where it won’t show) so you can use half as much fabric – hooray!
Though she says to print this on legal size paper, I printed mine on letter size and it turned out just fine, but I think some of her other patterns may use up more space on the page than the bow tie. Check out her Esther blouse and Marion skirt patterns. I am sure they are just as well put together. She is located in Australia, so she includes a great sizing chart on her website.
When you have finished making your bow tie head over to Art of Manliness and print out an illustrated copy of “How to Tie a Bow Tie”. Wrap up the printout with your bow tie and give it to someone special! See you soon, I think, with the dress photos (for those of you who didn’t get a sneak peek on Twitter!). The girls had a great time with the photo shoot as usual.
(By the way – Walter the hedgehog says he is glad to have his photo posted. And thanks to Ben for being a good sport and letting us take his picture too!)
by Sherri Sylvester | Mar 27, 2013
So, on Sunday I was doing a little of this…
Which turned into a lot of this…
Which (when finally finished with the seam ripper, thankfully!) – turned into this…
I have finished the quilt top – hooray! I am so excited. All of the things I dreaded (mentioned here and here) haven’t happened and I am done! (Sorry for the super predictable “clothespin the quilt on the fence” photo. I’ll do better next time.)
I bought Denyse Schmidt’s Proverbial Quilt pattern a few years ago and have been waiting for a good quote so I could use it to make her pattern. Since you might be wondering why the quilt says what it says, I will tell you! When I was small my mom made myself and my siblings each a cross stitch wall hanging that said “Jesus Loves You” along with our name. That cross stitch hung on my wall for all of the years I lived in my parent’s house – as far as I can remember. I dug it out of our crawl space (quite a feat – trust me!) so I could show it to you.
Since my family’s faith is very important to us, and I am a bit sentimental (!) I decided to make the same quote into something for my girls. As each stitch goes into the quilt I hope my girls someday understand how much I care about them, and how I spent so many hours making it just for them. The same, I imagine, as my mom felt when she was making our cross stitch hangings. Hopefully they will keep their quilts as long as I will keep my mom’s handiwork.
Sentiment aside, (though a bit teary eyed), I’m excited to get the backing finished, since it is not quite as involved (thank goodness!). Then I can get to the really scary bits – like trying to machine quilt and bind it! Anyone have any tips I’d love it if you would leave a comment!
Now the old meets the new – and the legacy continues – wouldn’t it be great if my girls decided to love sewing and make something like this for their kids… hmmm… their kids?! What am I thinking!
I will be taking a bit of a break to spend some time with family over the weekend – but I’ll be back on Monday with another great project to show you! (And of course, you can follow me on Twitter to see what I’m up to even when I’m not here. Oh, and if you follow me on Twitter – put a comment on the giveaway post for an extra entry!)
Have a really great Easter! And, of course – take some time out to enter the giveaway! Enjoy spending time with your family! Sew something… maybe a shirt or two? I know a few good tutorials for that!
by Sherri Sylvester | Mar 25, 2013
Happy Monday! Hope you all have had a great weekend. We had a very relaxing one, which is nice (and rare) around here! I’ve gotten a ton of quilt sewing finished this weekend. But I’ve got a lot more to do before Easter weekend. I promised two little girls they would have new dresses to wear to church on Sunday. There are going to be some late nights this week! So… that explanation given… I am pulling something from a while ago out to show you this Monday!
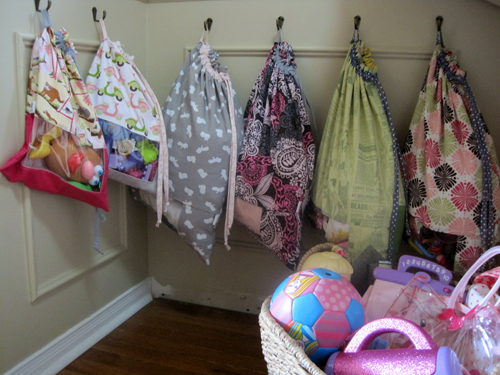
Make It Perfect – the Peek-A-Boo Toy Sack
These bags are amazing, and the tutorial is even better! Toni from Make It Perfect does a great job of explaining the process and the photos are really great and easy to follow.
The main thing that worries me when making a bag that uses plastic is that it tends to stick under the presser foot when you sew it. This bag is fully lined, and you never have to stitch over the plastic, making it quick and easy to make a lot of storage for your kids’ toys. They would also make an amazing new baby gift – just make one up and fill it with some handmade tiny cute things!
I made some in the smaller size (like the tutorial) and also enlarged the pattern to make a few bigger ones to fit some larger toy collections! I added a small strap on one side so that they hang up and a loop over the strings that tightens so they can stay closed. With those and some small hooks our toy corner on the main floor ends up looking pretty tidy. (Okay, who am I kidding, I moved a ton of stuff for this photo shoot! At least I have an idea of where the toys are supposed to go! Oh, and just ignore the missing piece of baseboard – it’s been that way for years!)
I used up some of the fabrics that I loved and/or loved and didn’t know what to do with – so now I can look at them every day, and that makes me happy! The bags do work really well, especially for small collections. Mrs Potato Head will likely never lose her purse again, and I think she looks pretty happy about that too!
If you are following me on twitter you would already know what happened yesterday. My seam ripper got a good workout on the quilt I’m making… but – I’m all finished with the quilt top. EEEeeee!!!! I’m only a little excited! I just need a sunny day to photograph it. Unfortunately there’s rain in the forecast and, though I may have to make up some sun myself, I will post a progress report mid-week. Come on back and see what I wrote on it!