by Sherri Sylvester | Nov 29, 2012
On the topic of my daughter’s birthday – we needed to send something small for each of the 20 kids in her class. Since they don’t allow food to be sent to the school anymore we have gotten an abundance of pencils, erasers and cheap party toys. While my daughter likes them (for a few minutes), I am left to throw them out or kick them around the floor for a month. The other problem is that they cost a fortune! Some of the bags that were coming home must have set the parents back $2-$4 per kid and that was not in my budget – especially when I needed to also fund a party with it’s own goodie bags!
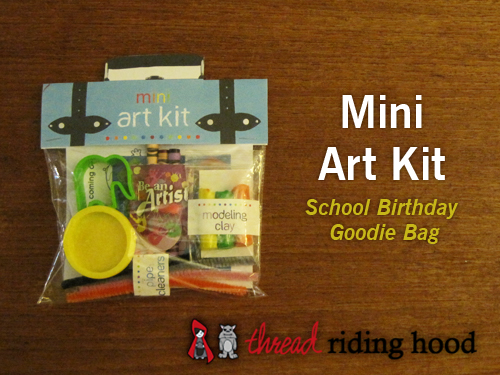
So, I made it my goal to find something I could put together that would be approximately $1 per kid and would be fun and somewhat useful, and this is what I came up with.

The cute factor on this is fantastic! The play factor? I gave it to my daughters and it kept them both busy for an hour – so that’s saying something! The cost factor? I think I came in at about $1.25 per kid, for a class of 20 students.
I have written up a quick tutorial below – use your imagination! There are so many more simple inexpensive things you could add to this.
Here’s what you need:
- 1 pack of 64 crayons (the good ones!)
- 1 $Store package of bookmarks (the ones I found had a semi-circle cutout near the top)
- 1 $Store package of mini ziploc bags
- 3 $Store packages of modeling clay (mine had 12 sticks each)
- 1 $Store package of 40 pipe cleaners
- 1 package of mini cookie cutters (I found my set at Michaels)
- 20 mini playdough containers
- 20 $Store sticker pages
- Sandwich Bags (the zip-able kind)
- Cardstock
- Printer paper
- Labels
- Stapler
- Paper Cutter (optional, but super useful)
- Printer
- A few hours of your time
Here’s how you do it:
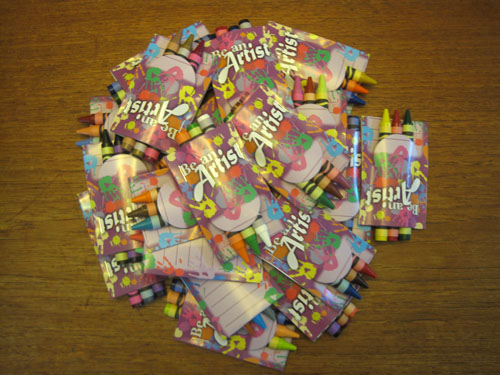
1) Count out 20 of your bookmarks and fold them in half. Insert 3 crayons in each semi-circle cutout (see the photo) and staple the bookmark on either side of the crayons.
2) Cut each stick of modeling clay in half. Arrange them on small squares of cardstock that fit inside the mini bags you bought. Make some labels for the outside. I added one on the back that said they were not for kids under 3, non-toxic and gluten free – because this was the only thing in the bag that didn’t have a brand label on it. Stick on the labels, insert the modeling clay (the square of card stock makes this step a lot easier) and zip them shut.
3) Take your 40 pipe cleaners and cut them in half. DO NOT under any circumstance use your sewing scissors to cut these! Even if you are not near other scissors and are feeling super lazy (I know I do that too!) Don’t even use your paper cutting scissors for that matter. Use wire cutters or an old pair of scissors, the wire will wreck your blades in no time. Make some labels and wrap them around the pipe cleaners.
4) Count out 20 play dough containers, 20 cookie cutters and 20 sticker pages. (This step is super easy!)
5) Go online and find your child’s favorite tv character, or a few cute colouring pages. I made 4 pages per child for my kits. I included 2 “unisex” colouring pages, 1 princess page and 1 superhero page. Print them out 4 per page on letter size paper (8.5″ x 11″). Cut the pages in half each way to get 4 mini colouring pages per kid. This is where a paper cutter comes in super handy.
6) Put 1 set of everything into each of your zip-able bags. You’re almost done!
7) You could at this point print out a few more labels saying “mini Art Kit” or something similar, OR you could download the printable for the topper and make these look like a tiny suitcase. I will be posting it very soon! – Update: The free printable art kit topper is here – Mini Art Kit (mini) Tutorial – Printable
If you do use this tutorial I would love to hear from you, leave me a comment and let me know how it goes!
by Sherri Sylvester | Nov 19, 2012
Easy Cupcake Flags
You’ll have to forgive me for not posting something I’ve sewn. The projects have been few and far between in the last few weeks because I have been working on my daughter’s birthday party. This week I am posting an easy way to make cupcake toppers.
You will need:
- toothpicks (round or flat)
- rectangular label paper (ex. Avery from an office store)
- a printer
Now – to get to the fun part!
1) Design your labels and set them up using the template provided with your paper. Usually the supplier provides directions for this online and you can make them in a word processing program. My labels are 2 5/8″ wide x 1″ high. I used the generic label paper from my local office supply store.
2) Print them! (This is pretty self explanatory!) Make sure the paper is the right way up or you will print on the back of it instead of on your labels. I added a gray line that indicates where to cut if you want to remove the rounded corners.
3) Peel a label off and line up the rounded end of the sticker – see photo below.
4) Put the toothpick in the space between the stickers and push the label together from the rounded edge side to the toothpick. This avoids any unevenness and wrinkles in the label. Here is a photo before I pushed the label together.
5) Cut off the edge of the label on the gray line (if desired). I wanted a square cornered flag – and the cutting also helps to remove any uneven edges if it is not perfectly lined up.
6) Top your cupcakes and enjoy!
I think it took me about 20 minutes to make 12 of these from start to finish – so it’s pretty quick. Who’s your favorite princess?!
by Sherri Sylvester | Nov 12, 2012
Alright – here we are folks. Better late than never! My sister is visiting for a week and we don’t get to see each other often, so I am using a few precious moments to post something today. Remind me again to have a few posts ready for times like these!
the Library Tote
This bag is made from a Noodlehead tutorial – here. When I found it I was actually looking for a cute tote to use for library trips.
The fabric is an “As Is” piece from Ikea. I pieced the pocket together so I could use more of the cute birdhouse pattern. I think the brown is some linen I had in my stash. As usual I changed it a bit by making the pattern piece a bit wider to accommodate the kids’ larger book size.
Since making this bag I have sewn quite a few more for teacher gifts. It doesn’t require a lot of fabric, and is very quick and easy and looks great. There are reinforcement pieces on the inside at the top, and I have gotten my daughter to write “Thank You” and her name and the year on the inside with fabric markers – something to put a personal touch on the bag. I made them a bit quicker by using a french seam instead of the bias tape on the outside rounded edge. They sound fancy, but are really easy. It is a nice way to hide your raw edges without a lot of work. Here is a good tutorial. Just ignore the part where she says not to use a french seam on thick fabric with curves because of the bulk! I used home decor weight fabric on all of the bags and they worked out fine.
by Sherri Sylvester | Nov 6, 2012
Before we begin – I know what you are thinking… “She didn’t just make a title with the word ‘sew’ in it – that’s so punny”… But I did! And it is amazing, because I could actually spell words with the magnetic letters I found. Given that most of them are lost, or under the fridge or someplace else I don’t want to think about. So, forgive me. (Though it is possible I may do it again!)
A while ago I was online searching for a tutorial for a towel I could hang on my fridge door handle. The fridge is right next to the sink, so it would be super-handy to have it there. I found a whole bunch of really great stove handle tutorials – the kind where the piece of fabric comes up and over the handle and buttons onto the front. The problem is, that the fridge handle is vertical, not horizontal like the stove handle – so those won’t work. I came up with this bunny-ear shape.
I have made 6 of them for myself so far and they are really great! Especially if your fridge is anywhere near your sink. Especially if you have kids that pull on towels when they dry their hands. And especially if those towels inevitably end up on the floor and need to be washed – again… This towel has a tie long enough to be made into a knot, and even if you don’t have kids it will never fall off causing you to have to do unnecessary laundry! (Anything to save doing laundry!)
You will need:
- 1 bath towel (makes 4 towels), or 1 hand towel (makes 2 towels)
- just over 1/4 meter of fabric for the tie portion of the towel (makes 2 towels)
- 1/2″ double fold Bias tape – 2 pieces equal to the height of your towel + 2″ – you will need 2 pieces for each towel you are making (Note: you do not need the bias tape if you are using a hand towel)
- The pattern piece – here.
I bought a cheap bath towel for $5 at my local Walmart, sized 27″ x 50″. The fabric is Michael Miller – Put A Lid On It. The bias tape was made from Kona Cotton Ash.
1) Print the
pattern piece full size (do not select “fit to page”). Fold your fabric and cut 4 top pieces on the fold, as noted on the pattern piece. Make sure that you put the fabric the right way up if it is a one-directional print. Set aside.
2) If you are using a hand towel cut it in half through the middle, the short way. You will end up with 2 square-ish pieces with one raw edge on the top of each, skip to step 5. (Sorry, I don’t have photos to make this using a hand towel.) If you are using a bath towel: Cut the towel in half lengthwise (down the centre the long way) and then cut those long rectangles in half (down each centre the short way) to make shorter rectangles – each with a thickly woven end of the towel to use as the bottom of your fridge towel. (see below photo, ignore the ruler.)
3) You now have 4 towel shapes, each with a raw edge top, a raw edge side, a finished edge side and a finished thick woven bottom. Now, cut the one finished edge off of the side of each towel piece. I know this seems like a make-work idea, but if you want both edges to match you must cover them both with bias tape. Do not cut the thick woven bottom piece off!
4) Now, if you used a
bath towel – go ahead and make your bias tape (or pull it out of the package!) If you want to make your own here is a
good tutorial. I started with 2″ strips and folded each edge into the center, then folded the whole thing in half to get my 1/2″ bias tape. Read the tutorial – it makes more sense! If you did happen to use a 27″x50″ towel, you will need about 36″ (1 yard) of bias tape for each towel. On a side note, I did not cut my bias tape fabric on the bias because we won’t be sewing it around any curves.
Here is what you should have now:
Hooray – the tedious part is done, now we can really start!
5) Iron the bottom straight edge of your fabric up 1/4″ once. Do this for all of your pieces.
6) Place 2 pieces of fabric right sides together, pin, sew around the curved edges with a 1/4″ seam allowance starting at one side, up and down the bunny ears and down the other side to the bottom. Do not sew across the straight edge you just ironed! When you get to the top of each bunny ear stop and pivot the fabric around your needle to make a sharp corner.
7) Clip the top of each ear close to the stitching (1st photo), the bottom edge you ironed up (2nd photo) and clip the curve (3rd photo).
8) Turn the pieces right side out and iron. Set aside – we will topstitch this later.
9) Now it is time to sew on the bias tape to finish any raw edges. (If you used a hand towel skip to step 14 below). Lay one of your towel pieces with the back facing up (right side to the table). Find the end of your bias tape and open it out flat. Pin it (or wing it) with the edge of the bias tape lined up with the edge of your towel. Sew down the bias fold line (should be 1/2″ seam allowance). When you get to the bottom cut the bias tape 1/2″ longer than the bottom of your towel.
10) Now, turn your towel over and fold the bias tape over the edge of your towel to the front. Pin the bias tape to the edge almost all of the way to the bottom.
11) Fold up the extra 1/2″ you left at the bottom carefully and sandwich it between the towel and the fold of the bias tape (see photo). Pin.
12) Sew the edge of the bias tape from the top to the bottom of the towel, insert a tag or folded ribbon in this step if you want.
13) Repeat the bias tape for all of your raw edges.
14) Now, grab a ruler and mark every 1″ across the top of your towel.
15) Make three pleats on each side of the towel, folded towards the centre. (1st Photo shows left pleats only) If you have not used a 27″x50″ bath towel, size the pleats as needed to make the top of your towel 7″ wide. (2nd Photo) If you want you can baste the pleats with a 1/2″ seam allowance and remove the pins – if you hate basting like I do, keep the pins in and move on to step 16.
16) Now, insert the top of your towel 3/4″ into the bottom of your fabric. You should have a towel sandwich with fabric on both sides. The green pins in the photo are holding my towel pleats together, the red pins are pinned through the fabric as well. Make sure that the bottom of your fabric lines up with itself by checking the position of your pins. We are about to sew blindly through the fabric from the top and won’t be able to see the back to line it up.
17) Sew across the bottom straight edge of the fabric 1/8″ away from the fabric edge. Sew slowly over the thick pleats (and the pins!) so you don’t break your needle. Sew a second line 1/4″ away from the bottom straight edge to make sure everything is secure and give added strength.
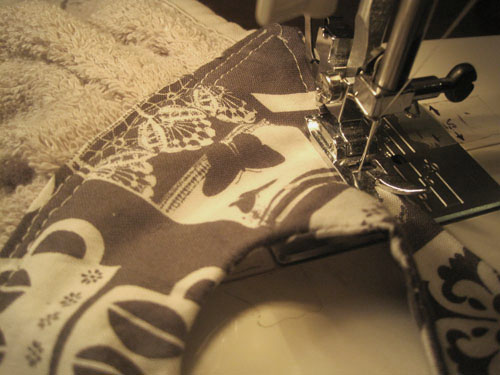
18) Now, topstitch around the curved edges of your fabric towel top 1/8″ or so away from the edge.
You’re Done, hooray!
Quickly now, tie it to the fridge and enlist someone to wash their hands and try, just try to pull it onto the floor! Now, laugh in delight at the laundry you have saved yourself – really, it’s okay – we can’t hear you!
Update: Find a link to this tutorial on Sew Set! Link here.
As usual, please feel free to use my patterns/tutorials for your personal projects and gifts and for charitable fundraising events. Please do not sell anything made with this pattern. Thanks! Sherri