by Sherri Sylvester | Jul 26, 2012
I have been wanting to try to make a shirt out of this material for about a year and a half now and I finally found the perfect pattern. I was on burdastyle hoping to find something quick and easy. This pattern from dixiediy was exactly what I was looking for. This is such an easy pattern, and the instructions are simple to follow for a “just more than beginning” sewer.
I’m sure there is a more technical approach to making the stripes match at the side seams, but here is what I did.

Cut out the back piece – one of the two pattern pieces.
Match the stripes on the piece you just cut (the back) with the stripes that are going to be sewn to it (the front). Make sure that the bottoms of the two pattern pieces line up as well.
This is another closeup of the matched fabric. Now, remove the “already cut” piece from the table (the back) and cut out the front pattern piece.
Tada! Wasn’t that easy! Now a word about the pattern. I decided to use knit fabric for a woven fabric pattern – which is not always a super idea. However it worked out here. The only problem was that I had to take in about 2 inches on either side because I made the shirt a bit big – of course erring on the large side is mostly always a super idea.
I will post photos of the finished shirt as soon as I can get my overworked husband to do it for me. Our business has had a very busy last few weeks. Either that or I may have to bribe my 4 year old and see if I can get a good one that way!
by Sherri Sylvester | Jul 19, 2012
Have you ever wondered what to do with those straight edge pieces you cut off of the printable patterns before you glue the pattern together?
Here is an easy solution – Find a 2 year old, a placemat and a glue stick (no reference to the last post, here). Hand the strips to the 2 year old and glue your pattern together without interruption as the child is entertained for hours. Well, maybe not hours, but at least long enough to get your work done!
by Sherri Sylvester | Jul 17, 2012
In my list of the necessary evils of sewing, pins, zippers and sewing on Velcro are near the top. Pins are forever breaking needles (Does anyone actually remove them as you get to them?)! Zippers are never straight, and pinning one on is not the easiest thing you ever tried to do. Tiny hooked Velcro pieces shift when you lower the presser foot, and don’t like to stay put as you sew them on.
Fortunately I found
this tutorial a few years ago and it has gone a long way towards helping me change my mind. I think I was trying to find out how best to install a zipper and stumbled upon a staple that I use almost every time I sew. A glue stick. Nothing fancy – just any old glue stick – even the cheapy ones from the dollar store work fine. The purple school glue kind are great because you can see what you are doing. Stick some on the side of your zipper, press on the fabric and voila – “Look Ma! No pins!” You can sew straight through it, I haven’t had any trouble with sticking or having any residue on my needle. This stuff is so strong it’s hard to separate the fabric when I have accidentally put something together the wrong way.
1) Add glue to the fabric or zipper and stick them together.
2) Sew them together – no pins!
3) All done – hooray!
Velcro is the same – just add some glue to the back of your velcro and press it on. It will stay put while you sew it on too. Thanks to Michelle for posting the zipper tutorial in the first place. Now, go find a glue stick and never be afraid of a zipper again!
by Sherri Sylvester | Jul 12, 2012
My parents live in south Texas, which is a 36 hour drive (straight with no stopping!) from where we are. This leads to me needing to make something to send with them on their flight today. They just returned home after a 3 week much loved visit with their grand-kids. I think they also enjoyed seeing my husband and I!
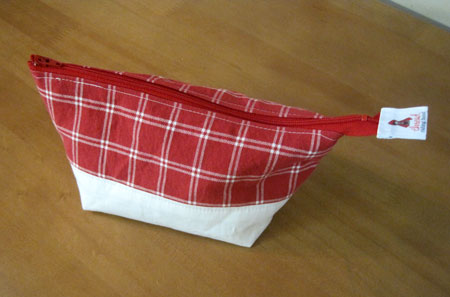
I went back to a tutorial recently posted on one of my favorite blogs. Anna from Noodlehead has an amazing ability to add just the right topstitching and detailing to make a project turn out looking tidy and finished. I used this tutorial which is so new it hasn’t even made it to my Pinterest yet! The smallest size was perfect to fit a snack for two and a pack of travel Kleenex. (Unfortunately the Kleenex was a necessity.) Glad you got home safe Mom & Dad!