by Sherri Sylvester | Jun 9, 2014

Last week my church made some new t-shirts available in adult sizes. After my husband and I picked one up, I thought there must be an easy way to make them into dresses for the girls. So we brought home two extra-small women’s tees. Of course, once we got them home I needed more than just a dress to make them happy. Gray is “boring” apparently – we needed to add colour as well. I totally should have seen that coming!
A little research later and my great love of collecting coloured Sharpie’s has finally paid off. We spent a few fun hours colouring in all of the screen-printed lettering. I let them dry for 24 hours, (no idea if this is necessary, it just seemed like a good idea). Then I heat-set them in my dryer (inside out) on high for 20 minutes. After that I washed and dried them with a dark load of laundry, just to be sure the colour was permanent.
The pillowcase dress style is nothing new, but since I made them in a super-easy way and prevented the usual “knit stretching” fiasco with interfacing I thought I’d put up a little tutorial for them. I hesitate to call things easy too often, but seriously – this is easy! After the first one, I made the second in about 1/2 an hour. It left me wanting to take all of my small tees and turn them into dresses for the girls!
You will need a ballpoint needle for your machine – but don’t be afraid! They are easy to buy at your local sewing supply store. If you don’t know how to already, grab your manual (or look it up online) and find out how to change your needle. Once you have sorted out how to change it you will wonder why you haven’t done it yet! You can find out why you need to use a ballpoint needle here.
Ready to start?
You will need:
- one adult tee – it is best if the tee is not much larger around than your child & the “right” length for a dress or tunic
- one long knit or woven scrap 2″ wide by about 44″ long (or you could use ribbon)
- lightweight fusible interfacing (knit or woven is fine)
- ballpoint sewing machine needle
- matching thread, scissors, water soluble or other fabric marker, your regular sewing supplies
Here we go:
- Wash and dry your tee in a normal load of laundry. This will prevent it from shrinking after it is finished.
- Fold the tee in half, so the armholes seams match up. Take extra care to make sure all of the parts of the t-shirt are laying flat.
- Measure about 1/3 of the way down the armhole on the tee, in my case this was right under the neckline. You will need at least 2″ of un-printed area under this line if you want all of the wording on your tee to show. Mark a line across the tee, including the sleeves, at your measured point. Cut your tee across this line.
- Next, unfold the tee and open up the sleeve area. Cut each sleeve about 1/2″ away from the armhole seam. You will not be cutting the body of the tee, you will be cutting into the sleeve following the curve of the armhole seam. (see photos below)
- Fold each sleeve along the seam-line, so the 1/2″ of extra sleeve is tucked inside the armhole. This creates a facing (nice finished edge) for your dress’ armholes. Pin and stitch each side once or twice as desired.
- Cut two rectangles of fusible interfacing. They should be 1.75″ high each and as wide as the top edge of your shirt, just inside the armhole stitching. If you are using knit interfacing, make sure to cut the length of the interfacing along the direction of least stretch. Fuse the interfacing to the top of the tee. If you have done this correctly, the top of the tee will not stretch from side to side.
- Fold, press and pin each interfaced edge down. Line each raw top edge of the tee with the bottom of the interfacing to make a casing for your straps. This helps keep your casing an even width across the top. Stitch along the bottom edge of each casing about 3/4″ away from the folded edge. (sorry, this stitching is not pictured)
- Get your strap fabric. I used knit, so I also cut a piece of interfacing 1″ wide by the length of the strap fabric (again, the length is cut along the direction of least stretch).
- Fuse the interfacing to the centre of the 2″ knit fabric strap (if using). The strap should not stretch along the length if the interfacing was cut correctly.
- Fold each strap edge into the centre and press. I used the edgs of the interfacing as a guide for where to fold. The edges of the fabric tend to fold over where the interfacing starts. Your strap will be about 1″ wide with each edge folded to the centre. Fold the strap again, so the folded edges meet. Pin along the length of the strap.
- Stitch once on each edge of the strap.
- Use a safety pin to thread the strap through the casing front and back. Be careful not to twist the strap.
- Try the dress on your child and tie the strap in the correct position. Cut each strap about 5-6″ away from the shoulder knot. Knot the bottom of each strap to finish it.
- Pin the straps in place on each edge of the casing, making sure that the front and back “neckline” of the dress are the same width. Also make sure the straps are the same length before pinning.
- To permanently tack the straps in place, stitch over the casing and strap at each of the 4 ends of the casing – as indicated in the photo below.
And you’re done! I hope your little one enjoys her new summer dress. You can share your projects on Twitter and Instagram with the hashtag #alongforthreadride, or post them on the Thread Riding Hood Facebook page. And, of course, if you have any questions please be sure to contact me on any of the above or email sherri@threadridinghood.com. I’d love to hear from you!
by Sherri Sylvester | Jun 7, 2014
It’s been a long time since I’ve put up an about me post. Today seems like a good day for that. Lately I’ve been reflecting on how busy I have been and how I can’t ever seem to get back to anyone by the time I’ve told them. I read somewhere recently, on a blog post that I should have bookmarked because I can’t find it now. (Update: Reece reminded me that I found it here. Still can’t find the actual post though, sorry.) But anyhow – it was reminding me that being busy is a choice.
It is a choice… yes, but of course there are so many things I “have to do”. Spending quality time with my husband and my kids, doing the laundry and cleaning the bathrooms (and showers, my least favorite!). And we need to eat, and of course I absolutely LOVE blogging here. And sewing… and a zillion projects I want to do. So I have decided to try to start choosing to be more intentional. So often I get an idea in my head and go out and buy supplies right away… and then it sits. For years sometimes. Until it gets used for it’s intended purpose. For some reason I think I should have time to finish the 4 dresses, dress shirt for my husband and new t-shirts for me with the 7 free shirt patterns I have currently on my wait list – all in one week. But of course that is impossible and I feel guilty for ignoring/displacing all of the above important quality time with my family because I tried to finish my “list”.
I don’t and haven’t ever paid much attention to our house. It definitely needs to be cleaned more often – but it is tidy, and my (wonderful) friends assure me that since my husband and I work from home, we make it dirtier than someone who’s family is away during most days. So, I’ve tried to remember that and not feel so bad! I also heard on the radio that due to a change in values, families (specifically mothers) actually spend more quality time with their kids than in the mid-to-late 1900’s – so, if you think you are doing a bad job, you are trying to live up to an ideal that is not actually true. (Hooray!) Apparently “back then” priorities dictated that mothers should provide a super-clean home and wonderful meals and so they would send their kids out to play so they could accomplish that. Now, apparently, we have dirty homes, but we spend enormous amounts of time with our kids.
Adding to the busyness, I’ve often felt helpless against the barrage of ideas that live constantly in my head. I can never accomplish them, but I haven’t been able to tame the guilt caused by not following up on them all, especially if I’ve already purchased supplies. I’ve even had a few conversations with my husband about what it would be like to not be creative, and that my life would be so much simpler. And then I’ve taken it back. Because I can’t imagine ever not-creating something.
One thing that has led to me trying to slow down is that I’m a bit apprehensive about this summer. Both of my kids will be home most days in July and August with “nothing” to do. Of course we have vacation and weekends and other things planned – but school and pre-school have been life-savers for me, since I produce much of this blog’s content while they are away from home or in the evening. I have a great group of supportive friends and grandparents around me that have offered to have the kids over if I’m busy. I am so fortunate to have them! But, this is my youngest’s last summer before full-day kindergarten begins and I’m super-emotional about her going, so I want to prioritize our time before she isn’t home as much.
Solutions? And I think these are actually do-able…
- Turn our dining room into a little sewing studio until September. (With the approval of my husband, who is so supportive of my work. I’m so fortunate!) I’m trying to keep 1 or 2 projects in this area and making a good effort to put things away in my sewing room as I go. This way I can be around while the kids are playing, and I can see them in the backyard as well.
- Plan adventures for my kids. I’m going to tape 9 giant weekly calendars to our wall – despite the fact that our main floor will start to resemble a badly decorated dorm room! We will pencil in our plans and decorate it with drawings and paste photos on the date of each event so they know what’s going to happen. I think being excited about something is half the fun of enjoying it and I hope to do that for my kids.
- Organize all of my projects into bags. As much as I want not to create plastic waste – those large resealable bags are so useful. I think this will stop me from feeling overwhelmed by the large pile of unfinished/un-started projects in my sewing area.
- Change my sewing process. Having everything organized allows me to be able to cut out a pattern, pin part of a project together, or do any other prep work, more easily and quickly. There are lots of times when I’ve left mending on our kitchen counter ready to go and had a minute to finish it up. I find when everything is organized I can concentrate on doing something, rather than thinking about how I feel like I never do anything (which leads to more of me not doing anything!)
- Ask myself regularly if the project I feel like I “need” to do is really necessary. And more than that – what it will displace if I prioritize it. I find a lot of projects I take on look like a lot of fun, but could wait if I was a bit more patient.
- Spend a few minutes cleaning something every morning and evening. That is when I “feel” like cleaning anyhow – so I may as well go with it! I don’t know about you but I feel like super-mom when the counter is empty of dishes, but I rarely take the time to finish them. It’s amazing how much this helps my outlook on the day (pre-coffee even!) when I come downstairs in the morning.
I’m pretty sure I’m not the only one who feels this way because I’m learning more and more that I’m not alone. Everyone I’ve talked to with any creative impulse at all seems to be dealing with the same issues and feelings. I’d love it if everyone would share their tips on how to deal with the busyness of life and still come out on top. Even a little thing, because every little bit counts. We can, slowly maybe – but steadily and surely!
How are you doing today?
by Sherri Sylvester | Jun 5, 2014
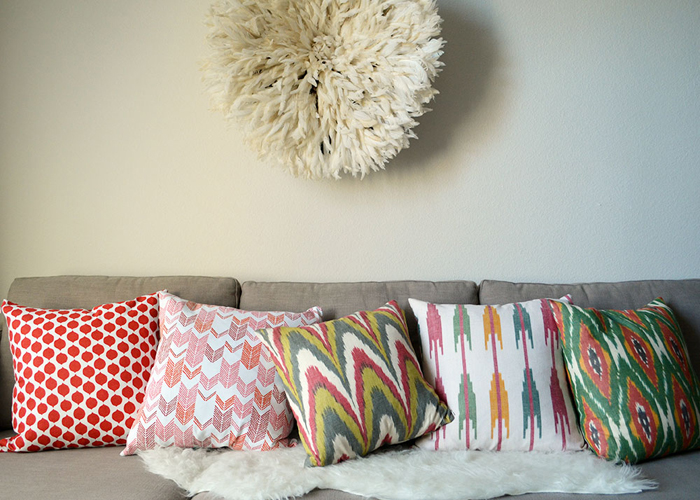
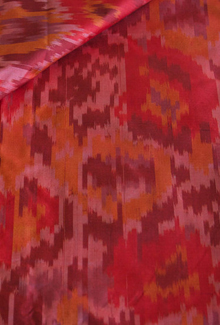
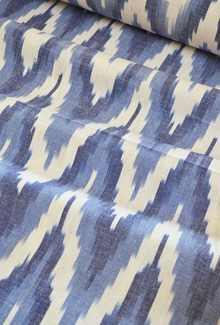
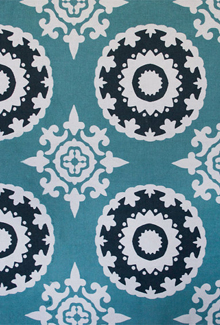
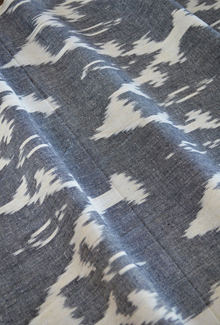
I’m excited to introduce a new shop to you today! Boho Fabric Trim hails from Dallas, Texas where they sell the most lovely ikat and gorgeous hand printed fabric in their Etsy shop. They have just recently begun sponsoring Thread Riding Hood, so you can find their link right on the side bar!
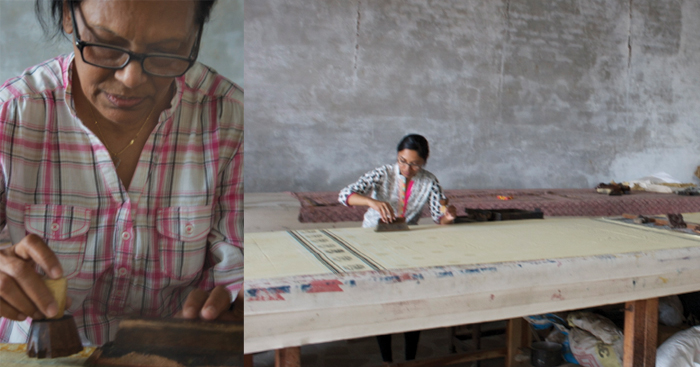
I got to hear a bit about how this shop came about and it’s inspiring! Mili (the owner) and her mother Maya work together to curate and create the collection both locally and internationally.
“Our shop began as an idea to get mother & daughter closer together — a creative journey where my mother and I could connect and deepen our bond through something creative, productive and have memories that would last more than a lifetime. Hopefully, this will be our legacy.” ~ Mili
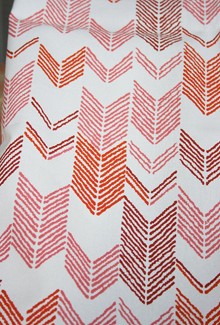
The more I find out about the shop, the more I know these ladies are not just selling fabric. They are hand crafting textiles as fabric artists. The thought of the time spent handloom weaving, block printing and hand screen printing. Goodness, they even do things I have to look up in Wikipedia – kantha, kalamkari, pintaks (which I can’t even find!). They add beading and more!
Modern Boho Phoenix |
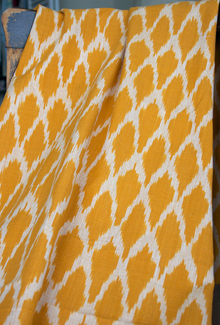
Ikat Mango Yellow |
Silk Ikat Red Orange |
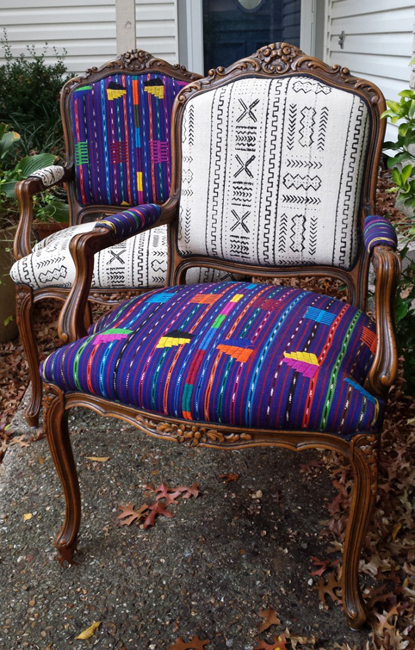
When Mili contacted me a few months ago I immediately fell in love with so many of her fabrics! The photos in this post were so hard to choose. The style and the ikat goodness are very much what I am looking for right now. They are perfect for throw pillows, re-upholstering that favorite chair that you’ve had for years, or use it to finish off your windows with the most perfect curtains! Maybe even a Camber Dress or Top for yourself?
Mili has let me know that the Boho Fabric Trimshop is offering special introductory discounts – just for you. You’ve always wanted to sew with a piece of hand crafted art – now you can! (Honestly, even if it is a special birthday gift to yourself.) If not for pillows or curtains, these can be stretched onto frames and used as artwork for your home. That would look amazing!
Hand Woven Ikat Blue Chevron |
Modern Boho Empire |
Hand Woven Ikat Charcoal Grey |
Head on over to Boho Fabric Trim and check out what she has in stock. You will not be disappointed! I’ll let Mili have the last word: “My ‘Kufri Life’ can be described as having these elements in my life – creativity, connecting with family and making new friends and exploring this great big world… I have always had a serious case of the wanderlust! It’s been amazing connecting with my mother through this new adventure… I can’t wait to see where we land next!”
by Sherri Sylvester | Jun 2, 2014
My youngest needed something to do the other day while I was sewing so I decided to see what she would do with some hand stitching. I gathered up a few supplies – 10″ embroidery hoops I found the day before, some spare rectangles of canvas and some embroidery floss I bought for my fabric tray tutorial. Those plus a needle and a water soluble marker and we were good to go!
I got her busy colouring her hoop with markers while I drew a few straight dashed lines and tied a knot in the end of the floss – no point in teaching her how to do it without a knot yet. I was happy to find out that she actually enjoyed finishing up her “sewing work”! Of course, she took breaks in between, but by the end of the afternoon she had managed to finish her three lines one at a time.
I have to admit it was a bit scary giving my almost-4 year old a sharp needle. But she did very well with it and only pricked her finger (very lightly) once. It was good that the canvas has such a loose weave, because we were able to easily back out of a stitch the few times she forgot to go “up” on the same side she went “down” into with the needle. I used very technical terms to describe everything to her (hee hee)!
The next day my oldest was looking for something to do and spotted her sister’s canvas – so she had to start one of course! Since she’s a bit older, she decided to draw something herself and then proceeded to sort out how to embroider it. I did try to teach her a back-stitch, but in the end it was more fun for her to do her own thing. I decided that it was not important to teach her this time, and that we’d try again later. I’ll have to post photos when she is finished, since she’s not keen on letting me post it here half done – though you can see a peek on instagram (that she agreed to) if you’d like!
Speaking of Instagram, I am playing along with Made for Kids Month this June. This is a Liesel Gibson (Oliver & S) and Rae Hoekstra (Made by Rae) invention. Post photos of your kids wearing clothes that you have sewn with the hashtag #madeforkidsmonth. You can find out more here. So far my kids have randomly chosen clothing I have made each day, so that has been fun! I have definitely sewn them a lot more summer things than I have winter things, so my odds are good! Follow along if you’d like!
by Sherri Sylvester | May 30, 2014
So, you’ve all been waiting for the grand reveal?! Who will participate in the Frolic with Fabric Spot Challenge? Before we get to the winners, there’s a lovely surprise for everyone! Karen has applied a discount to the entire Frolic fabric collection, so we can all be winners (and get the fabric we’ve been eyeing since Tuesday!).
The entire organic Frolic collection available from Fabric Spot will be discounted by 20% from May 30th (today) until June 30th, 2014. WOW, 20% off! Thanks so much Karen! Click here or below to see Fabric Spot’s Frolic collection. (The discount will not show on the Fabric Spot website, but will be applied when you check out.)
And on to the winners! Oh my goodness, this post is later than I had planned because I had such a hard time deciding who should win! You all are amazing, thank you for entering! In the end it was so difficult to decide that I put the top 10 entries into the “random.org hat” and pulled out these four.
- Sarah – The Crazy Tailor from Alberta, Canada – Blue Bundle
- Cyndi – The Nosy Pepper from Ohio, USA – Blue Bundle
- Carla – Carla’s Creations from Ontario, Canada – Pink Bundle
- Laura – Seams Sew Laura from Ontario, Canada – Pink Bundle
Sarah, Stacey, Carla and Laura please watch your email! We are sending out your confirmation and need your addresses so we can send you your bundles. We will also be sending you a few instructions as to how to complete the challenge.
Again, to everyone who entered, thanks so much for putting your name in the hat! Karen and I are so excited to see the challengers projects. Remember, you can sew-along if you’d like and post a link on the Fabric Spot or Thread Riding Hood Facebook pages. Or you can let us know by commenting about your Frolic project at the end of June when we post the winners. We’d love to see everyone dressed, accessorized and snuggled under organic Frolic goodness. I can’t wait!