by Sherri Sylvester | Jun 19, 2014
Thanks so much to everyone who entered the Country Clothesline giveaway! Want to know who won?

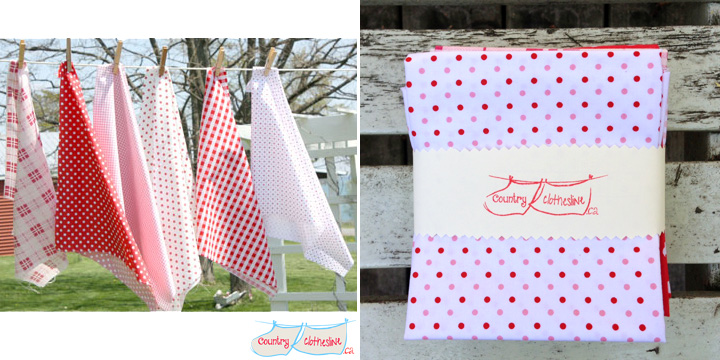
And the winner is… #196 Julie H! Julie will be getting a “Dots & Checks” Fat Quarter bundle in the mail very soon! In her entry, she commented about what she might like to make with the bundle… “I think some pillows. I have seen some really cute ones on Pinterest.” I think some pillows would be perfect, Julie. Have fun!
If you’d like to get your own bundle you can visit Country Clothesline. She is always adding new inventory, so you’re sure to find something beautiful to add to your stash. I’m working on a summery top for my daughter with the fabric I bought from Sylvia at the Creativ Festival and I hope to share it with you soon.
I hope your weather is warm, the breeze is blowing and your clothesline is full of freshly washed laundry. Now – go sew something fun! Talk soon!
by Sherri Sylvester | Jun 17, 2014
Good Tuesday to you! After a long and drawn out technology war with my computer today, I finally get to introduce a new sponsor – Double Decker Fabric! I met Dorienne online when I interviewed her last year for my Canadian Online Fabric Store series. She has a giveaway and a discount code for you today, so stay tuned! Before we get to the giveaway, I thought it would be fun to pair some of Dorienne and my favorite tutorials with her fabric. I love finding out what other people’s favorite tutorials are. Sometimes I have seen them before, and sometimes (like with Dorienne’s today) I find a few new ones, and some new favorite bloggers too. I hope you enjoy the list!
|
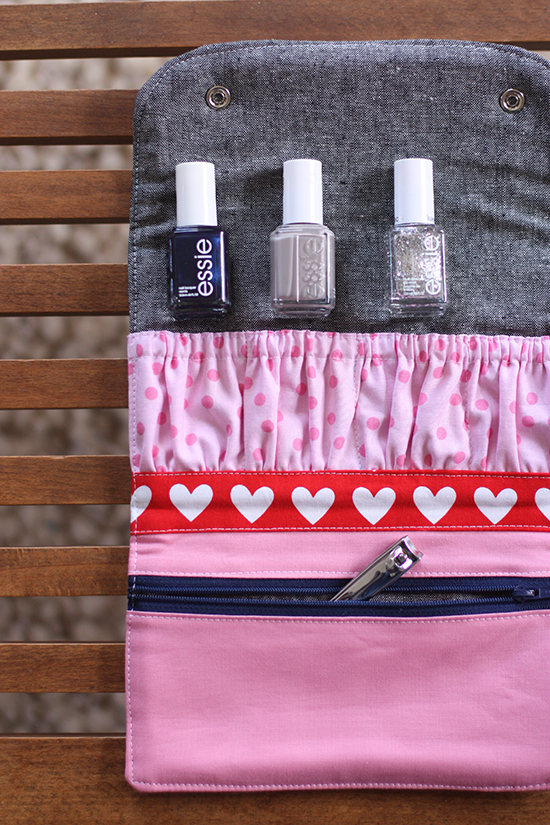
Tutorial: Snappy Manicure Wallet from noodlehead
+ Double Decker Fabric’s “Geekly Chic”
Use Dorienne’s extensive collection of Geekly Chic from Riley Blake Designs to make one (or several!) of these cute manicure wallets.
|
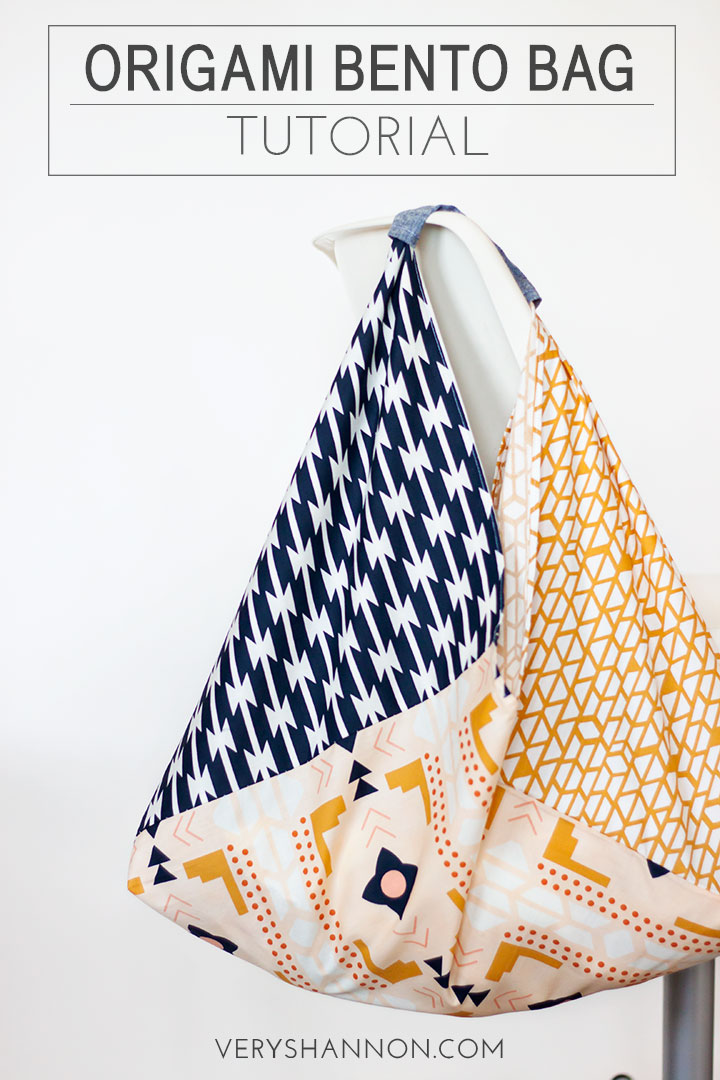
Tutorial: Origami Bento Bag from Very Shannon
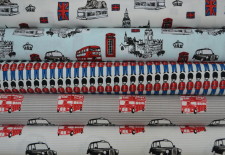
+ Double Decker Fabric’s “British Invasion”
British Invasion is the perfect trendy fabric to use for a fun summer bag. This tutorial is so quick and easy. Sew up a summer hostess gift in no time! |
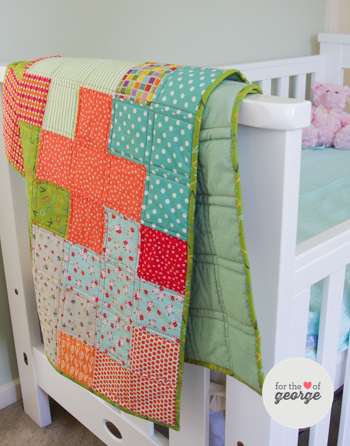
| Tutorial: Plus Quilt from For the Love of George
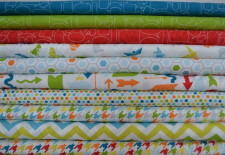
+ Double Decker Fabric’s “Mixed Bag”
This Mixed Bag collection from Studio M for Moda is so colourful and looks great together, it would be perfect for an easy-to-make Plus Quilt! |
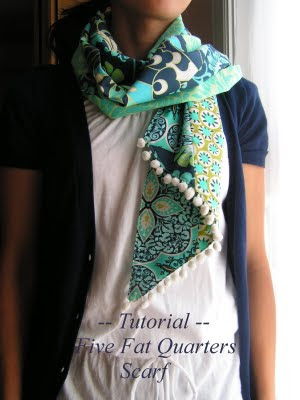
Tutorial: 5 Fat Quarters Scarf from Tea Rose Home
+ Double Decker Fabric’s “Textured Basics”
Use these textured basics to make a gorgeous bright scarf for summer. Perfect with those neutral colours that are so popular! |
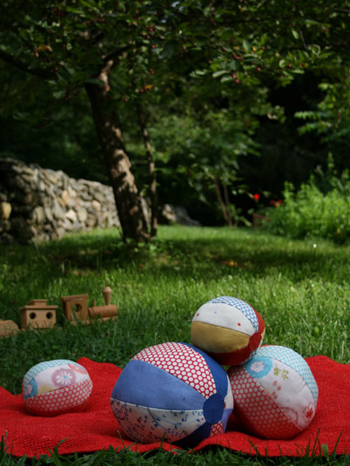
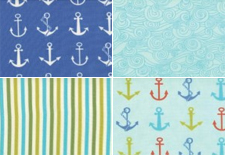
| Tutorial: Fabric Beach Balls from the Purl Bee
+ Double Decker Fabric’s BarthloMeow’s Reef
BartholoMeow’s Reef from Moda fits perfectly into this summer’s nautical trends and would be so cute as a fun soft beach ball! |
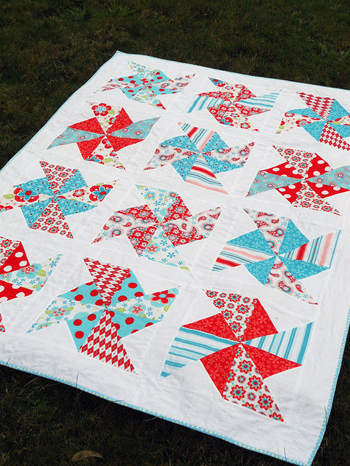
Tutorial: Pinwheels in the Park from Sew Mama Sew
+ Double Decker Fabric’s “Storybook”
Add a few of Dorienne’s solids to this lovely Storybook fabric from Kate & Birdie for Moda and this tutorial would make the sweetest little boy’s quilt! |
Hooray for summer sewing, Dorienne has provided a discount for you that lasts until the end of June! Use the code “Summer15” to get 15% off your purchase from today until June 30, 2014. Head on over and stock up, I know you must have summer projects planned. (Or you could plan some now!)
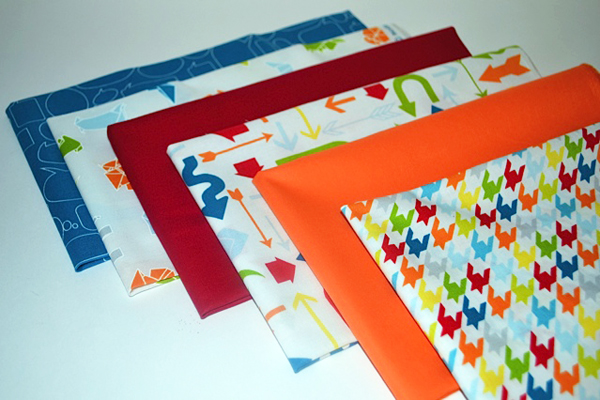
Last, but certainly not least, you can try your hand at winning some fun fabric today! Dorienne is giving away a bundle of Mixed Bag by Studio M for Moda. When I saw this collection I thought, “Oh my, I have to have some of those origami animals… and the houndstooth… and the dots… and I’ll need some of those red speech bubbles!” (Hee Hee, I know what I’m going to be spending my 15% off on!) pic of mixed bag bundle This contest is open to Canada and the US, and will remain open from today until midnight on Monday, June 23, 2014. Use the Rafflecopter widget below to enter – and if you don’t have Facebook to sign in with, just use your name and email address!
a Rafflecopter giveaway
by Sherri Sylvester | Jun 14, 2014
Ok – just a quick note because I’m feeling like I’m leaving a few people wondering what I’ve been doing lately. Not with the sewing… I’m lucky to be constantly sewing! But with a few regular series’ on the blog that might seem to have disappeared.
1) Sewing Survey Saturday
- I have fallen off the track on this one. Unfortunately I’ve found it is reasonably difficult to post on Saturdays – even if they are relatively quick to write. This may disappear for a while and come back in the fall once everything returns to a more normal schedule.
2) Made by Me Monday
- I was feeling quite a bit of pressure to post on Mondays with this series. Due to my “No Stress” sewing resolution I decided that it was better to post on an different day than to rush a stressed post on Mondays. I’m still posting “Made by Me” things every week, just maybe not on Mondays.
3) Quiet Book Sew-Along
- Don’t worry, we are still on track to finish by the end of November. To be completely honest, I am feeling a tad de-motivated, since I’m not sure anyone is actually sewing-along! But, I want to finish the series, and I should not use that as an excuse… so I will get back to it! Promise! And if you are sewing along, I’d love to know you are out there and I’m sorry for the delays lately.
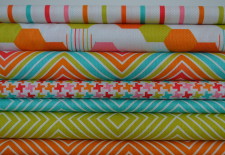
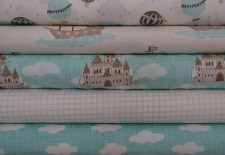
Hope that helps catch everyone up! Have a wonderful rest of the weekend and we’ll talk again soon, and because “every post needs a photo and it’s fun to look at fabric”, here’s a fun (un-sponsored) shot of some fabric I got recently from my local online-turned-brick-and-morter-shop, Mad about Patchwork.
by Sherri Sylvester | Jun 12, 2014
UPDATE 2020-07-17: Sew Mama Sew is unavailable. Please use the links to access the original tutorial and pattern.
Click to download the FREE INSULATED LUNCH SACK PATTERN PDF
Click to ACCESS THE LUNCH SACK TUTORIAL on the Wayback Machine
___________________________________________
I’ve been busy working with Warp & Weft and Sew Mama Sew to make another tutorial! This time around, it is for a flat-folding lunch bag tutorial, and I got to work with the new Anna Maria Horner collection – Pretty Potent! (Woot Woot!)
When I thought up the idea of making this lunch bag a few months ago I was thinking about how amazing it would be to make this type of lunch bag. You’ve likely seen similar ones at for sale… they fold flat with a zippered closure and lovely oval shaped handle cut-out? Unfortunately for me, some of the details on this bag were stupid complicated extra fun to figure out! Especially if your aim is not to use bias tape because you can never sew it on around curves (or is that just me?) Lucky you – because I’ve done all of the hard work, you can make it the easy way the first time around! (And I get to have extra workable-but-not-quite-right lunch bags around for… umm… using… for stuff… hooray for stuff!)
All kidding aside – I LOVE this tutorial and will likely use it to make my kids’ lunch bags from now until they are finished University. They are insulated with Insul-Bright, and water resistant because they are lined with ripstop nylon. Of course, all of the materials are washable – so they are kid-proof as well! They are very simply constructed, especially the Velcro closure version – since you can omit the longer zipper insertion instructions. I’ve listed a few ideas for how to use them on the main Sew Mama Sew tutorial, and here are a few more. Teacher gifts? or maybe the bus driver, piano teacher, swim instructor or a coach. Maybe you could even make some to use on picnics – everyone packs their favorite meal in their own bag!
Can I talk about the Anna Maria Horner fabric for a while? To be honest, I haven’t been a long-time fan of her work. I have always considered her work interesting, but not interesting enough to buy. But… this collection changed everything, I think I’m now officially hooked and may soon become one of “those people” who are geekily showing off their knowledge of and devotion to AMH! The deep bold colours are beautiful. And somehow she’s managed to mix varying types and styles of art into a cohesive collection. I can think of so many ways to use these individually, but I think my favorite would be an amazing quilt with blocks made of a mix of each print – all together. No solids added. Is that crazy?! (If you want some, you can get the fabrics I used in this tutorial from Warp & Weft!)
Are you ready to make one? This tutorial is a short supplement to the main tutorial posted on Sew Mama Sew and only covers how to use a Velcro closure instead of a zipper closure for the lunch bag. Please be sure to read the directions posted on their site and the instructions below before you begin.
In addition to the main tutorial’s materials you will need:
- one 13” piece of ¾” Velcro – with hook and loop sides together (omit the 12″ separating zipper from the main tutorial’s materials list)
Here we go:
Step 1: Align and pin straight edge of lower lining and straight edge of upper lining, right sides together. Stitch with a ¼” seam. Repeat for other lining side.
Step 2: Finger press the seam allowance to the lower lining side. Align one half of the Velcro to the lining, centering it over the seam. Pin the top only. (
Do not iron, the nylon lower lining may melt!)
Step 3: Stitch the Velcro close to the top edge. Pin the bottom edge of the Velcro, making sure that the seam is flat underneath the Velcro.
Step 4: Stitch the Velcro close to the bottom edge. Trim any extra to the width of the bag.
Step 5: Repeat Steps 2-4 of this tutorial to attach the Velcro to the other lining side.
Step 6: Place one side of the lower lining right side up on your work surface. Align one side of lining base right sides together with the base on top and pin. Stitch with a 3/8” seam allowance. Start stitching at one marked dot and stop your seam at the other marked dot.
Step 7: Fold stitched side of base up out of the way and align and stitch the other side of the lower lining to the other side of the base. Start and stop your seam at the marked dots, as in the last step.
Step 8: Fold the base pieces together and align and pin both sides of the lining. Pin and stitch with a 3/8” seam. Begin stitching where the base stitches meet and finish stitching at the top of the bag.
Step 9: Stitch outer base and sides together (with attached Insul-Bright) in the same way as the lining (Steps 6-8 of this tutorial). Trim away half of all 4 outer base and side seam allowances to reduce bulk.
Return to the main tutorial on Sew Mama Sew to complete your Velcro closure lunch bag. Continue on starting with Step 17 and follow all further steps to the end of the main tutorial.
I hope you love your new lunch bag! Please share your photos on the Thread Riding Hood
Facebook page, or hashtag #alongforthreadride or #threadridinghood on
Instagram or
Twitter. And don’t forget to get your Anna Maria Horner fix from
Warp & Weft!
** Please note: This is a sponsored post and the fabric was provided to me at no cost by Warp & Weft, through Sew Mama Sew. However, as always, all opinions are my own and I will not promote a business that I do not love myself!
by Sherri Sylvester | Jun 10, 2014
Today I get to introduce you to the ninth Canadian Online Fabric Store in our series – Country Clothesline! I found Sylvia’s shop at the Toronto Creativ Festival this spring and I’m really excited that she agreed to be featured here. Sylvia is even giving away some country fabric goodness (scroll down for the giveaway if you can’t wait!).
When my friends and I spotted Sylvia’s booth at the show we immediately went over to check it out. I have not seen a store online as yet with her style of selection. She has fine-tuned country goodness using vintage and modern florals down to perfection! If you love the new trendy florals or are always collecting vintage sheets at the thrift store you are in for a treat. Her stock even has a few very modern surprises if you take a look for them! As a bonus, Sylvia is lovely as well and it was so nice to get to meet her.
I asked Sylvia to write up a little bit about herself and her shop and here is what she had to say:
“I love flowers – roses, lilacs, daisies, simple wildflowers…
I have been quilting for years and had trouble finding a good selection of the fresh, country inspired floral fabrics that I love. So seeing a niche in the marketplace and with my years of experience in retail, hospitality and customer service I’ve created Country Clothesline. I want to offer quilters and sewers this unique Collection of floraly, vintagy, countryish, cute, pretty and just plain fun fabrics for their personal sewing and quilting projects. I don’t buy full lines of fabric from my suppliers but prefer to just choose the fabrics that really speak to me. That is also how I decide on the fabrics I use when I am making a quilt or a pillowcase – the ones that feel right together end up together. I truly hope that the Country Clothesline Collection of fabrics will speak to all the creative sewers out there and you’ll love these fabrics as much as I do!”
I love meeting the online shop owners, even if it is only over the interweb. I find it is really fun to know what they are like and how it reflects in their online store front. I asked Sylvia a few questions to find out a bit more.
Thread Riding Hood: What inspired you to start Country Clothesline?
Sylvia: The inspiration behind Country Clothesline really comes from our little farmhouse in Prince Edward County where the constant breeze makes all that I hang on our clothesline dance in the sun overlooking the green fields. So simple, yet so beautiful 🙂
Thread Riding Hood: What is your favorite type of sewing project?
Sylvia: My favourite sewing project is when I have the time to sit down and do the hand-quilting on a gift that I am making for someone special. I love the effect of a quilt that has been hand-quilted. These quilts just feel different, softer, cozier, each stitch really is an extension of the quilter. Here is a close up of one of the squares from a charm quilt I made for my daughter for her 13th birthday – it is hand-quilted with various size hearts. (certainly not perfect stitching – but full of love nonetheless)
Thread Riding Hood: What is something coming up in the near future that you are especially excited about?
Sylvia: As far as what I am excited about in the near future for Country Clothesline, to be honest, because the business is so new, I just really want to improve upon what I have so far. With each customer interaction I learn a little more about how to provide better service, how to make the website work for my customer better, etc. And on top of that I am excited to be adding some quilt and pillowcase kits and some exciting patterns to the store as well. Lots to do and lots to look forward to!
Doesn’t it sound amazing?! I think I need to find myself a clothesline and a breeze. Not to mention a country farmhouse… though I suppose a pretty floral quilt will do! Sylvia has more than enough options to select from! Here are a few of my favorites…
So, you want to get some of this lovely fabric for yourself?! Sylvia is giving away a lovely 6 fat quarter bundle of 100% quilting cotton in reds and pinks! This “Dots & Checks” bundle is made from quality quilting fabrics by Riley Blake and Freespirit. Sylvia writes, “Some images that this group evokes for me are: picnics, farmhouse tablecloths, little girls dresses and elements of a country patchwork quilt.” I couldn’t agree more!
This giveaway is open to everyone, internationally from today until midnight on Monday evening, June 16th. Use the Rafflecopter widget below to enter – and if you don’t have Facebook to sign in with, just use your name and email address!
a Rafflecopter giveaway
Now that you have met Sylvia and signed up for the giveaway, head on over to visit Country Clothesline! I’ve selected a few more gorgeous florals from her shop for you to start with…