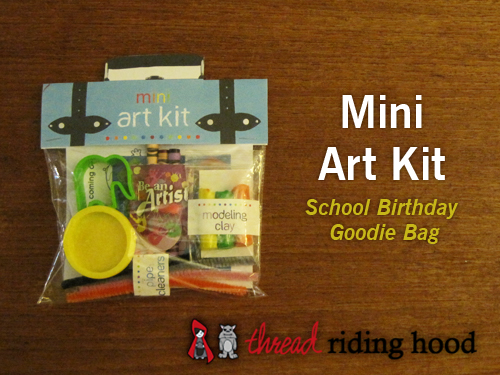
On the topic of my daughter’s birthday – we needed to send something small for each of the 20 kids in her class. Since they don’t allow food to be sent to the school anymore we have gotten an abundance of pencils, erasers and cheap party toys. While my daughter likes them (for a few minutes), I am left to throw them out or kick them around the floor for a month. The other problem is that they cost a fortune! Some of the bags that were coming home must have set the parents back $2-$4 per kid and that was not in my budget – especially when I needed to also fund a party with it’s own goodie bags!
So, I made it my goal to find something I could put together that would be approximately $1 per kid and would be fun and somewhat useful, and this is what I came up with.
The cute factor on this is fantastic! The play factor? I gave it to my daughters and it kept them both busy for an hour – so that’s saying something! The cost factor? I think I came in at about $1.25 per kid, for a class of 20 students.
I have written up a quick tutorial below – use your imagination! There are so many more simple inexpensive things you could add to this.
Here’s what you need:
- 1 pack of 64 crayons (the good ones!)
- 1 $Store package of bookmarks (the ones I found had a semi-circle cutout near the top)
- 1 $Store package of mini ziploc bags
- 3 $Store packages of modeling clay (mine had 12 sticks each)
- 1 $Store package of 40 pipe cleaners
- 1 package of mini cookie cutters (I found my set at Michaels)
- 20 mini playdough containers
- 20 $Store sticker pages
- Sandwich Bags (the zip-able kind)
- Cardstock
- Printer paper
- Labels
- Stapler
- Paper Cutter (optional, but super useful)
- Printer
- A few hours of your time
Here’s how you do it:
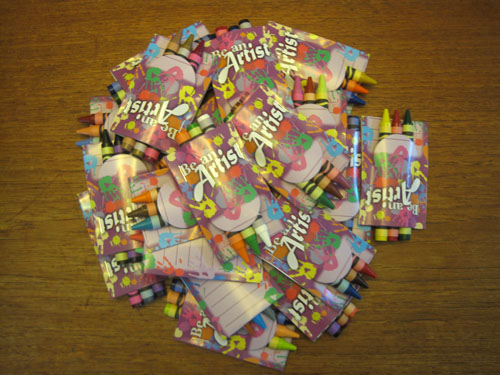
1) Count out 20 of your bookmarks and fold them in half. Insert 3 crayons in each semi-circle cutout (see the photo) and staple the bookmark on either side of the crayons.
2) Cut each stick of modeling clay in half. Arrange them on small squares of cardstock that fit inside the mini bags you bought. Make some labels for the outside. I added one on the back that said they were not for kids under 3, non-toxic and gluten free – because this was the only thing in the bag that didn’t have a brand label on it. Stick on the labels, insert the modeling clay (the square of card stock makes this step a lot easier) and zip them shut.
3) Take your 40 pipe cleaners and cut them in half. DO NOT under any circumstance use your sewing scissors to cut these! Even if you are not near other scissors and are feeling super lazy (I know I do that too!) Don’t even use your paper cutting scissors for that matter. Use wire cutters or an old pair of scissors, the wire will wreck your blades in no time. Make some labels and wrap them around the pipe cleaners.
4) Count out 20 play dough containers, 20 cookie cutters and 20 sticker pages. (This step is super easy!)
5) Go online and find your child’s favorite tv character, or a few cute colouring pages. I made 4 pages per child for my kits. I included 2 “unisex” colouring pages, 1 princess page and 1 superhero page. Print them out 4 per page on letter size paper (8.5″ x 11″). Cut the pages in half each way to get 4 mini colouring pages per kid. This is where a paper cutter comes in super handy.
6) Put 1 set of everything into each of your zip-able bags. You’re almost done!
7) You could at this point print out a few more labels saying “mini Art Kit” or something similar, OR you could download the printable for the topper and make these look like a tiny suitcase. I will be posting it very soon! – Update: The free printable art kit topper is here – Mini Art Kit (mini) Tutorial – Printable
If you do use this tutorial I would love to hear from you, leave me a comment and let me know how it goes!


Wow great idea! Love the creativity for kids to keep them entertained instead of being on a sugar high!
Awesome idea! Thanks for breaking it all down for us 🙂
So is it a Canadian tradition to send in gifts to school on their birthday? That s sweet but a lot of work. This would be good for party favour bags though. I never do lollies as my kids get silly with the additives. Thank you.
I have read your article, I think this is very good! Simple language, concise blog! Another kind of style! I like!
I love this idea and am planning on doing this for my son’s class when he turns 7 in March. Quick question, where did you get the cute labels for the crayons. I understand you made them but they’re awesome.
Thanks so much Lara! I’m glad you like it! Kudos to you for planning ahead 🙂 The crayons are wrapped in some bookmarks that I found. They are folded in half and had a semi-circle pre-cut in them, which is where I placed the crayons. You could also use a long rectangle of folded card-stock, cut a slit in one end, fold it in half and staple the sides in a similar fashion. Hope that helps!