by Sherri Sylvester | May 6, 2013
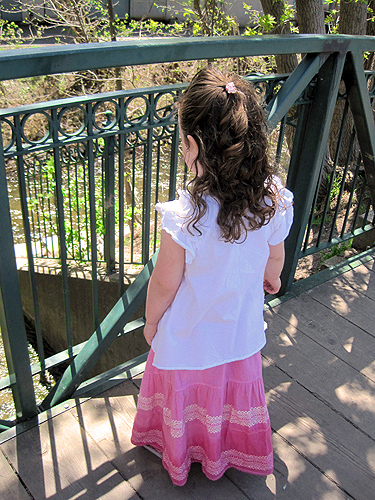
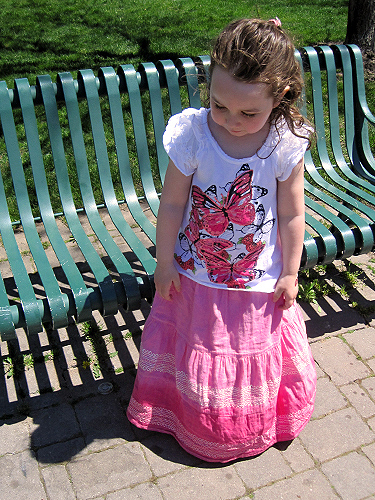
I’ve been wanting to try dying something ombré for a while – ever since seeing this post on No Big Dill. Since ombré is big for pretty well anything right now (hair, tops, dresses, shoes…) I figured I could turn a dress that I don’t wear anymore into an ombré skirt for my oldest.
The Ombré “Feel Like a Princess” Skirt

When I was younger I always felt more grown up and “lady-like” in a long skirt or dress, so I decided, even though it is not very practical, to make this skirt as long as possible for my daughter. Then I dyed it pink – which makes it “100 million, thousand, billion times better” (to quote my daughter!). Of course you can make it any length you choose.
Just one word to the wise (meaning those who check my sewing technique!) – this is a quick and easy tutorial! I was not concerned with stitching a proper casing or overlapping my elastic, I just wanted it done – so, with that in mind… you can now forge ahead!
If you want to make one too, you might not have a long, white cotton dress like I did, so you can make a very simple skirt from scratch in 10 easy steps:
- Find a layer or two of white cotton fabric (cotton dyes the best)
- Measure the length you want to make the skirt and the waist size of your model
- Your length = the length measurement + twice the width of your elastic + 1/2″ for the seam allowance on your casing + 1/2″ for hem
- Your width = twice the waist size +1″ for seam allowance
- Cut your fabric into a rectangle that is your length (step 3) x your width (step 4)
- Fold your rectangle together so the two “length” sides are aligned
- Stitch down the “length” of the skirt with a 1/2″ seam allowance
- Zig-Zag or Serge over the edge of your seam allowance to finish the edge
- Hem the bottom of the skirt by folding the fabric up 1/4″ and then 1/4″ again to the wrong side of the fabric, now stitch close to the top edge of your fold
- Finish the raw edge at the top of the skirt by zig-zagging or serging over the edge
Perfect! Now grab your supplies (below) and you can join in on the tutorial at Step 3:
You will need:
- 1 old dress (or simple skirt beginnings from the directions above)
- fabric dye (I used RIT in the box)
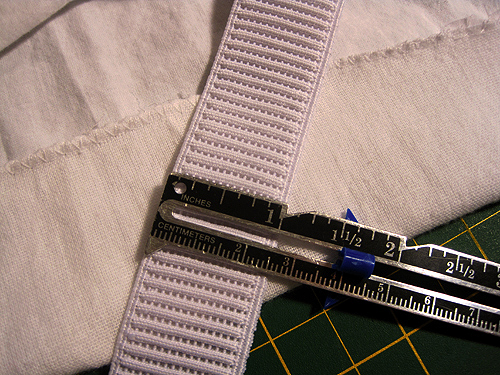
- elastic for the waist (I use 3/4″ non-roll knit elastic)
- pins, scissors, ruler/measuring tape, matching thread
- bucket for dyeing (a stainable one!)
- rubber gloves
- a hanger/ribbon/safety pins
- extras for the dye (mine calls for salt and laundry detergent)
Measure first:
- Length = the length measurement + twice the width of your elastic + 1/2″ for the seam allowance on your casing (+ 1/2″ for hem if you don’t have one already on the dress)
- Width = at least twice your model’s waist size (this should easily be met with any adult dress when sizing it down for a child – just double check)
Here we go (the sewing):
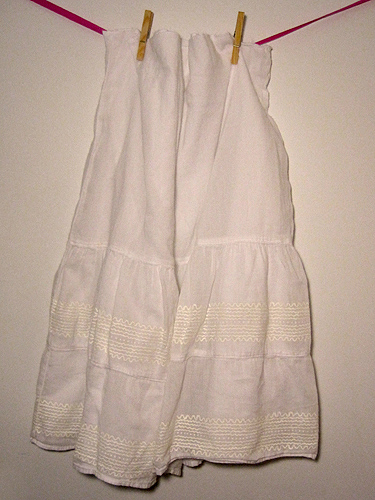
Step 1: Measure up from the hem to your “Length” measurement and mark it and then cut the dress off at that point. You now have this:
Step 2: Zig-zag or serge the new raw top edge of the skirt. If your dress is not hemmed, hem it by folding the fabric up 1/4″ and then 1/4″ again to the wrong side of the fabric, now stitch close to the top edge of your fold.
Step 3: Calculate the casing width. Measure the width of your elastic and add 1/2″.
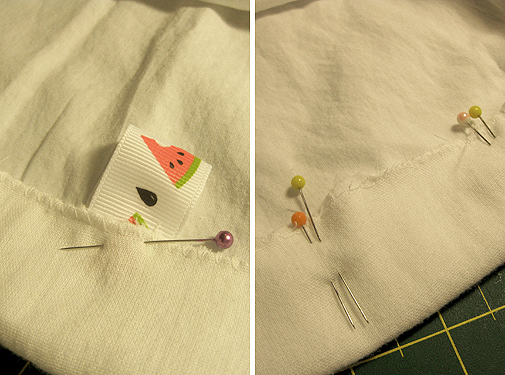
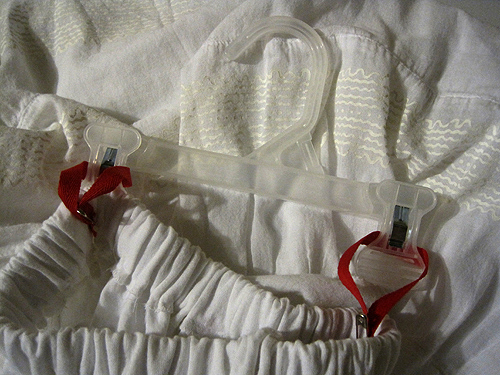
Step 4: Turn down the top edge of your skirt once by the number you calculated in Step 3. Pin in place. (1) Pin a small piece of ribbon at the back of the skirt so your small person can find the “back” of the skirt (2) Double pin (two pins in the same spot) a small section aprox. 2″ somewhere in the casing – this will be your opening to feed the elastic through.
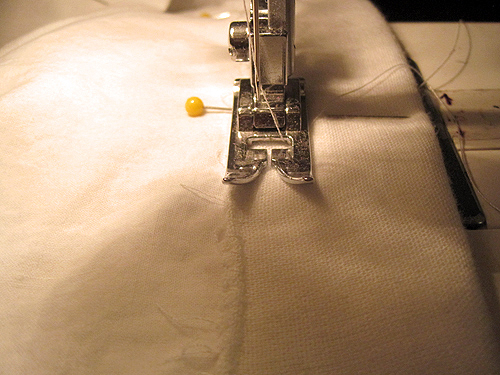
Step 5: Stitch around the bottom of the casing 1/4″ away from the edge beginning and ending at a double pin and leaving the opening open (hee hee!)
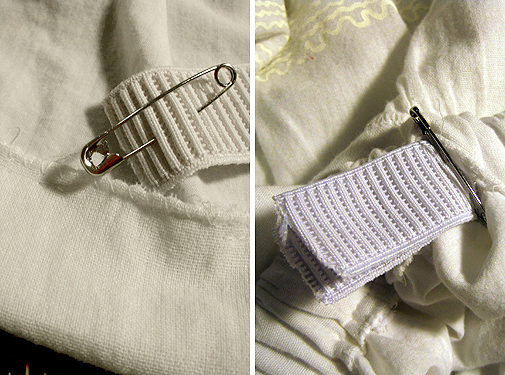
Step 6: Cut the elastic to your waist measurement + 1″. Feed the elastic through the casing using a safety pin or other fun threading device. Match up the ends of the elastic and stitch with a 1/2″ seam allowance.
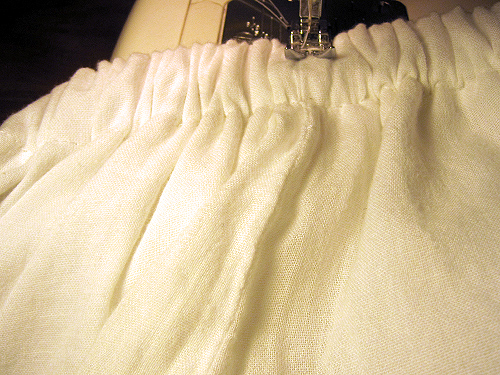
Step 7: Stitch up the opening making sure not to stitch over your elastic.
Step 8: Stitch “in the ditch” (on the seam line) where the seams are on either side of your casing. I know this is non-roll elastic, but this will help it to stay in place even better.
Here we go (the dying):
Step 9: Rig up a hanger above your bucket somewhere safe. If your dye happens to splatter you don’t want your carpet/brand new pants/hamster dyed as well. I have a clothes line above my laundry tub, so I hung the skirt there to dye. You could also hang it above a stainless steel sink if you have one in your kitchen.
Step 10: Attach two cast-off pieces of ribbon to the sides of your skirt with the safety pins.
Step 11: Wet your skirt with hot water until it is pretty wet – wring a bit, so it’s not dripping too much. Hang the skirt on the hanger with the ribbon pieces.
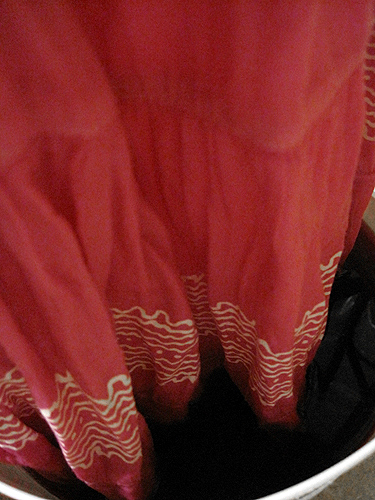
Step 12: Hang the whole thing over your empty bucket. Make sure the bottom 1/4 of the skirt length hangs to the bottom of your bucket. You want the skirt to hang into the dye.
Step 13: Mix up your dye in the bucket as per the directions using HOT water. Dip the whole skirt once (quickly) and then hang it up, making sure the bottom 1/4 of the length of the skirt is in the dye as per Step 12.
Step 14: Wait… and wait… and check on it… and wait… (1/2 hour later…) Then dunk the skirt length 3/4 of the way into the bucket for about 20 seconds and hang it up again. Wait about 1/2 hour and then dunk the skirt length 1/2 way into the dye (same as before) and hang it up again. Now leave the skirt as is for as long as you can stand it. I think I lasted about 3 hours in total.
Step 15: Wash your skirt in warm or cold – as per the directions on your dye – until the water runs clear. I machine washed mine on a warm small load setting.
Step 16: Dry it and you are done.
Take your ombré princess out for a walk!
Now, on to current happenings! Due to the extra warm weather here I think it is finally time to stitch up some summer clothes for my youngest. I’ll be posting tutorials all next week – come back later this week to find out what we’ll be making!
by Sherri Sylvester | May 2, 2013
I went to Creativ Festival last Friday afternoon with my (also loves sewing) friend Laura. I was really happy to find a place to shop for some fabric, too bad it only happens twice a year! I found out about the Festival because Karen from Fabric Spot mentioned she was going to have a booth there when we were planning her interview and giveaway.
I’m not sure how I missed this one, but apparently it has been happening since 1988. I have heard, from those who have known about this for longer than me (lucky them!), that the fall one is a lot more put together. Hooray for us – something to look forward to!
Speaking of Fabric Spot – I was able to meet Karen at her booth. She is amazing and let me grab a shot of us together. I really hope she comes back to Creativ Festival in the fall. It is so nice to be able to shop by touch rather than by click! (and I really do love her fabric selection, I’m not getting paid to say this!)
Just for something different than the norm on Thread Riding Hood – here is a photo of something I think is really great! They had this “Yarn Bike” on display at a crochet booth. The bike’s creator, Michael Sellick, is the founder of the Crochet Crowd, a quickly growing website with free crochet information and videos. It took him 8 days to make this thing! I know some of you are crocheters (is that a word?!) – check out his site! He also had a huge hot air balloon and a crochet covered lamp post on display!
Funny thing, when I went to ask permission to photograph the bike and post it for you all to see I ended up talking to Michael himself, and I found out he runs the social media for the Festival. And (shameless self promotion) he put me up on their Facebook page! Hooray! So, if you want to see a really scary photo of me and the yarn bike you can visit their page and scroll down a bit – you can’t miss me! It was also fun to randomly run into someone at Karen’s booth that had read Thread Riding Hood before – Hooray again!
So, I know why you are really here – to see fabric of course! Here you are! I was able to pick up quite a few fat quarters, and a bit of yardage from the Lens Mill booth. And of course I had to get some of my own Tsuru from Fabric Spot.
I got some Piper and Oh Deer fat quarters to play with from Karen as well.
This photo is kind of random – but they “match”! (clockwise from the squirrel) Birds and the Bees by Tula Pink (same designer as the fabric on my Octopus chair), Yard Sale by Dear Stella (Dear Stella is quickly becoming one of my favorites – I would love to stash some Clementine) and 2wenty-thr3e by Cosmo Cricket (Not from Fabric Spot, but I don’t know which store it was now, sorry. I think this is destined to make a camera strap).
Rounding out the fat quarters are these two. Sherbet Pips from Aneela Hoey (not from Fabric Spot, same problem as the Cosmo Cricket) and Robotic The Lab from Birch Fabrics (organic!).
Last but not least, the yardage from Lens Mill. My mother-in-law found a really cute sundress for my oldest and I’m going to try to re-create it and provide a tutorial. Though it might not happen until the fall at the rate I am completing the ideas I have in my head! (Then I suppose I will have to make a sweater tutorial so your girls can wear the dresses!)
Alright, so, save the $2/metre pink fabric and the rainbow Anne Kelle fat quarter I made the snack bags with, that is what I bought at the Festival. To be honest, once I had finished shopping at Fabric Spot I was pretty well done. A lot of the booths had great fabric, but you really had to hunt for it as most of the stock was traditional quilting fabric, not modern.
I suppose a lot of it looks familiar – seeing as how I posted them as my “favorite picks” from Fabric Spot the other day in connection with Karen’s giveaway. Which, by the way, you should really enter right now if you haven’t already! Really!
So, the one thing I don’t know now… what am I going to do with my Tsuru fat quarters? Do you have any great fat quarter projects I could use?
by Sherri Sylvester | Apr 29, 2013
I love my daughter very much, and she loves rainbows – so, when I decided to make some (badly needed) reusable snack bags this weekend, it turned into a rainbow project. I think it started with a fat quarter of Anne Kelle Remix that I bought at the Creativ Festival on Friday last week. Somewhere between Anne Kelle and a random pile of scraps I dug out yesterday a tidy stack of snack bags (in rainbow order) ended up in front of my camera.
We Wilsons: the Reusable Snack Bag Tutorial
I made some snack bags a few years ago, and after searching high and low through snack bag tutorials I came upon this one by Laura from We Wilsons. It is the fastest and best tutorial I have come upon as yet. Laura has obviously put a ton of time into thinking through each step to make the bags fast and easy to put together. Her tutorial is easy to follow and she even provides a pdf download for it, so you can save it to your computer, or print it out easily.
I did things a bit differently than she did – some things to speed up the process and some to make them more “scrap friendly”! So I’ve decided to document what I did here so you can decide how you’d like to make yours!
First thing I do is line the bags with ripstop nylon. If you go to buy this you can ask the friendly employees at your local fabric store which nylon is the “ripstop” type. If you can’t find anyone to help you – look for the tiny squares on the fabric. Ripstop nylon is reinforced with a crosshatch pattern that regular nylon does not have. It is considered food safe and is FDA approved for use with food, just make sure you use the shiny side of the nylon as the “wrong side” when you are sewing it into the snack bag.
There are two other things I do when making snack bags for kids. (1) I cut my regular 3/4″ velcro in half lengthwise. The velcro sticks just fine and it makes the bags easier to open. (2) I add in a grosgrain ribbon tab on the top of the bags, again, making them easier to open because you can pull on the ribbon tabs instead of fiddling with the flat top of the bag. I add a 3″ piece of ribbon (folded in half so the tab is 1.5″ long) to the centre of each end before following step 2 of Laura’s tutorial. When I am sewing I like to double-stitch over the spot where the ribbon is, for added strength. It also helps to cut the ends of the ribbon with pinking shears so it doesn’t fray.
When I sew step 4 on the We Wilsons snack bag, I use one line of wide zig-zag stitching to attach the velcro instead of stitching around all of the edges. Because the velcro is half the width it holds just fine and makes the whole process much faster. I also like to attach my velcro with a glue stick before I stitch it, so it stays in place without pins.
Since I wanted to use up some of my scraps I decided to have 3 different versions of the bags. All of my bags measure 6″ wide by almost 5″ high when finished. Here are the measurements for how I get there. The labels on the photos are CUTTING measurements for the height of the pieces. The width of the pieces should be 6.5″ and all measurements include a 1/4″ seam allowance. If you have “one way up” fabric, use the “OR 2 pieces” size to cut your largest pieces. Once they are cut, stitch them together, you should end up with a rectangle roughly 6.5″ by 10.5″-11″ long. Go ahead and follow Laura’s tutorial.
Now, take your stack of snack bags and fill them up – your kid will have the best dressed snack around! I’ll be posting a review of the Creativ Festival later this week so you can see some of my new stash!
P.S. Just in case you need more rainbow inspiration. Here are a few more things I love:
Rainbow Quilt (photo: Made By Rae) |
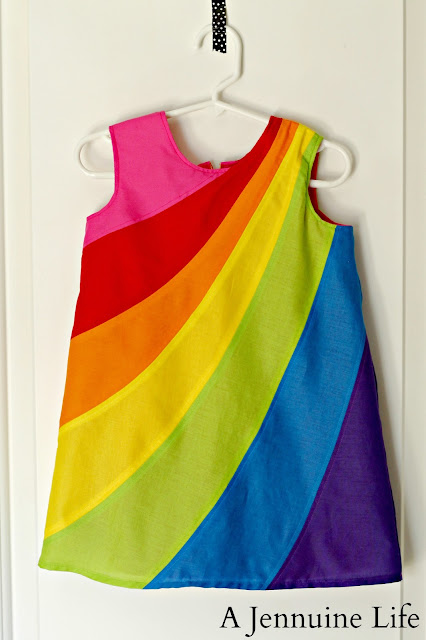
Arden’s Rainbow Dress (photo: A Jennuine Life) |
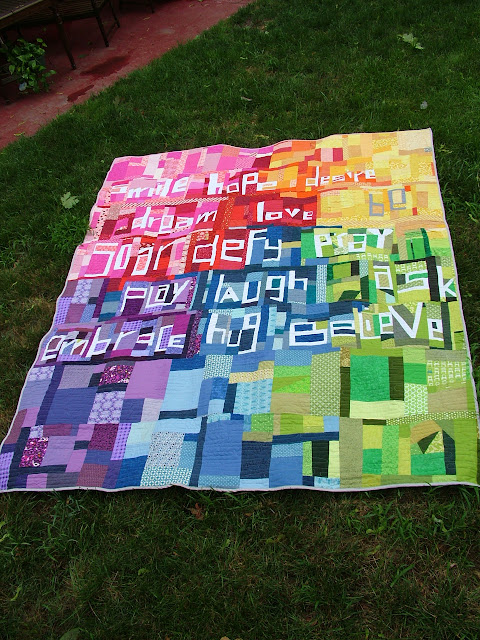
Rainbow Improv Quilt (quilt: Kelli P, photo: Lazy Gal Quilting) |
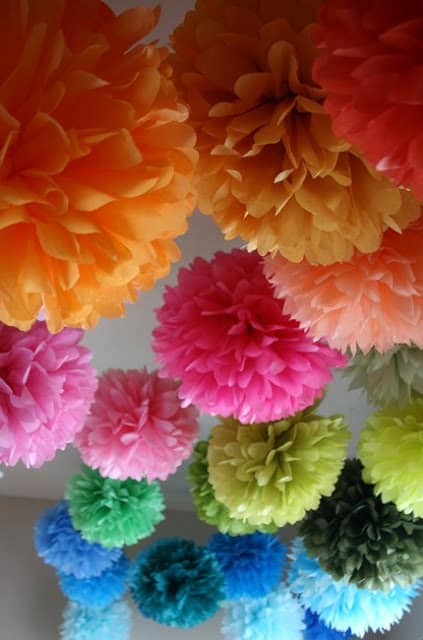
Pom Pom Tissue Flowers (photo: Design Dazzle) |
by Sherri Sylvester | Apr 26, 2013
*** The giveaway is now closed. Thanks for entering! Find out who won here. ***
Today we are welcoming Karen from Fabric Spot. She left a comment on my Canadian Online Fabric Stores post and I was blown away when I visited her site. She has the most gorgeous shot of solid fabrics she stocks on her front page, a great selection of modern designer fabrics and (save the best for last) a large organic fabric selection! Karen’s shop is a family run business with, as she says, “three of us under the age of eight” (How she manages this I don’t know!)
Karen is a believer in organic fabrics and respecting our planet. Her fabric selection shows that and she has stocked the largest online selection of organic fabrics in Canada. You may think that all organics must be more expensive – think again. Hooray for all of us – Karen believes everyone should not have to choose between organic and non-organic fabrics by price, so she stocks her organic solids at the same price as her non-organic solids – amazing!
My Fabric Spot Purchase: Comma Intersecting Circles in Slate, Comma Asterisk in Chalk and Kona Cotton in Carrot
If you read through her FAQ’s you can see just how much she concentrates on customer service. I had an amazing experience when I ordered some fabric for an upcoming tutorial (this diaper bag (with Sew Much Ado), coming soon!). I love the Comma collection and emailed her to ask the best matching orange from her large stock of solids. She emailed me back within the hour and I was able to place my order the next day. Because I live fairly close to her Markham, Ontario shop, the fabric was in my mailbox a day and a half later!
Thread Riding Hood: What inspired you to start Fabric Spot?
Karen: “The biggest motivation for starting Fabric Spot was that I couldn’t find the fabrics that I wanted in my local quilt shops. The only places I saw cool, modern fabrics were on U.S. based fabric websites. But, I was turned off from buying from them because of the U.S dollar conversion, the shipping costs and the duties/customs charges. It seemed ridiculous to me that in Canada we couldn’t get these fabrics. Another reason for starting Fabric Spot was that not only could I not get modern fabrics here in Canada, but getting organic fabrics was even harder! My children were quite young (and still are!) and I wanted to sew things for them out of organic fabrics. When I went to the quilt shops asking about organic fabrics, they told me that there was no demand for it. This again, I couldn’t believe. I had debated about opening Fabric Spot for a couple of years until finally, I decided that I had to go for it. Life is short. I decided that I had to stop being afraid of the future and instead, embrace the adventure that the future could bring. I had to live according to Karen and not to what others expected of me. And so, Fabric Spot started!”
Thread Riding Hood: What are your favorite types of projects to sew?
Karen: “My favourite thing to sew are quilts. The idea that I’m making something that is wrapping my child in love is very comforting to me. As well, the idea that this object is not only beautiful to look at but practical too, is great! I’m also very sentimental. And so, I hope that one day, when my children look back in time, they can say that their mom made this quilt especially for them because she loved me. Now, if it’s made out of organic cotton, then that’s an extra bonus! ”
Thread Riding Hood: Which of your upcoming fabric lines are you most excited about right now?
Karen: “One of my problems is that there are too many fabric collections that I am excited about!! But, if I had to pick one, it would be Eiko by Jay-Cyn Designs. It’s organic and made by Birch Fabrics. I love love love Asian inspired fabrics (like the Tsuru Collection)! [Eiko is] due to be released in July or August.”
Karen has generously offered to give away an organic fat quarter set of (my current favorite) Tsuru! This Asian inspired fabric was designed by Rashida Coleman-Hale and is made of 100% OE certified cotton printed with low impact dyes. Okay – and it’s also gorgeous! Check out what Made By Rae did with them here. I’ve been dreaming of a set of those little dresses for my girls – but where to get the time to sew them?! Anyhow, I’m getting off track. Here’s a photo of what you could win.
This giveaway is open to all Thread Riding Hood readers from Canada and the US. The giveaway will be run from today, April 26th, until Friday May 17th, 2013 at 10pm Friday, May 24th, 2013 at 10pm (The contest has been extended!). Three weeks to enter!
Here’s how to win: (Make sure to leave one comment per entry on this post so we can count them all properly.)
- Leave a comment on this post – easy peasy!
- Optional Extra Entry: Like Fabric Spot on Facebook. Leave a comment on this post to say that you did, include your Facebook name.
- Optional Extra Entry: Like Thread Riding Hood on Facebook. Leave a comment on this post to say that you did, include your Facebook name. (If you have already liked Thread Riding Hood on Facebook this is a free entry for you – Leave a comment!)
- Optional Extra Entry: Comment about this giveaway on Facebook – be sure to link back to this post! Leave a comment on this post to say that you did, include your facebook name.
- Optional Extra Entry: Follow Fabric Spot on Twitter. Leave a comment on this post to say that you did, include your Twitter name.
- Optional Extra Entry: Follow Thread Riding Hood on Twitter. Leave a comment on this post to say that you did, include your Twitter name. (If you already followed Thread Riding Hood on Twitter this is a free entry for you – Leave a comment!)
- Optional Extra Entry: Tweet about this giveaway using the hashtags #TRHGiveaway and #fabricspot. Leave a comment on this post to say that you did. Include your twitter name or url.
- Optional Extra Entry: Check out Fabric Spot. Leave a comment on this post that includes your favorite fabric from Karen’s shop!
- Optional Extra Entry: Check out the Thread Riding Hood Tutorials page. Leave a comment on this post that includes the tutorial you’d like to try next!
- Optional Extra Entry: Pin the Official Giveaway Pic (directly below this list). Leave a comment on this post to say that you did, include your Pinterest name.
I suppose that’s enough ways to win for now! The
Random Number Generator will pick a winner on Saturday
May 18th May 25th in the morning and I will update this post then, so be sure to check back! Choose your favorite ways to win or just leave a comment below – you never know – you just might win!
And, just to add more excitement! Karen is letting me give you a discount code that runs the length of the giveaway. Thank you Karen! Shop at Fabric Spot throughout the giveaway (April 26 until May 17th) and get 10% off your order! Use the discount code: 10FABRICSPOT to get some of that organic goodness – or anything else for that matter!
Here are some of my favorites to get you going:
If you live near Toronto, you can visit Karen’s booth today and tomorrow at Creativ Festival. I’m going to be there – it should be amazing! Good luck to everyone that enters the giveaway, have a wonderful weekend.
by Sherri Sylvester | Apr 22, 2013
Today I finished the first piece of clothing I have made for myself in a very long time. I made a few tops when I was pregnant with my second daughter that I wore quite a bit, but since then I have concentrated more on the kids.
I bought a shirt last Friday that I really like, it is sort of a wing sleeve shirt and has a boat neck, which works well on me because I have wide shoulders and this does not have a shoulder seam in it. Not having to set in a sleeve also makes it really easy to sew, which is part of the reason I decided to buy the shirt in the first place. I folded the new shirt in half, laid it on a piece of knit fabric, cut it out and stitched on the sleeve and bottom hem finishing pieces – Done!
Super Simple Wing Sleeve Shirt
I think I might make at least 3 more of these! I’m so happy with how it turned out. Made By Rae just finished her yearly Spring Top Sewalong and I missed it by 3 days, next year I will have to plan better! You can still see the flicker group by clicking on the button below.
The fabric is a piece of slightly sheer knit from the end-of-yardage pile at my local fabric shop. I’ve had it for at least a year now and am finally making a shirt with it. I can’t complain, the piece was likely around $3.00 – a shirt for that price? And it only took a couple of hours to sew – I’ve got to get me some more pieces of knit like that!
This is a really great project for a knit fabric beginner because it is so simple to sew up. The folded fabric on the sleeves and hem edge are a lot easier than stitching a hem, which can really be hard to do with knit fabric because it tends to ripple and stretch. There was just under a meter of fabric and so I barely squeezed the shirt out of it. The sleeves on the original shirt were a bit longer than on this one. But it is so comfy and I love the colours. Next time I make one I will have to post a tutorial.
I have to say, this was a strange post for me. Editing and choosing photos of my kids, husband and inanimate objects is so easy! Editing and choosing photos of myself is SUPER hard! I have discovered that looking at “posed” photos of yourself is like listening to a recording of your own voice. Apparently you don’t actually look (or sound) like what you think you look (or sound) like in your head as you walk around each day! As a result, choosing photos of someone that is supposed to be you, but doesn’t look quite right is pretty difficult!
Hope you all are having a wonderful beginning to your week. Come back on Friday for another Canadian Online Fabric Store interview. This one comes with a giveaway and discount code again! I’m really excited to share Karen’s store with you, she’s got a really great selection and amazing service! AND, she’s giving away a set of one of my most favorite fabrics! Have a great week – See you soon!
If you are wondering… My husband’s knee surgery went really well! Everything is progressing along much better than we ever could have expected. We even got to go on a trip to the park today with the kids, Hooray!