by Sherri Sylvester | Jan 7, 2013
Today’s Made by Me Monday is one of my sewn Christmas gifts. This tote bag went to my mom. My sister got one as well, but I forgot to photograph it before it was wrapped.
The Go Anywhere Bag

Front View
This bag is super cute and large enough to hold a lot. I bought the pattern from noodle-head here. Anna also has a few other bag patterns on her patterns page – go check them out! I think the Sidekick tote looks really handy, and you can learn how to make a recessed zipper too!
Back View
I added a small detail with a clasp on the back of the bag because I didn’t have any magnetic snaps at home and didn’t like the look of adding velcro to close it. I think the clasp adds a nice touch and looks more professional anyhow. This way it stays closed but still has plenty of room on either side to reach in and grab your book/keys etc.
Clasp View
The fabrics are from a local shop near me. Both are Dear Stella prints. The green is Stella-2 and the flowered on is Stella-46. Funny thing is I didn’t realize I had put them together until I got home… no wonder they match each other perfectly!
by Sherri Sylvester | Jan 5, 2013
Now starts the fun! I can finally post some Christmas gifts that I made now that Christmas is over. This is the first, though you may have seen these before on my first blog post (ever!) here.
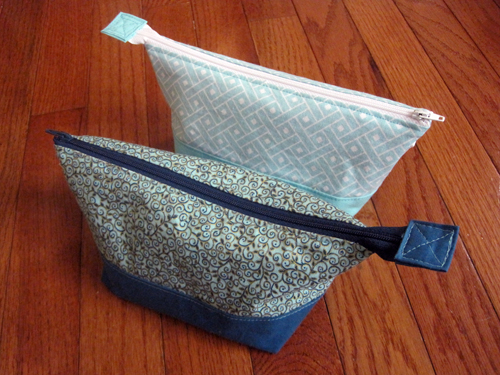
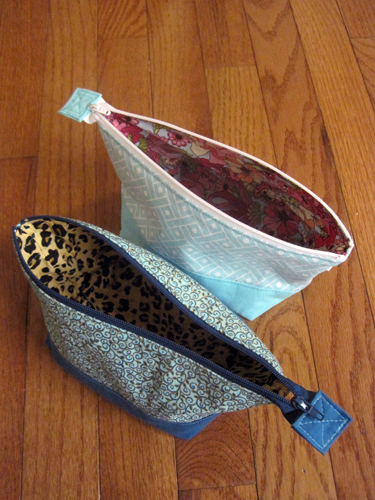
I made a few more Open Wide Zippered Pouches from Noodlehead and called them Makeup Bags. It was so much fun picking the fabrics. I especially like these two combinations.
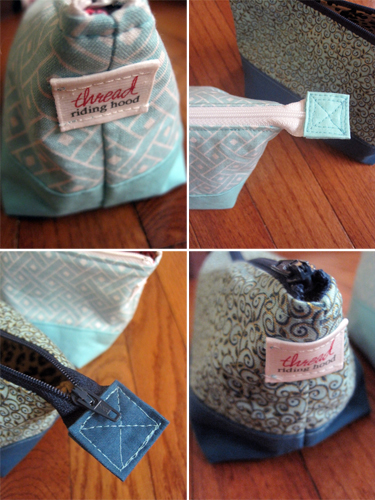
The little details on these really make them nice and give them a professionally finished look. I like the crossover on the tab, and adding a label to the end doesn’t hurt either!
I did actually end up making 4 of these, but 2 disappeared (to my daughter’s teacher and my favorite hairdresser) before I could photograph them. I went out and bought some tiny lotion/shower gel/candles to put inside. They are the perfect size for traveling.
by Sherri Sylvester | Jan 3, 2013
Since I sew A LOT for my kids, my husband sometimes wonders if I will ever sew anything for him! Even hemming pants is put on the back burner when I have a new project in mind. (I really have to get over that – hemming is so easy!) I was searching through my bin of clothing to fix/re-purpose when I was making the girls’ Christmas shirts and came across two of his zip-up sweaters. They were put aside because the sweaters had shrunk a bit over time and the zipper hadn’t leaving the front seam wavy – isn’t that irritating?!
Evidence Submitted: Item No. 1 “Before Refashion”
I remembered reading a series by Grosgrain called Embellish Knit Month. This series is amazing and left me wanting to tear apart every sweater in our house and remake it. I did make one for myself, which I should really remember to post. Anyhow, she turns sweaters into cardigans etc. and they looked amazing! I did a quick search and it looks like there are a lot of posts on how to refashion a sweater for women, but I couldn’t find one on making a refashioned sweater into a cardigan for a man. Here you go!
This is a quick, not too detailed/photographed tutorial, so I will leave out any “necessary items list”, save the obvious – an old sweater, a sewing machine, a ballpoint needle (used for sewing knits) and possibly some extra bias tape. Here is my disclaimer: Since you can do this with a lot of different types of sweaters, use this a guide and read all of the instructions before going ahead!
1) Remove the collar (if it exists) and the zipper carefully, saving the finished edge on the front of the sweater. Cut the finished edges to almost half (see photo). Of course if you want you could cut a “non-zippered” sweater down the middle front and use the bias tape to finish all of your edges.
2) Draw a line with a water soluble marker from the bottom of the finished edge that you just cut to the corner of the neck. Now cut on the line, remove the pieces and discard them. DO NOT remove or discard the “finished edge” that you have cut partially away from the front. Please take note in the photos.
3) We will be using the finished edge to finish the new v-neck edge, but I needed some extra bias tape to finish the neck and collar edge since the unfinished edges are now a lot longer. Make sure the bias tape is the same width as the width of the finished edge piece you have cut. Take your bias tape (I made mine) and sew it right sides together to the finished edge piece. I roughly measured the length I would need, added extra and then cut it in half and sewed one end of each bias tape to the end of each finished edge piece.
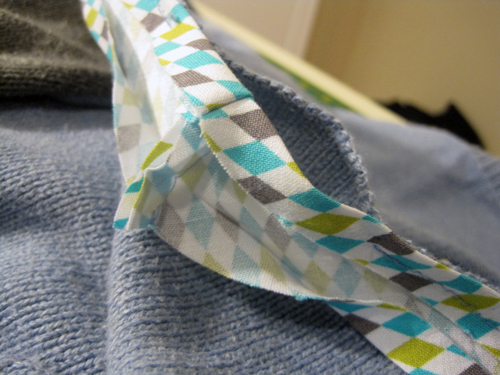
4) Pin the bias and finished edge right sides together with the sweater all the way around the unfinished sweater opening to the middle back of the neck. Sew (using your ballpoint needle) along the edge from both middle-front seams until you get to the middle back-neck. Stop with about 2 inches of opening in the back.
5) You should have two ends of bias tape at the back-neck and you will need to sew them together to make one continuous piece. Cut off any extra and then stitch this (now continuous bias piece) onto the back neck.
6) Fold the edge you have just sewn under to create a fully finished edge. Pin all the way around.
7) Stitch all around the edge. I find I get better results if I put a piece of tissue paper under my knits when I “hem” them. It stops the knit from stretching and it is easy to remove when you are finished sewing the seam.
8) Remove the tissue paper. Place your buttons, mark where you would like them to be with a water soluble pen.
9) Make your button holes and sew on you buttons.
You are done, another piece of clothing destined for the trash averted. Pat yourself on the back!
Now – go ask your husband to put on his new cardigan and take a fancy dining room chair out into the newly snow covered backyard and take some pictures – oh wait, I suppose that’s just what I did… I do think the photos are pretty good though, if not at least fun!
Evidence Submitted: Item No. 2 “After Refashion A”
Evidence Submitted: Item No. 3 “After Refashion B”
Evidence Submitted: Item No. 4 “After Refashion C”
Go crazy – make a ton of sweaters – send me links to your photos! I’d love to see them.
by Sherri Sylvester | Dec 31, 2012
This idea has been floating around in my head for a few weeks now and I have finally been able to get it sewn. My very own fur trimmed winter toque – all with things I had at home (hurray!)
The Furry Winter Toque
I had a random remove-able collar (that I never used) from a maternity sweater that I gave away. I’m sorry to whomever has the sweater without it’s fur collar. The collar has been re-purposed and is in a much happier place. I also had a toque that didn’t really keep my ears warm and some black fleece. Here’s a visual for those who work better that way!
The collar was cut in half lengthwise, sewn right sides together with the black fleece, flipped right side out and attached to the bottom of the hat along the unfinished seam. I measured first to make sure the fur was the right length to fit around my head because is not stretchy.
I like how the hat is a bit slouchy at the back, and how the fleece lands right on my ears – super warm! Oh, and it’s uncanny how well the fur collar matches my winter jacket eh? Coincidence?! Hope you are keeping warm if it is winter where you are.
by Sherri Sylvester | Dec 30, 2012
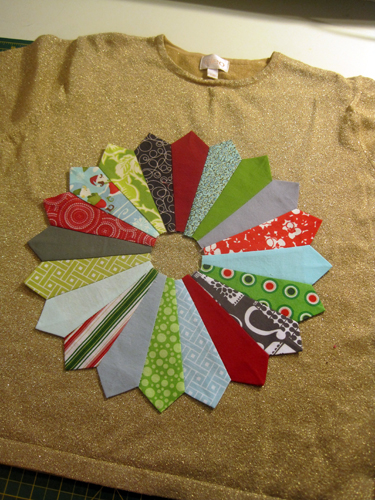
I have seen this pattern before online at one of my favorite blogs – Maureen Cracknell Handmade. I thought it would be good to give it a try. As much as I love a ton of quilts (check out my pinterest folder here), I can’t seem to get my desire-on for making one. They seem so repetitive and time consuming to cut out.
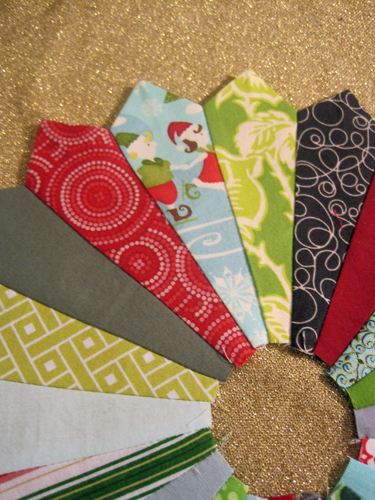
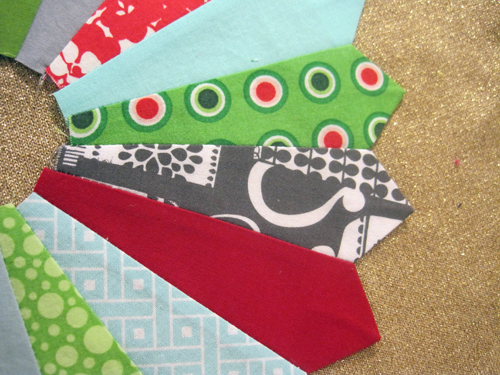
Anyhow, either way, I thought this dresden plate was super easy to make. It is also very pretty. It was also going to be my last Christmas project to finish before the holiday. Ooops. The holidays took over and I finished this one last Wednesday. I am using the term finished loosely, as you can see it has no centre and is not attached to anything as yet. I found this large size gold shirt that is a good size for a pillow and I think I am going to fold them up together and pack them away with the Christmas things – something to finish next Christmas!
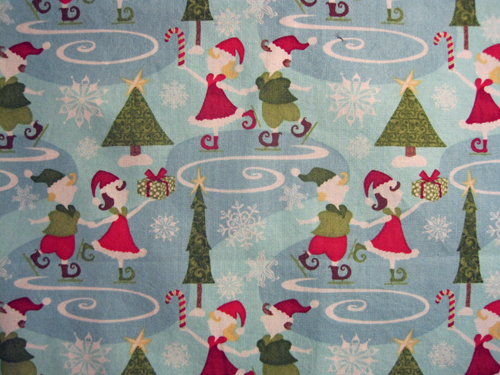
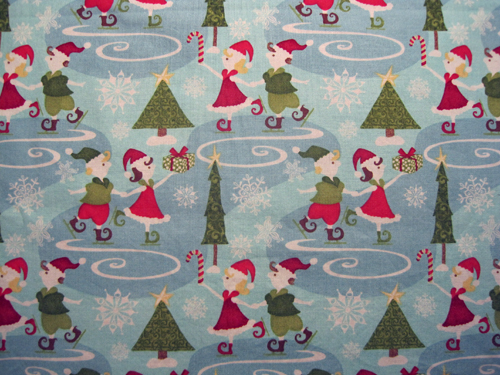
I have been stashing the elf fabric for a couple of years now. Funny thing is the fabric arrived and the elves had no eyes. I know it is personal preference, but I think they looked a bit creepy that way (see below) and have never sewn anything from it.
A while back I was sewing with a friend and came up with the idea of putting the eyes on myself. I have some fabric markers from the Dollar Store and always wondered what I would do with the brown one. Now I know! I took the whole 1/2 meter of fabric and put eyes on every single elf.
Ahhh… much better!
Of course, I also couldn’t resist adding in some of my favorite Michael Miller Fabric – Put A Lid On It in Charcoal. My husband surprised me a while ago by buying 2 meters of it and I’ve been adding it to everything I can ever since. You can also see it here and here. They also have it in yellow (citrus!) with multi-coloured pots! Love!
I was thinking about making a few different sized templates for a dresden plate and will post them here soon.