by Sherri Sylvester | Mar 28, 2014
Alright – so this is what happens when you forget to post something and then it becomes the last day of the giveaway and you find it in your drafts! Ack! I have decided to delay the giveaway to give you all a chance to enter the contest. Read on for the not-so-new Giveaway information!

Earlier last week I was super excited to have reached 500 likes on Facebook – so I decided to have a little giveaway to say thank you! Since it is looking a little like spring outside here, it seemed appropriate to go with a sunny theme. I found a lovely 6 fat quarter bundle at Warp & Weft called “Walking on Sunshine” and made a Sunny Glasses Case for you to win too! I love this little bundle of fabric, I’ve been quite inspired by yellow and pink lately – it looks so happy! The Sunny Glasses Case is great for your sunglasses, but doubles as an amazing little sewing kit. It’s perfect for a small pincushion, pair of mini scissors and a needle and thread. I use one of my test versions all the time to carry around the house so I can do mending while I watch the kids.
I have to say that I am so happy to have met so many people through this blog. I keep writing because I love doing it, and I want to share my love of sewing – but also because so many people keep coming back to see what is new here. It is quite a humbling experience. I am honoured that you have chosen to follow along. Thank you so very, very much. Maybe you want to know how to win? Click on this link to head over to Facebook for the giveaway! (The giveaway will close on March 31st.)
“Walking on Sunshine” Bundle Fabrics: Dot; Cotton Ombre Dots, Hot Pink; Kosta, Spark; Curvy Stripe Pink; Shima, Sunset; Estonia, Spark (100% cotton), Sunny Glasses Case Fabrics: Riley Blake, Geekly Glasses (from Double Decker Fabrics) and Dear Stella, Piper, Zig-Zag in Yellow
by Sherri Sylvester | Mar 26, 2014
I find that I tend to be driven by deadlines – especially with posting things here. (I love it – so it’s not as bad as it sounds!) Instead of having fun with the process of sewing I get anxious about whether the project will turn out ok, or if I will waste the fabric – or the most horrifying of them all – I might waste the time it took to make it! It’s gotten pretty bad.
I found an article on Sew Mama Sew a couple of months ago. It is titled “Joyful Sewing: 12 Tips for Enjoying a Stress-free Hobby“. I was curious about what Kristin had to say, and as I read the article I realized how much I really do stress about something that is supposed to be fun! If you remember my “No Stress” button and subsequent goal of not being stressed while sewing… Kristin’s article was posted just a few days later – great timing on her part!
I think that the tip I need to practice the most is #1. “Tackle one project at a time… ok maybe two.” Since my brain is working 24/7 thinking up grand new ideas, I have a habit of pulling fabric and pattern pieces and stacking them up. I have 4 clear shoe-size bins and 1 large basket sitting in my sewing area. They are full of countless options for sewing… and they stress me out! I constantly feel I am not sewing fast enough, and that I must be dysfunctional because I can’t get everything done. Not true – but my brain keeps trying and it’s got me a bit brainwashed.
Since I realized that I have a habit of stacking projects, I have tried instead to put my fabric on the shelf – and my ideas on paper. My goal is to get through these bins and basket this year so I can have my space back! There are really great projects laid out already that I am really excited to work on and share with you. And I will feel so much better if I can concentrate on less things at once.
If you have not read the article yet – head on over. Or click here to pin it for later! If you think you don’t stress about your hobby, you might find that you are more anxious about it than you realized. Kristin’s 12 suggestions ring true for me and I am trying to change how I think about sewing so it is fun all the time again!
How about you? Do you place so much thought into sewing that it has become a source of stress?
by Sherri Sylvester | Mar 25, 2014
We had a milestone event here last week – my oldest lost her first tooth! It had been wiggly for a week or so and meanwhile I was planning this tooth fairy pillow. Of course on the day I set aside to work on it, she lost the tooth. And, of course I wasn’t able to finish the pillow before bedtime – so lucky for her she got to stay up a little! There’s a little pocket hidden behind the top of the tooth – did you spot it? It also has a hanging tab for a doorknob or bed frame. The final size of the pillow is roughly 8″x8″. I used small scraps from my Pink Chalk Fabrics Solids Club stash, quite a few years old now! LOVE these colours together! What do you think?
When her tooth got wiggly, I searched the web high and low for a paper pieced tooth pattern, but I didn’t find one. So instead of giving up like a sane person, I went off to my computer to design it. The first version had about 35 or 40 pieces (after 2 hours!) but thankfully after another hour or so I narrowed it down to just 19 – including the border strips. Crazy – but I wanted it to match what was in my head!
Right off – I have to apologize to any quilters, I am not a quilter and I am certain I do not use all of the proper terminology for the parts of a “quilted something” in this post! I also happen to love making things overly complex – thus the foray into paper piecing. Which I’m finding is not super complex, (once you get your head around it) and is very enjoyable. I also tried out some embroidery and found a few helpful tutorials on how to make a back stitch and a satin stitch.
My original intention was to provide a pattern piece for each section of the tooth and make a full tutorial so everyone unfamiliar with paper piecing could make this too. I have the pieces, but for some reason the measurements don’t work out – the final project is about 1/4″-1/2″ smaller all round, which slightly affected the shape of the tooth. I am not certain it is my seam allowance, because I have recently checked that it is 1/4″. I’d love to know if anyone has any other ideas for why it didn’t work out? I hope I can sort it out and make non-paper pieced instructions too.
I am including a quick tutorial here – since I will make a full one when I sort out the pattern piece issue. I am assuming that you are familiar with paper piecing and binding, so I am not providing very many details.
You will need:
- Paper Pieced Tooth Fairy Pillow Pattern Pieces – click to download
- Fabric Scraps – White for the Tooth + Background/Strips
- Small fabric pieces for the pocket lining (See pattern piece pdf)
- Quilt batting
- Backing fabric
- Binding – I used a piece 36″ long and 1/2″ wide (folded)
- Hanging Tab – 1 piece 2″ x 10″
- Stuffing
- Embroidery Floss & Needle
- Regular sewing gear
Here we go:
Step 1: Cut out your pockets as per the pattern pieces, make your binding and fold the hanging tab as if you are making bias tape. Top-stitch the hanging tab on both sides close to the edges. Set pieces aside.
Step 2: Cut the paper pattern out around the tooth portion (cut away the border strips).
Step 3: Cut the tooth pattern into 3 sections – pieces 1-3, pieces 4-6 and pieces 7-11
Step 4: Piece together each of the 3 sections individually, then stitch the three sections together to make the tooth.
Step 5:Attach border pieces 12 and 14 to each side. These are 1″ wide including the 1/4″ seam allowance.
Step 6, Making the Pocket: (a) Centre the pocket lining back on the bottom of piece 13 (also a 1″ strip) and the pocket lining front on the centre top of the tooth block as shown. (b) Stitch along the top/bottom of each lining piece. Follow the curve of the lining front. Use a 1/4″ seam. (c) Flip up each lining piece along the seam and press. (d) Place the pocket linings/block and strip right sides together. Pin all matching edges.
Step 6 continued: (e) Mark a dot 1/4″ in from each side of the pocket and 1/4″ down from the top of the tooth block. (f) Beginning at the left, stitch across the top of the strip/tooth block, pivot at the dot and stitch up and around the pocket, pivot at the dot again and stitch across to the right side of the tooth block. (g) Flip strip 13 up and the pocket down. Iron. What a cute pocket you have!
Step 7: Finish attaching all other border strips. First 15 (1″ wide), then 16-19 (1 1/4″ wide each).
Step 8: Trace the face and wand onto your block. Attach quilt batting and the block together (spray baste or pin). Embroider the face and wand.
Step 9: Cut your backing to fit the block. Place the block and the backing fabric wrong sides together. Baste on all sides leaving a 3″ space for stuffing.
Step 10: Baste/pin the hanging tab 1″ down from the top of the block on each side. Stuff the pillow lightly, baste the opening shut.
Step 11: Attach binding using your prefered method. Miter all corners. Done!
Don’t forget the “fairy dust” when you help make your little one’s tooth disappear! As usual, please use this project/pattern for personal use only and email me (sherri@threadridinghood.com) if you have any problems or questions!
by Sherri Sylvester | Mar 22, 2014
Last Survey’s Results:
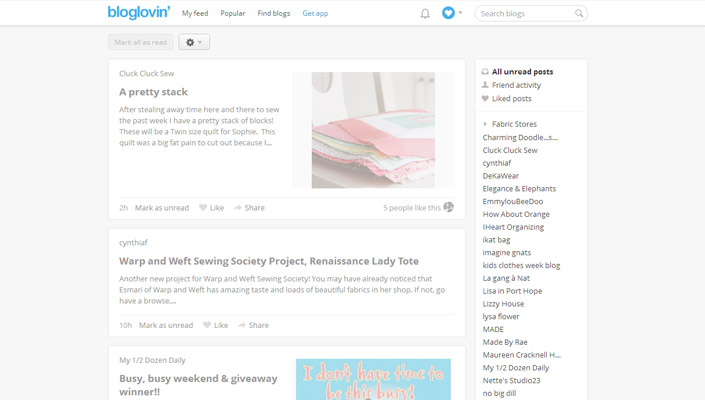
Well, I feel better! We had a lot of people with the same problem as me answer the survey last week. The question was: “How do you keep up with your favorite blogs?” and I was generally feeling overwhelmed following my list of “only” 38! With many more solutions being mentioned in the comments, the most popular survey answer was “I skim… a lot… whenever I have a moment” with 58%! In second place (with 21%) were the people who “I dedicate a certain amount of time every day to catch up.” I envy the person who answered that they have lots of time and read them as they come in! I can’t forget to mention the winner of the “I read the most blogs” Award – seems Amy is officially the winner with 120. Congrats Amy!
I am happy to say that since last week I have completely emptied my Bloglovin’ inbox almost every day. Hooray! I’ve been following the “skim… a lot… whenever” method and it has worked out well so far. Though maybe this week was an anomaly? I have my doubts as to if it will stay that way… But, I have been keeping my sewing area cleaner and I didn’t think that would work so maybe there is hope! (I have to admit, for the sake of full disclosure, that I read the 2 that came in late today before I took the screen shot!)
This Week’s Question:
Today I am curious about your sewing notions. Specifically scissors. I have several pairs that I use. Mostly Fiskars – Regular, Pinking, Micro-Tip and a pair for cutting paper. I also picked up a rotary cutter a while ago – not an expensive brand, but it works just fine!
I have been thinking lately about getting a fancy pair of shears, but I’m not sure I care? I cut a lot with my rotary blade and the Fiskars are working out well for me. Maybe a fancy pair of scissors would just make me feel more official and not really improve my sewing experience?! What do you use? I’ve include a few options below – if yours are not listed, please leave a comment – we’d love to know what they are. (Want your sewing project or blog featured on Sewing Survey Saturday? It’s easy! Find out how at the bottom of this post!)
[polldaddy poll=7903926]
How to get your Sewing Project or Blog featured on Sewing Survey Saturday: Send an email to sherri@threadridinghood.com that includes your sewing related multiple choice question, your name and where you live (if you’d like it included). Please send your question with 3 to 5 multiple choice answers. Also send your blog information including which post you’d like me to link up to if you are featured! If you do not blog I would love to post a photo of one of your recent projects, so please send it along with your question. (Note: I may also feature a photo from your blog post (if applicable), if you do not want a linked photo please let me know in your email.)
by Sherri Sylvester | Mar 21, 2014
Hi again all! We’re back again with week 5 of the Quiet Book Sew-Along. This page is really fast to put together, so – if you didn’t get your materials ready last week go and get them now and let’s get sewing. This will be our second finish. With 2 pages under your belt we are 1/6th of our way through the pages already! (Am I the only one that thinks like that!?)
One important thing to note – you will need 1 piece of ribbon 3 1/2″ long for the side tab. I forgot to add this to the shopping list in week #4. I like to match the tab to my page as much as possible, so you could use the extra length you have available after stitching your photo edging ribbon. You will have plenty.
Here is my finished Mitten Sew-Along page, beside the original quiet book’s mitten page for comparison. Ready? Let’s go! (PS. Did you see the cute Geekly Retro Telly fabric I got from Double Decker Fabric?! Love it!)
You will need:
- 1 Small Safety Pin (to hold on the side tab ribbon)
- Thread: 2 colours that match your photo edging ribbon and your mitten fabric
- your normal sewing gear, including a ruler, iron and washable fabric marker
- School Glue Stick
- Clear/Masking/Washi Tape
- Mitten Page Pattern Pieces (click to download the 2 page pdf)
Before we begin/Important Notes:
- Download and print the pattern pieces pdf on letter size (8.5″ x 11″) or A4 paper. It will have 2 pages. Important: Make sure scaling is set to ”None” or “Actual Size” when printing. Once you have printed the page, measure the 1″ test square (it should measure 1″ in both directions) to ensure the pattern pieces will be the correct size.
- When you are sewing this book it is good to remember that some of the edges will be covered after the book is completed and sewn together. 1/2″ on the top edge of your page and 3/4″ on each side edge will not show in the final project.
- Remember to use your iron liberally when you are sewing this book. It is going to be a work of art when you are done! Since it is thick and some of the pages will not be iron-able once you are finished with them it is advisable to take all of the care you can to remove wrinkles so they are not accidentally permanent in your final book.
Cutting Your Fabric:
- Pre-wash (if possible, a baby might be chewing on this book!) and iron your fabric well before beginning.
- Cut your vinyl piece using the pattern on page 2 of the pattern piece pdf. I found the easiest way to cut it out was to tape it down on top of the untrimmed pattern page and trace the lines with a ruler. Then I used scissors to cut out the vinyl piece along the traced lines.
- Cut your mitten pieces according to the pattern page. You will need 2 pieces. Be sure to mark the dot near the thumb on the wrong side of one of your pieces.
- Cut your cuff ribbing to size – leave the height at 3″, cut the width down to 8″.
Here we go:
Mitten Prep: (1) Place mitten fabric right sides together and pin. (2) With the “marked dot” side up – stitch around the curved edges with a 1/4″ seam allowance starting on the thumb side and leaving the straight bottom edge (cuff) unsewn. ** When sewing the inside edge of the thumb, continue sewing down to the marked dot, pivot, and then continue up the side of the mitten to the cuff edge. (3) Trim your edges with pinking shears or notch your curves. Carefully cut almost to the marked dot – do not cut through your seam! – to open up the thumb area for turning. (4) Turn your mitten right side out, push out all of the edges and press flat. Set aside.
Mitten Cuff: (5) Fold your cuff ribbing wrong sides together so the short edges are aligned and pin. (6) Stitch the short end with a 1/2″ seam allowance. (7) Turn your cuff circle right side out and fold in half lengthwise. (8) Lay the cuff flat with the seam at the left edge. Mark the opposite right edge with a pin.
Mitten Cuff: (9) Place the cuff circle over the mitten cuff with the raw edges lined up. Match the cuff side seam to a mitten side seam. Match the pin in the cuff to the other mitten side seam. (10) Stretch the cuff to match the mitten cuff edge while matching up and pinning the remaining edges. (11) Stitch around the raw edges with a 1/2″ seam allowance. Use a stretch stitch (as in the photo) or a long, narrow zig-zag to allow for some stretching. (12) Neaten your raw edge by trimming close to the seam and/or zig-zaging over the raw edges to prevent fraying.
Make the vinyl pocket frame: (13) Apply the 9″x9″ fusible interfacing to the back of your backing fabric. Find and mark (with a removable fabric marker) a 4 1/2″ x 4 1/2″ square in the centre of your backing fabric. (14) Line the left and right sides and bottom of the vinyl with the box. I applied a very thin line of glue to the 3 edges with my glue stick to hold it in place. Make sure the glue does not extend farther than 1/4″ in from each edge. (15) **The ribbon will cover the 3 edges of the vinyl that is within the marked box area only.** Fold down 1/2″ at one end of your ribbon – pin or use a glue stick to hold it in place. Pin the ribbon over the vinyl, beginning with the folded edge. Line up the outside edge of the ribbon and the vinyl, making sure the ribbon covers the vinyl so it does not show. Do not pin the vinyl where it will show because the pins will leave holes. Miter the corners as you go around. When you reach the end, leave 1/2″ of ribbon when trimming. Pin and fold that end under as well. (16) Stitch over the ribbon with a wide zig-zag or 2 rows of straight stitching to attach.
Finishing the Page: (17) Place the mitten, making sure it is covering the framed vinyl. Make sure to allow 1/2″ on the top edge of your page and 3/4″ on each side edge because they will not show in the final project. (18) Stitch the far right side of your mitten to the page. I stitched a 3″ seam about 1/8″ away from the edge. (See the photo) Before stitching, check to see if the seam area is on top of the right side of your frame – if it is, move your mitten over a bit, so you don’t accidentally stitch over the vinyl. (19) Place your photo in the vinyl pocket. (20) Fold and crease the remaining vinyl down into the pocket and behind the photo to enclose it and (hopefully) prevent any tampering! If it does not fit into the pocket, taper the edges a bit more until it will fold flat. If the vinyl will not crease easily, hold an iron close to (but not touching!) the vinyl to heat it up a bit, then crease it carefully while it is more pliable. Remove your fabric markings.
Finish with the Ribbon: (21) Use your small safety pin to attach the ribbon tab to your finished page. Since this is a long Sew-Along you would hate to lose it!
You are finished page #2! Post it on our Flickr page so we can see it – or check this page for more quiet book sharing ideas – Pretty please? I’m so curious!