by Sherri Sylvester | Oct 18, 2013

Hi! We’re talking about customizing your patterns again today. There are so many things you can do if you know how… so – here’s another tutorial this week (previous one here) on how to help make any pattern into your own creation!
Adding gathers to a shoulder seam can do a few things. First – it will add extra width to the top or the whole bodice – especially nice if you have a fabric with a great drape, or if you need a bit of extra wiggle room in the width of your pattern. Second – it adds a nice feminine touch and a bit of visual interest to the shirt – especially if it is a straight-forward simple pattern.
Wanna try it?
You will need:
- bodice pattern piece – must include shoulder area (I used the Skipper Top from Sew Much Ado – pattern review here)
- paper the length of the bodice
- pen
- ruler or straight edge
Here we go:
(1) Determine how much of the neckline on your pattern piece will be taken up with the seam allowance and/or neckline finish – mark this on your pattern piece. This pattern, for example, has a hemmed neckline and a neckband finish. Since I was using the neckband 1/2″ from the seam allowance would be removed from the visible shoulder area.
(2) Determine where to put the extra width for the gathers.
- (2a,b) Because I used a dolman sleeve top it is not immediately obvious where the gathers should be placed because the sleeve has no shoulder indication. I measured my daughter and found about 2″ of room before her shoulder started. I decided to leave 1″ between my seam allowance mark from Step (1) and where the gathers would start.
- OR If you are starting with a set in sleeve pattern this is a much easier process. Because you know where the shoulder starts, draw a mark at the centre of the shoulder seam area.
(3) Determine how you would like the final shirt to fit.
- Do you need extra width in the top of the shirt only, or also through to the bottom of the bodice (say, to cover a toddler belly!)? For my daughter’s shirt I picked a size width that would cover her belly and added the extra width only to the top 2/3 of the pattern. I ended up cutting a size 5 width, with a size 4 everywhere else.
- Top only (Track A): (3a) Pick and mark a spot about 2/3 of the way down the bodice along the centre line – Draw a line from your Step (2) mark to this new mark. ** The area above this mark will have added width – so be careful with your choice! Do not place your mark too high or the fit of your sleeve and/or neckline will be off due to the extra width that only occurs around the top of the shirt.
- Through the whole shirt (Track B): (3b) If you like you can add width all of the way through the shirt by drawing your line from your Step (2) mark to the hem, parallel to the centre fold line. ** Be careful, the width you add will be doubled – once on each side of the shirt!
(4) Cut the line you just drew.
- Track A: (4a) If you followed Track A cut the line ALMOST to the edge of the centre seam. Leave a little “hinge” of paper.
- Track B: (4b) If you are following Track B you can cut your line all the way down the pattern.
(5) Determine how long you want the gathers to be. I decided to add in 1 3/4″ of extra space – though, I think looking back I should have only added 1″ because the added width distorted the top a bit much.
- Track A: (5a) Spread the top of the paper by the amount of gathering space you want to add. Tape another piece of paper underneath the entire area you just opened up.
- Track B: (5b) Spread the pattern pieces apart by the amount of gathering space you want to add. Tape them to another piece of paper the length of the pattern piece, matching up the hemline. Make sure they are evenly spaced all of the way along.
(6) Cut away the extra and even out your pattern lines.
- Track A: (6a,b) Draw a line from neckline point to sleeve point along the shoulder/sleeve seam.Cut along the line to remove the excess paper. Add in paper to straighten the bodice centre line. Tape the paper in and draw a line from neckline centre to hemline centre. Cut along this line.
- Track B: (6c,d) Draw a line from neckline point to sleeve point along the shoulder/sleeve seam. Draw a line along the hemline from side to side. Cut along these new lines to remove the excess paper and straighten your pattern lines.
- NOTE: If you have curved lines (say, at a hemline) eyeball a curve instead of straightening the pattern line.
YAY! You now have your new pattern piece!
(7) Cut out your pattern pieces as per the pattern instructions. * You may need more yardage if you are adding a lot of extra width.
(8) Line up your new pattern piece with the shoulder seam of your fabric. Now you will mark the area you will need to gather. (8a) Mark 1 edge even with one edge of your added width, I chose the right side. (8b) The gathers will need more space than the width you added, so mark 1/2″ to 1″ extra on the other side of your extra width, I added 1/2″ extra. Mark the other shoulder seam in the same way* If you do not have the room and are making a set in sleeve with a skinny shoulder seam, you can gather the whole shoulder seam. Or, distribute the extra amount by adding 1/4″ – 1/2″ on either side of the extra width instead of on one side only.
(9a) Make two lines of basting width straight stitches within your seam allowance area. (9b) Gather the area to match the shoulder/sleeve width of your back bodice and tie off the ends of the gathering stitches to keep them in place. Continue following the pattern instructions as written using your newly gathered shoulder!
I’d love to know how your project went. Post your project on Facebook and it might end up in a “You Made It” post on the blog! I’d love to hear if you liked this tutorial or any changes you might make.
by Sherri Sylvester | Oct 16, 2013
Can I say I am soooo excited to have been asked to be on Abby’s pattern tour. I have been reading Sew Much Ado for at least 3 years now and love what she does. I’m sure you’ve seen her super-cute Mommy and Mia apron pattern (my version here), the Ruby Lou doll, and my all-time favorite diaper bag! But… today I get to talk about her great new pattern for girls. (And according to Max California – maybe boys?!)
The Skipper Top is a dolman sleeve pattern for girls sized for 6 months to 10 years. I’ve raved about dolman sleeve tops before, they go together super-fast because you do not need to set in a sleeve. Abby’s pattern does not disappoint in the style factor either. There are different sleeve hems, hem, neckline and pocket options – so you can make it over and over and never have the same result. As always, Abby’s photos and directions are super informative and easy to follow (geared for beginners). I like that she includes the finished measurements of each size – so you can gauge the ease and sizing better.
I also love that Abby has made this as a pdf pattern. Even though taping pages together takes a bit more time, I tend to sew as inspiration hits and I don’t like to have to wait for shipping! I also like the fact that I can print it out each time I need a new size, easy peasy! Speaking of sizing – this pattern is great. I did check out my kids’ measurement chart before I started, but it worked out that they both needed their ready-to-wear size Skipper Top. The length is great too – it’s on the long side – which I especially like the look of with the waistband and leggings.
As far as fabric, I decided to try and use up some of my stash – since I’ve now maxed out my new bookshelf space! I have mostly plain coloured knits and some stashed Heaven and Helsinki in different prints and colours. Since my youngest will still wear anything I figured this was a good time to cut up the adorable cat knit shirt that doesn’t fit her anymore. (no more toddler shirts, tears…) Since the solid pink was the only knit I had that matched, that was what we went with. My oldest has always been more selective (*cough* loudly opinionated *cough*) and so I let her have a go at choosing her own fabric. And that is how I gained two more pink shirts to add to the stacks around here!
I did manage (as usual, I know…!) to alter a few things on Abby’s amazing pattern. I thought it would be nice, needed to was obligated to add a skirt to my oldest’s shirt – because she would not wear it at all if I didn’t. Thankfully the forced creativeness turned into something I am really happy with. I added a gathered length of knit (double the width of my daughter’s waist measurement) when I stitched on the bottom waist band. Then I turned up the waistband toward the bodice (seam allowances pressed toward the skirt) and stitched it along the sides to hold it in place. For my youngest I added a bit more fullness to the shirt front with some gathers along the shoulder seam. Since she’s still got some toddler-chubs (love them!) fitted shirts don’t always look the best. I’ll be posting a tutorial on that tomorrow.
Enough about me! You are here to check out Abby’s pattern and I am here to tell you I love it! I have already seen what the first four stops on the tour have done (list below), and you can check out today’s other stop on the tour at Mad Mim. I have to say I am especially loving the shoulder patches on the Max California version! I may just have to spend about an hour (yup, it’s that quick to sew!) making one like it for my youngest. And I saw a great dolman sleeve sweater on my sister-in-law this past weekend that I’ve got to try… maybe for KCW next week?
I have to say, the only thing I am disappointed with on my shirts is that I wasn’t able to use quilting cotton for the pockets. When I first saw Abby’s women’s dolman sleeve top (The Seafarer) and now the Skipper Top – I thought that the quilting cotton allowed for a great use of different prints and patterns. Unfortunately because I matched the pocket to the shirt bands I needed to use a knit. Tip if you’re doing that – use medium interfacing on the pocket piece, it helps everything not to wiggle too much while you are sewing, and the top of the heart pocket might be a bit floppy without it as well.
Make sure (while you get distracted checking out the other Skipper Tops on the tour) that you eventually get back to Sew Much Ado to buy the pattern – you can get the Skipper Top here! I felt super professional when I stitched the (optional) 1/4″ clear elastic into the shoulder seams of these shirts – you can too!
Disclosure: I received this pattern free as part of The Skipper Top Pattern Tour. As usual, all opinions are my own.
by Sherri Sylvester | Oct 15, 2013
Since it is quickly becoming cooler around here these days, I am finding that a lot of my go-to kids patterns have short sleeves! Not a problem – there is an easy way to change a simple sleeve pattern so it is fall and winter appropriate.
I traced one of my daughter’s shirts when extending the sleeve of the Figgy’s Banyan Tee for my oldest.
You will need:
- long sleeve tee that fits and uses the same fabric as your pattern (woven tee – woven pattern, knit tee – knit pattern…)
- short sleeve pattern piece
- paper a bit longer than the length of the sample tee sleeve
- pen
- ruler or straight edge
Here we go:
(1) Fold your sample sleeve exactly in half. (2) Check the seam allowance amount in your pattern directions and mark it on the pattern piece. (3) If your sleeve is not cut on the fold, find the centre and lay it on the edge of your paper (4) Lay the sample long sleeve on the pattern piece with the fold along the edge of your paper. Line up the shoulder seam with the seam allowance mark on your pattern piece.
(5) Trace the sleeve edge allowing extra at the wrist for hemming. Trace a few inches up the side of the sleeve, adding in the seam allowance amount.
(6) Mark the top corner of the sleeve pattern piece with a dot (see photo).
(7) Use the straight edge to make a line from the bottom hem edge to the dot you just marked.
(8) Finish by tracing the rounded part of the sleeve around to the edge of your paper.
Proceed as detailed in your pattern instructions with your new long sleeved pattern piece. Be sure to mark your pattern piece so you don’t forget to cut it on the Fold! It is on the straight paper edge of your pattern piece. You will also need a bit more yardage than the pattern instructions suggest to fit your new sleeves.
by Sherri Sylvester | Oct 7, 2013
So… my three year old is more stylish than me today! But honestly, that’s not hard since I work from home and don’t have to (but should) take time to get dressed properly every day. For the record, 99% of the time I do get dressed, and 85% of the time I do my hair and makeup too!
Before I get too far into I wanted to talk about the Sew Fab bundle again – where I got the Bimaa Sweater pattern. I made the cowl neck version, but it also comes in a scarf neck and a hooded version – which makes it a unisex pattern, hooray! The Sew Fab sale ends October 8th, so if you like the Bimaa – here’s your chance to get it and 25 other patterns for just $29.95! Here’s the Sew Fab Bundle link again to Sew Much Ado (one of the many places you can buy the bundle from).
Since I’m always trying to think of new photo shoot props, today we got out our super-cool industrial style step ladder painting stool. It was fun to count how many differerent colours of paint I could find on it, which of course, makes it an even better photo prop! (Ok, that was sarcastic, hee, hee!) One of the real reasons I dug it out was that I figured my daughter would be more excited to take photos in her “new shirt that mommy made” if it involved climbing the generally-forbidden step ladder. You’ve got to be creative with these things! The Bimaa pattern is made by LouBee Clothing. And, if you missed the bundle sale you can get it at her Etsy shop here. I love this pattern for the same reason I love Figgy’s patterns – they are super stylish, but you can still have fun with them! I made my youngest’s cowl in a different fabric from the main sweater – which Sarah (EmmyLouBeeDoo) labels the “Infinity Scarf Bimaa”. I LOVE it! My husband’s first comment was that I should make one for myself – and I think I might? Suz from Sew Pony made an adult sized Bimaa for Selfish Sewing Week and it doesn’t seem too difficult. Sarah (LouBee Clothing) does a great job of writing this pattern. It is easy to follow and sews up super-quick once it’s cut out. She has a lot of drawings and the pattern pieces are well put together. I used my daughter’s filled out Measure-Me chart to choose a size and it fits perfectly! Since I don’t have a serger (yet?!) I used my regular machine’s stretch stitch to sew the whole thing together. The only tricky parts were the waist and arm bands, because they are cut across the stretchiest part of the knit they stretch more while they are being sewed. I ironed the wobbliness out when I was done and I think it will be fine when it comes out after the first wash. The cowl fabric is some more Heaven & Helsinki knit from my local Fabricland. It is usually $15 and I found it there for $5/m a few weeks ago. I’ve got it in a few more colourways now, which is great – because I have a lot more knit patterns I want to make for my girls this fall. This knit is a dream to work with, even with the 4-way stretch. The light green is 2-way stretch fabric for $3/m fabric I picked up from Fabricland as well. Even though the Bimaa pattern recommends a 4-way stretch fabric I found it worked out just fine for the body of the sweater. It may not have worked for the cowl though, because you need to have the extra stretch so you can put it over your head.
I think there will be more Bimaas in our future… Have a great start to your week!
by Sherri Sylvester | Oct 1, 2013
Happy Super-Tuesday! Today you get to read would-be-yesterday’s post. I was feeling a bit under the weather so I decided to post this today and get some rest – thankfully it seems to have worked!
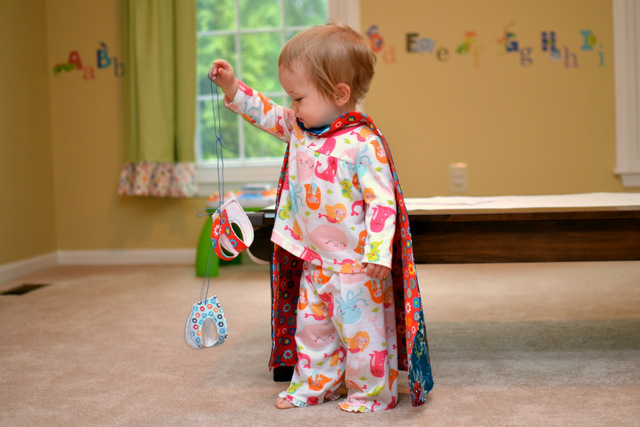
I have likely postponed this post way too long – my apologies to all of the sewists out there who have taken the time to share their Thread Riding Hood Super Hero Capes! When I posted the tutorial for these capes I had no idea they would be so popular and I’m super-glad (hee hee) you all like the free pattern. So, without further delay – here are (a very few) of my favorites! Too bad I can’t post them all! Check out the descriptions for some great tips and fabric ideas.
This is the first super cape that was shared with me, and it totally made my day! Thanks Sdeaf! (photo: Sdeaf on Facebook)
Linda made these for her grandchildren… Narrator Voice: “After “V” saved the princesses, “O” tricycled off to save the world!” (photo: Linda via Facebook)
This cute cape was made by Laurie from Dresden Lane. She used a “super” Ann Kelle fabric to make her Super Grover cape! (photo: Laurie, blogged: Dresden Lane)
This photo comes from Christiane who used plastic tablecloths to make easy capes for her daughter’s birthday party. The kids were able to decorate them and take them home! (photo: Christiane on Facebook)
These little capes have super-cute super buttons! (photo: Sandra, blogged: Suddenly Sandra)
Nancy has made all of these capes and plans to make more to give out at her local children’s hospital. What a great idea to help sick children feel like heros! (photo: Nancy via Facebook)
I love the stripes on these capes that Sarah made. Her daughter chose the fabrics, they are lined with polka dots! (photo: Sarah via Facebook)
This wild cape was made for a very special granddaughter! (photo/blogged: Quilter in the Gap)
I LOVE the princess crown – what a precious photo! Lynn plans to use old bridesmaid dresses to make more capes – a great use for them! (photo: Lynn on Facebook)
Ending with another cutie?! This cape wasn’t made for her, but she looks pretty comfortable in it! Laurie also made some eye masks to gift with the capes. (photo: Laurie, blogged: Life Between Snapshots)
After all that Super-ness, you can’t help but have a Super rest of your week! Please be sure to share your photos – they make my day! See you again soon!
by Sherri Sylvester | Sep 25, 2013
Project Run and Play Week 3 is “Mad for Plaid” themed. This is definitely my favorite outfit of my three sew-along entries so far. My opinion is a tad biased because I spent the most time on this one and I love the final photos! I spent a day and a half drafting the pattern and another day and a half making the dress. (Give or take a few hours making dinners, playing with the kids, sleeping, eating, cleaning the house…) Here it is:
The design of the dress comes from a photo that my daughter drew up a few months ago. I think she is pleased with the plaid outcome, but doesn’t think it matches her design because the dress was “supposed to be pink”. Ack, I guess I’ll have to make another one now that I have the pattern! When I said I was going to copy her drawing she also told me that the dress most definitely needed to have puffed sleeves instead of straps. To do that I changed the ruffles to come from a curved bodice so I could have somewhere to attach the sleeves. I also shortened the zipper in the back to go about 3/4 of the way down the back instead of separating at the bottom – since it didn’t really need to be that long.
You can also see her version of my logo on Facebook today!
The drafting process was trickier than I had counted on, mostly due to the fact that I didn’t get a solid amount of time to work on it. Coming back and forth caused all sorts of problems when I didn’t remember if I added seam allowance to certain areas or not! Going forward, I’m labeling all pieces with seam allowance amounts on the edges so it’s easier to follow. My original idea was to curve both the front and back bodice pieces down – but when I made a muslin it did not lie well or look flattering on the front – so I upwardly curved both bodice pieces, only to have the idea to curve the back down and the front up. Now I was reversing my work and digging for cut off pieces of drafts from the day before. Argh! Another lesson learned – re-trace all pieces and label them with dates or version numbers so I can go back and forth more easily.
I didn’t draft this completely from scratch. I started with McCall’s M5793 pattern and used the sleeve and front and back bodice pieces as a start. The sleeves now have a cuff instead of an elastic casing and the bodices have been altered to curve on the bottom edges. I used freezer paper for the pattern pieces and it is quickly becoming my favorite. It is thin enough to see through easily for tracing, and is very strong and more durable than the cheap paper rolls I was using. It is also really nice to be able to iron the paper to the fabric and then cut it out before removing the pattern piece. It holds everything in place, which is really important when matching plaids!
On the subject of matching, I was pretty pleased with how everything lines up on the back of the dress. That said, I think it would be fun to have the back bodice cut on the bias, like the front is. If you take a look at the inside of the dress (I’m feeling brave today, so I’ll show it to you!) you can better see the shape of the bodice – which would have shown up more on the outside if I had bias cut the back outer bodice. You can also see the 2/3 of a circle skirt that I added to the dress – super twirly! This one was tricky, because I have tried to add circles before, but did not do it correctly so the hem was longer on the sides than the middle. I figured out that you need an invisible point to measure to so that all points along the circle are the same length – whew! I was super-happy when the muslin hem hung straight! I did line the back, but not the front because I was worried that it would be too heavy. I’m really glad I didn’t, the brushed cotton is not light – but I suppose it is not really a true lining.
The front bodice is cut into two pieces, the curved upper and the lower piece that ends in a straight line and attaches to the circle skirt. It doesn’t show that well from the outside because of the ruffles, so you can check out the inside pics to see it. This was the easiest way I could figure out to make it lay properly once my daughter was wearing it. Otherwise I was going to have to add some kind of dart to the front to curve it in enough to meet up with the upper curved portion – and I didn’t want to have to draft that! Especially if it wasn’t going to show under all of those ruffles. Do you have any drafting tips? I’d love to get better at this.
Speaking of ruffles, which are apparently on trend according to Sew Mama Sew’s contributing writer Rachael from imagine gnats – I love these! I was not sure how a dress would look with the plain back and ruffled front, but that was what my daughter drew – so that is what I drafted! Each ruffle is double the width of the skirt panel it is attached to. The top ruffle was an inigma fun to draft too – I had to curve the ruffle piece so the bottom would hang straight even though the top was curved. I felt like I was a kid again with one of those graph-squared pictures you are supposed to copy one square at a time (like this)!
I hope I didn’t bore you with details this time around – I needed lots of space to include my photos, it was so hard narrowing this shoot down! Next week’s Project Run & Play is to make something that shows your own signature style. I’ve been stumped by this one for the three weeks it has taken me to get here – I am not entirely sure what that means, or what my signature style is! I do think that I most often take a pattern and alter it – similar to what I did here. If I was to make something for next week it might be the same dress (in pink of course!). We’ll see – it is possible I will skip it all together unless I get some kind of genius idea! If you are interested, here is a link to the other plaid sew-along entries – Which is your favorite?


")
")
")
") (5) Determine how long you want the gathers to be. I decided to add in 1 3/4″ of extra space – though, I think looking back I should have only added 1″ because the added width distorted the top a bit much.
(5) Determine how long you want the gathers to be. I decided to add in 1 3/4″ of extra space – though, I think looking back I should have only added 1″ because the added width distorted the top a bit much. ")
")
")
")


")
")
")
")
")


")


")